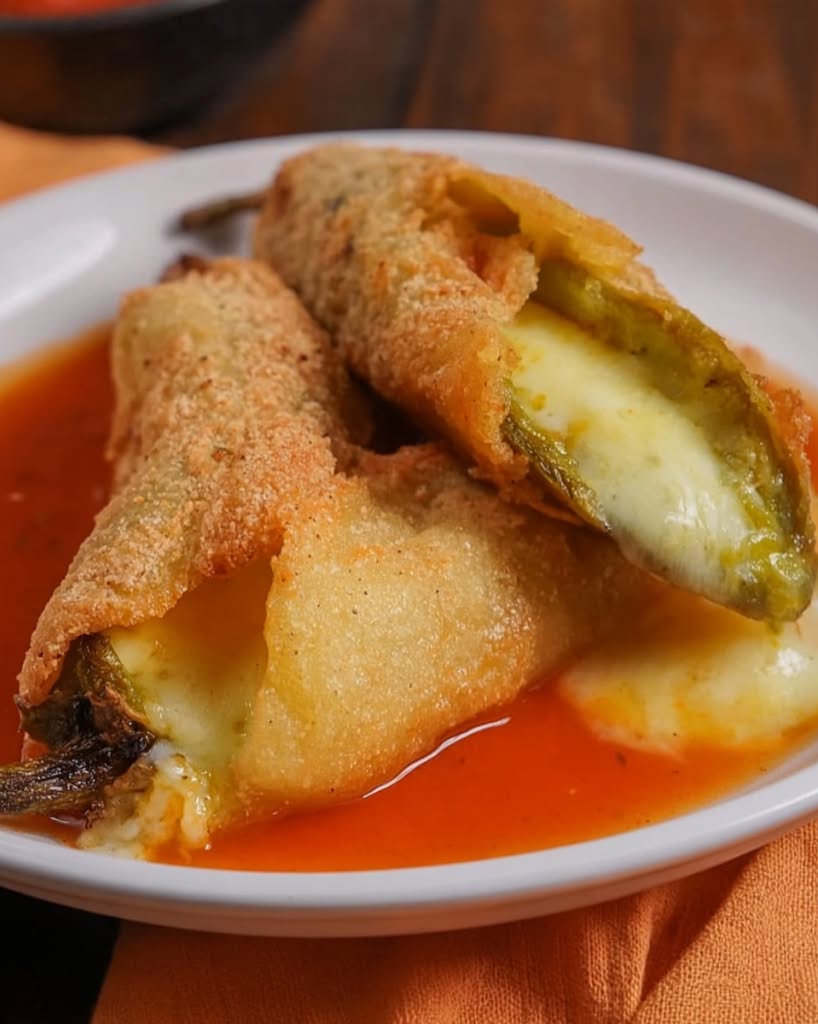
(Roasted Hatch Green Chiles Stuffed with Cheese, Fried Golden & Served with Roasted Tomato Salsa)
These Crispy Hatch Chile Rellenos are filled with gooey melted cheese, coated in a light, golden egg batter, and fried until beautifully crisp on the outside while the roasted chile stays tender underneath. 🌶️🧀❤️
Serve them smothered—or lightly topped—with a warm homemade roasted tomato salsa, plus Mexican rice, beans, and warm tortillas for a seriously satisfying New Mexico–inspired dinner.
Full Recipe (Ingredients + Instructions)
Serves: 6
Prep Time: 35 minutes
Cook Time: 30 minutes
Total Time: About 1 hour 5 minutes
For the Hatch Chile Rellenos 🌶️
- 6 large fresh Hatch/New Mexico green chiles
- 12 oz (340 g) Oaxaca, Monterey Jack, Asadero, or Chihuahua cheese
- ½ cup all-purpose flour, for dusting
- 5 large eggs, separated
- 2 tablespoons all-purpose flour, for the batter
- ½ teaspoon salt
- ¼ teaspoon black pepper
- Vegetable oil, for frying
- Toothpicks, if needed
Optional Cheese Combination 🧀
For an extra flavorful filling, combine:
- 8 oz Monterey Jack
- 4 oz sharp cheddar
Or use pepper Jack if you want even more chile heat.
Homemade Roasted Salsa 🍅🌶️
- 5 Roma tomatoes
- 1 jalapeño
- 1 serrano, optional
- ½ medium white onion
- 4 garlic cloves, unpeeled
- 1–2 dried chile de árbol, optional
- 1 tablespoon vegetable oil
- ½ cup fresh cilantro
- 1 teaspoon Mexican oregano
- ½ teaspoon ground cumin
- 1 teaspoon salt, or to taste
- 2 tablespoons fresh lime juice
- ¼–½ cup chicken broth, as needed
Step 1: Roast the Hatch Chiles 🌶️🔥
Place the Hatch chiles directly over a gas flame, on a hot grill, or underneath the broiler.
Turn frequently until the skins are blistered and charred all over.
You’re looking for plenty of blackened spots.
Immediately transfer the roasted chiles to a covered bowl.
Let them steam for 10–15 minutes.
This loosens the skins.
Step 2: Peel the Chiles
Carefully peel away the blistered skin.
Try not to rinse them under running water because that can wash away some of the roasted chile flavor.
Make a small slit lengthwise down one side of each chile.
Carefully remove the seeds.
Be Gentle ❤️
Hatch chiles are often thinner and more delicate than poblanos, so take your time.
You want to keep each chile as intact as possible for stuffing.
Step 3: STUFF THEM WITH CHEESE 🧀😍
Cut the cheese into thick strips.
Stuff each chile generously, but don’t pack it so tightly that the chile tears.
Gently close the opening.
Use one or two toothpicks if necessary.
Pat the outside of each chile completely dry.
Step 4: Make the Homemade Salsa 🍅🔥
Place the tomatoes, jalapeño, serrano, onion, and unpeeled garlic on a hot comal or cast-iron skillet.
Roast for approximately 8–12 minutes, turning occasionally.
You want softened vegetables with dark, charred spots.
Toast the chile de árbol for only 10–15 seconds per side.
Peel the roasted garlic.
Transfer everything to a blender.
Add cilantro, oregano, cumin, salt, and lime juice.
Pulse until you have a slightly rustic salsa.
Don’t Overblend!
A little texture makes this salsa SO much better over crispy rellenos.
Step 5: Cook the Salsa ❤️
Heat 1 tablespoon oil in a saucepan.
Carefully pour in the salsa.
Cook over medium-low heat for approximately 8–10 minutes.
Add enough chicken broth to reach your preferred consistency.
For rellenos, I like the salsa slightly thinner than burrito salsa so it can spoon beautifully around the chile without becoming watery.
Taste and adjust salt and lime.
Keep warm over LOW heat.
Step 6: Flour the Hatch Chiles
Place about ½ cup flour on a plate.
Very lightly coat each stuffed chile.
Shake off the excess.
Why Flour Them?
The flour creates a dry surface that helps the fluffy egg batter cling to the roasted chile.
Without it, the batter can slide right off.
Step 7: Make the Fluffy Egg Batter 🥚
Separate the eggs.
Place the whites in a completely clean bowl.
Beat until they form stiff, glossy peaks.
In another bowl, lightly whisk the egg yolks with:
- Salt
- Black pepper
- 2 tablespoons flour
Gently fold the yolk mixture into the beaten egg whites.
DON’T Beat It!
Fold gently.
You worked hard getting all that air into those egg whites—we want to keep it there. 😂❤️
Step 8: Batter the Chiles 🌶️
Heat about ½ inch of vegetable oil in a heavy skillet to approximately 350°F (175°C).
Working with one chile at a time, gently dip it into the egg batter.
Use a spoon to completely cover any exposed areas.
Carefully lower it into the hot oil.
Step 9: Fry Until Crispy & Golden 🔥
Fry for approximately 2–3 minutes per side.
The outside should become:
Puffy + golden + lightly crisp.
Don’t overcrowd the skillet.
Fry in batches so the oil temperature doesn’t drop too much.
Transfer the finished rellenos to a wire rack rather than stacking them.
CRISPY RELLENO SECRET 🔥
Don’t put them directly on top of each other and don’t immediately drown them in salsa.
Let them rest on a wire rack for several minutes.
That helps preserve the beautiful exterior.
Step 10: Serve with Salsa 🌶️🍅
There are two delicious ways to serve them.
For maximum crispiness, spoon some warm salsa onto the plate first and place the chile relleno on top.
Then add only a little salsa over the center.
For a smothered relleno, place the chile on the plate and generously spoon warm salsa over the entire thing.
Finish with:
- Queso fresco
- Cilantro
- Diced onion
- Avocado
- Mexican crema
- Lime
Then cut it open and watch that cheese come pouring out. 🧀😍
EXTRA CRISPY Hatch Chile Rellenos 🔥🌶️
Want them even crispier?
After coating the chile in the egg batter, sprinkle a very light dusting of finely crushed tortilla chips over the outside before frying.
This isn’t the classic fluffy relleno coating, but it gives you an incredible crunchy variation.
Beef & Cheese Hatch Chile Rellenos 🥩🧀
Brown:
- ¾ lb ground beef
- ¼ onion
- 2 garlic cloves
- ½ teaspoon cumin
- ½ teaspoon Mexican oregano
- Salt and pepper
Cool slightly.
Stuff each chile with:
Seasoned beef + Monterey Jack cheese.
Then batter and fry exactly as directed.
Ground beef should reach 160°F (71°C).
Chicken & Cheese Rellenos 🍗🌶️
Combine:
- 1½ cups shredded cooked chicken
- 1 cup Monterey Jack
- ½ cup roasted green chile
- ¼ teaspoon cumin
Stuff into the Hatch chiles.
These are especially good with the roasted tomato salsa and Mexican crema.
Christmas-Style Rellenos ❤️💚
For a New Mexico–inspired red-and-green presentation, serve the relleno with:
Red chile sauce on one side + green chile sauce on the other.
Cheesy Hatch relleno sitting between red and green chile?
YES PLEASE. 🌶️❤️💚
Extra Recipe Tips & Variations ✨
Choose large, relatively straight Hatch/New Mexico chiles because they’re easier to stuff.
If the roasted chiles are very delicate, refrigerate them for 15–20 minutes after stuffing. Cold stuffed chiles are easier to flour and batter.
Pat them dry before flouring.
Don’t overstuff them or they’ll split while frying.
Use cheese that melts beautifully but isn’t excessively watery.
Keep the frying oil near 350°F (175°C). Oil that’s too cool creates greasy rellenos; excessively hot oil browns the coating before the cheese is fully melted.
Flavor Upgrades / Secret Tips 🔥
🌶️ Char the Hatch chiles aggressively for smoky flavor.
🧀 Combine Oaxaca and Monterey Jack for an incredible cheese pull.
🍅 Roast the tomatoes instead of using them raw.
🧄 Roast garlic inside its skin so it becomes sweet and mellow.
🔥 Add chile de árbol to the salsa for extra heat.
🌿 Add fresh cilantro after the salsa has cooked.
🍋🟩 Finish everything with fresh lime.
My Favorite Secret Upgrade ❤️
Add ½ cup chopped roasted Hatch green chile to the homemade tomato salsa during the final few minutes of cooking.
Now you have roasted Hatch chile inside AND outside the relleno.
That’s how you make the green chile flavor impossible to miss. 🌶️🔥
Serving Ideas 🍽️
Turn these rellenos into a complete plate with:
- Mexican rice
- Refried beans
- Pinto beans
- Charro beans
- Calabacitas
- Warm flour tortillas
- Corn tortillas
- Avocado
- Pico de gallo
Restaurant-Style Plate ❤️
Spoon homemade salsa onto a colorful plate.
Place one crispy Hatch Chile Relleno in the center.
Add Mexican rice and refried beans on the side.
Drizzle a little crema over the relleno.
Finish with queso fresco, cilantro, and avocado.
Add two warm flour tortillas.
THAT’S a plate. 🌶️🧀🔥
Storage & Meal Prep Tips 🥡
Chile rellenos are best eaten fresh from the skillet.
If you have leftovers, cool promptly and refrigerate in an airtight container for up to 3–4 days.
Keep the salsa separately whenever possible.
Reheat rellenos in an air fryer or 375°F (190°C) oven until thoroughly hot and crisp again.
Avoid microwaving if crispness matters because the coating becomes soft.
The homemade salsa can be refrigerated separately for approximately 4–5 days.
Nutrition Facts 📊
Approximate per relleno with salsa:
- Calories: 380–450 kcal
- Protein: 18–22 g
- Carbohydrates: 18–24 g
- Fat: 26–32 g
- Fiber: 3–4 g
Nutrition varies with chile size, cheese quantity, frying oil, and salsa.
Frequently Asked Questions (Q&A)
What’s the difference between Hatch chile and poblano?
Hatch generally refers to New Mexico chile grown in the Hatch Valley/region of New Mexico. These chiles are typically longer and thinner than poblanos and come in varying heat levels.
Can I use poblano peppers instead?
Absolutely. Poblanos are sturdy and particularly easy to stuff.
Which cheese is best?
Oaxaca, Monterey Jack, Asadero, and Chihuahua are all excellent melting cheeses.
Why does my batter fall off?
The chile may be too wet. Pat it dry, coat it lightly in flour, and then immediately dip it in the egg batter.
Why are my rellenos greasy?
The oil was probably too cool. Keep it around 350°F (175°C) and fry in small batches.
Can I prepare the peppers ahead?
Yes. Roast, peel, seed, and stuff them several hours ahead. Refrigerate until you’re ready to batter and fry.
Can I make the salsa ahead?
Definitely. The salsa can be prepared a day ahead and gently reheated before serving.
Social Media Captions ❤️
Facebook Style:
“Made Crispy Hatch Chile Rellenos tonight with homemade roasted salsa! 🌶️🧀🔥 Roasted Hatch chiles stuffed with LOTS of melty cheese, dipped in fluffy egg batter and fried until golden. Then I added that homemade tomato-chile salsa on top. SO GOOD! ❤️ Recipe below 👇”
Short Caption:
“Crispy Hatch Chile Rellenos + melted cheese + homemade salsa. 🌶️🧀🔥 Who wants this plate?”
Family-Style Caption:
“Made these Hatch Chile Rellenos for dinner and the cheese pull alone was worth it. 😂🌶️🧀❤️ Homemade salsa on top and warm tortillas on the side!”
Spicy Caption:
“Used HOT Hatch chile AND chile de árbol in the salsa. 🌶️🔥 If I’m making chile rellenos, we’re making them SPICY! 😂”
Engagement Caption:
“How do you like your Chile Rellenos—SALSA ON TOP 🍅🌶️ or SALSA UNDERNEATH so they stay extra crispy? 👇🔥”
Final Food Description 🌶️🧀🍅❤️
Crispy Hatch Chile Rellenos feature smoky roasted New Mexico green chiles generously stuffed with melting cheese, lightly floured, wrapped in a fluffy egg batter, and fried until puffed and golden. Served with a rustic homemade salsa of fire-roasted tomatoes, jalapeño, garlic, onion, cilantro, and lime, every bite delivers roasted chile heat, molten cheese, crisp batter, and bright tomato salsa. 🌶️🧀🔥❤️