Category: RECIPES

  • Sticky Glazed BBQ Ribs

    Sticky Glazed BBQ Ribs

    (Fall-Off-the-Bone BBQ Ribs with Sweet & Smoky Glaze)

    These Sticky Glazed BBQ Ribs are slow-cooked until tender, coated with a smoky homemade BBQ sauce, and finished with a caramelized sticky glaze. Perfect for backyard cookouts, family dinners, game days, or anytime youโ€™re craving juicy, flavorful ribs!


    Ingredients

    For the Ribs:

    • 2 racks baby back ribs (about 4โ€“5 pounds)
    • 2 tablespoons yellow mustard (optional binder)
    • 2 tablespoons olive oil
    • 2 teaspoons salt
    • 2 teaspoons black pepper
    • 2 tablespoons brown sugar
    • 2 teaspoons smoked paprika
    • 2 teaspoons garlic powder
    • 2 teaspoons onion powder
    • 1 teaspoon chili powder
    • 1 teaspoon cumin
    • 1 teaspoon cayenne pepper (optional)

    Homemade Sticky BBQ Glaze:

    • 2 cups BBQ sauce
    • ยผ cup honey
    • ยผ cup brown sugar
    • 2 tablespoons apple cider vinegar
    • 1 tablespoon Worcestershire sauce
    • 2 cloves garlic, minced
    • 1 teaspoon smoked paprika
    • 1 tablespoon hot sauce (optional)

    Instructions

    Step 1: Prepare the Ribs

    Preheat oven to:

    275ยฐF (135ยฐC)

    Remove the thin membrane from the back of the ribs.

    Pat ribs dry.

    Rub with:

    • Mustard
    • Olive oil

    Mix seasonings:

    • Salt
    • Pepper
    • Brown sugar
    • Smoked paprika
    • Garlic powder
    • Onion powder
    • Chili powder
    • Cumin

    Coat ribs generously.


    Step 2: Slow Cook the Ribs

    Wrap ribs tightly in foil.

    Place on a baking sheet.

    Bake for:

    2ยฝโ€“3 hours

    until tender.


    Step 3: Make the Sticky Glaze

    In a saucepan combine:

    • BBQ sauce
    • Honey
    • Brown sugar
    • Apple cider vinegar
    • Worcestershire sauce
    • Garlic
    • Smoked paprika
    • Hot sauce

    Simmer:

    10โ€“15 minutes

    until thick and glossy.


    Step 4: Glaze & Finish

    Remove ribs from foil.

    Brush generously with BBQ glaze.

    Finish by:

    Oven:

    Broil for 3โ€“5 minutes

    or

    Grill:

    Cook over medium heat for 5โ€“10 minutes

    until caramelized and sticky.


    Step 5: Rest & Serve

    Let ribs rest for:

    10 minutes

    Slice between bones and serve!


    Serving Ideas ๐Ÿฝ๏ธ

    Serve with:

    ๐ŸŸ Crispy fries
    ๐Ÿฅ— Coleslaw
    ๐ŸŒฝ Corn on the cob
    ๐Ÿซ˜ Baked beans
    ๐Ÿฅ” Potato salad
    ๐Ÿž Cornbread
    ๐Ÿฅ’ Pickles


    Extra Tips & Secrets โœจ

    โœ… Remove the membrane for more tender ribs.

    โœ… Low and slow cooking creates the best texture.

    โœ… Add sauce near the end so it caramelizes instead of burning.

    โœ… Resting the ribs keeps them juicy.


    Delicious Variations

    ๐ŸŒถ๏ธ Green Chile BBQ Ribs

    Add:

    • Hatch green chiles
    • Roasted jalapeรฑos
    • Green chile BBQ sauce

    ๐Ÿฏ Honey Garlic Ribs

    Add:

    • Extra honey
    • Fresh garlic
    • Soy sauce

    ๐Ÿ”ฅ Spicy BBQ Ribs

    Add:

    • Cayenne
    • Chipotle peppers
    • Hot sauce

    ๐ŸŽ Apple Bourbon BBQ Ribs

    Add:

    • Apple juice
    • Bourbon flavoring
    • Brown sugar glaze

    ๐Ÿง„ Garlic Parmesan Ribs

    Finish with:

    • Garlic butter
    • Parmesan cheese

    Storage

    Refrigerator:
    Store leftovers for up to 4 days.

    Freezer:
    Freeze cooked ribs for up to 3 months.

    Reheating:
    Warm covered in the oven with extra sauce.


    Nutrition Facts (Approximate)

    Per serving (about 4 ribs):

    • Calories: 550โ€“750 kcal
    • Protein: 45โ€“55 g
    • Carbohydrates: 25โ€“40 g
    • Fat: 30โ€“45 g

    Frequently Asked Questions (Q&A)

    Q: What ribs are best for this recipe?
    A: Baby back ribs are tender and cook faster, while spare ribs have more meat and a richer flavor.

    Q: Can I make ribs ahead of time?
    A: Yes! Cook them slowly, refrigerate, and glaze before serving.

    Q: How do I know ribs are done?
    A: The meat should pull back from the bones and bend easily.

    Q: Can I cook these on a grill?
    A: Absolutely! Cook low and slow, then finish over higher heat with glaze.

    Q: Why are my ribs not sticky?
    A: Add the glaze during the final cooking stage and allow it to caramelize.


    Social Media Caption Ideas โค๏ธ

    Option 1:
    “Made these Sticky Glazed BBQ Ribs and they were fall-apart tender! ๐Ÿ–๐Ÿ”ฅ Sweet, smoky, and covered in a homemade sticky BBQ glaze โ€” the perfect comfort food!”

    Option 2:
    “Nothing beats ribs fresh off the grill! ๐Ÿ˜๐Ÿ– These BBQ ribs are juicy, saucy, and packed with smoky flavor. Who wants a plate?”

    Option 3:
    “Sticky, saucy, and seriously delicious! ๐Ÿ”ฅ๐Ÿ– Slow-cooked BBQ ribs with a sweet glaze that will have everyone coming back for seconds!”


    ๐Ÿ–๐Ÿ”ฅ Sticky Glazed BBQ Ribs are the ultimate BBQ classic โ€” tender meat, smoky flavor, and a sweet caramelized glaze in every bite! โค๏ธ

  • PHILLY CHEESESTEAK SLIDERS

    PHILLY CHEESESTEAK SLIDERS

    (Cheesy Steak & Onion Party Sliders)

    These Philly Cheesesteak Sliders bring all the flavors of the classic Philly sandwich into a fun, easy-to-make appetizer or meal. Soft slider rolls are filled with tender steak, caramelized onions, peppers, and lots of melted cheese, then baked with a buttery topping until golden and delicious.


    Ingredients

    For the Cheesesteak Filling:

    • 1ยฝ pounds thinly sliced steak (ribeye, sirloin, or shaved beef)
    • 2 tablespoons olive oil
    • 1 large onion, thinly sliced
    • 1 green bell pepper, sliced
    • 2 cups mushrooms, sliced (optional)
    • 3 cloves garlic, minced
    • 1 teaspoon salt
    • 1 teaspoon black pepper
    • 1 teaspoon garlic powder
    • 1 teaspoon smoked paprika
    • 1 tablespoon Worcestershire sauce

    For the Sliders:

    • 12 Hawaiian rolls or slider buns
    • 12 slices provolone cheese
    • 1 cup shredded mozzarella cheese (optional)
    • 3 tablespoons butter, melted
    • 1 teaspoon garlic powder
    • 1 teaspoon Italian seasoning
    • 1 tablespoon chopped parsley
    • 1 tablespoon Parmesan cheese (optional)

    Instructions

    Step 1: Cook the Steak Filling

    Heat a large skillet over medium-high heat.

    Add:

    • Olive oil
    • Steak

    Cook quickly until browned.

    Season with:

    • Salt
    • Pepper
    • Garlic powder
    • Smoked paprika
    • Worcestershire sauce

    Remove steak and set aside.


    Step 2: Cook the Vegetables

    In the same skillet add:

    • Onion
    • Bell pepper
    • Mushrooms

    Cook for:

    5โ€“8 minutes

    until soft and caramelized.

    Add garlic and cook for 30 seconds.

    Return steak to the skillet and mix together.


    Step 3: Assemble the Sliders

    Preheat oven to:

    350ยฐF (175ยฐC)

    Slice slider rolls in half horizontally (keep rolls connected).

    Place bottom half in a baking dish.

    Layer:

    1. Provolone cheese
    2. Steak mixture
    3. Extra cheese
    4. Top half of rolls

    Step 4: Add Butter Topping

    Mix melted butter with:

    • Garlic powder
    • Italian seasoning
    • Parsley
    • Parmesan

    Brush over the tops of rolls.


    Step 5: Bake

    Cover loosely with foil.

    Bake:

    15 minutes

    Remove foil and bake another:

    5โ€“10 minutes

    until golden and cheese is melted.


    Serving Ideas ๐Ÿฅช

    Serve with:

    ๐ŸŸ French fries
    ๐Ÿฅ” Potato wedges
    ๐Ÿฅ— Side salad
    ๐Ÿฅ’ Pickles
    ๐ŸŒถ๏ธ Peppers
    ๐Ÿง… Onion rings


    Extra Tips & Secrets โœจ

    โœ… Ribeye gives the most authentic Philly flavor.

    โœ… Freeze steak slightly before slicing for thin slices.

    โœ… Don’t overcrowd the pan when cooking steak.

    โœ… Brush the buttery topping generously for restaurant-style sliders.


    Delicious Variations

    ๐ŸŒถ๏ธ Green Chile Philly Sliders

    Add:

    • Hatch green chiles
    • Pepper Jack cheese

    ๐Ÿฅ“ Bacon Cheesesteak Sliders

    Add:

    • Crispy bacon
    • Cheddar cheese

    ๐Ÿ— Chicken Philly Sliders

    Replace steak with:

    • Thin sliced chicken

    ๐Ÿง€ Extra Cheesy Sliders

    Add:

    • Cheese sauce
    • Extra provolone

    ๐Ÿ”ฅ Spicy Philly Sliders

    Add:

    • Jalapeรฑos
    • Hot peppers
    • Spicy mayo

    Storage & Reheating

    Refrigerator:
    Store leftovers for up to 3 days.

    Reheating:
    Warm in the oven or air fryer for the best texture.


    Nutrition Facts (Approximate)

    Per slider:

    • Calories: 300โ€“400 kcal
    • Protein: 18โ€“25 g
    • Carbohydrates: 25โ€“35 g
    • Fat: 18โ€“25 g

    Frequently Asked Questions (Q&A)

    Q: What steak is best for Philly sliders?
    A: Ribeye is traditional, but shaved sirloin or deli-style shaved beef works well too.

    Q: Can I make these ahead?
    A: Yes! Assemble them, refrigerate, and bake when ready.

    Q: What cheese is best?
    A: Provolone is classic, but American, mozzarella, and Pepper Jack also work great.

    Q: Can I use leftover steak?
    A: Absolutely! Slice it thin and warm it with the onions and peppers.

    Q: Can I freeze Philly sliders?
    A: Yes, wrap tightly and freeze before baking.


    Social Media Caption Ideas โค๏ธ

    Option 1:
    “Made these Philly Cheesesteak Sliders and they disappeared fast! ๐Ÿฅฉ๐Ÿง€ Soft rolls loaded with tender steak, onions, peppers, and melted cheese โ€” the perfect game day or family dinner recipe!”

    Option 2:
    “All the flavors of a classic Philly cheesesteak in slider form! ๐Ÿ˜๐Ÿฅ– Cheesy, juicy, and packed with flavor. Save this recipe!”

    Option 3:
    “These sliders are a crowd favorite! ๐Ÿ”ฅ๐Ÿฅฉ Melted cheese, savory steak, and buttery toasted rolls make every bite amazing!”


    ๐Ÿฅฉ๐Ÿง€๐Ÿฅ– Philly Cheesesteak Sliders are the perfect combination of tender steak, melty cheese, and buttery rolls โ€” an easy recipe everyone will love! โค๏ธ

  • Homemade Peach Cobbler

    Homemade Peach Cobbler

    (Classic Southern Peach Cobbler Recipe)

    This Homemade Peach Cobbler is a warm, comforting dessert made with juicy peaches, buttery cinnamon filling, and a golden biscuit-like topping. Itโ€™s the perfect old-fashioned dessert served with a scoop of vanilla ice cream!


    Ingredients

    For the Peach Filling:

    • 6 cups fresh peaches, sliced
      (or 2 large cans sliced peaches, drained)
    • ยพ cup sugar
    • ยผ cup brown sugar
    • 2 tablespoons lemon juice
    • 1 teaspoon vanilla extract
    • 1 teaspoon cinnamon
    • ยผ teaspoon nutmeg
    • 2 tablespoons cornstarch
    • Pinch of salt

    For the Cobbler Topping:

    • 1ยฝ cups all-purpose flour
    • ยฝ cup sugar
    • 2 teaspoons baking powder
    • ยฝ teaspoon salt
    • ยฝ cup cold butter, cubed
    • ยพ cup milk or buttermilk
    • 1 teaspoon vanilla extract

    Instructions

    Step 1: Prepare the Peaches

    Preheat oven to:

    375ยฐF (190ยฐC)

    In a large bowl combine:

    • Peaches
    • Sugar
    • Brown sugar
    • Lemon juice
    • Vanilla
    • Cinnamon
    • Nutmeg
    • Cornstarch
    • Salt

    Mix well and let sit for 10 minutes.


    Step 2: Make the Topping

    In another bowl combine:

    • Flour
    • Sugar
    • Baking powder
    • Salt

    Cut in cold butter until mixture looks like coarse crumbs.

    Add:

    • Milk
    • Vanilla

    Mix until a soft dough forms.


    Step 3: Assemble Cobbler

    Pour peach mixture into a greased baking dish.

    Drop spoonfuls of topping over the peaches.

    Leave some spaces so the peach filling can bubble through.


    Step 4: Bake

    Bake for:

    40โ€“50 minutes

    until:

    โœ… Golden brown topping
    โœ… Bubbling peach filling
    โœ… Crispy edges

    Let cool for 10โ€“15 minutes before serving.


    Serving Ideas ๐Ÿจ

    Serve warm with:

    ๐Ÿฆ Vanilla ice cream
    ๐Ÿฅ› Whipped cream
    ๐Ÿฏ Caramel drizzle
    ๐ŸŒฐ Chopped pecans


    Extra Tips & Secrets โœจ

    โœ… Use ripe summer peaches for the best flavor.

    โœ… Add a little bourbon or almond extract for a special twist.

    โœ… Don’t overmix the topping โ€” it keeps it tender.

    โœ… Let it rest after baking so the filling thickens.


    Delicious Variations

    ๐Ÿ“ Peach Berry Cobbler

    Add:

    • Blueberries
    • Raspberries
    • Strawberries

    ๐Ÿ‘ Peach Cream Cheese Cobbler

    Add:

    • Cream cheese layer
    • Vanilla cheesecake flavor

    ๐Ÿฅœ Southern Peach Pecan Cobbler

    Add:

    • Toasted pecans
    • Brown sugar topping

    ๐Ÿช Peach Biscuit Cobbler

    Use:

    • Homemade biscuit dough topping

    ๐Ÿฏ Honey Cinnamon Peach Cobbler

    Replace sugar with:

    • Honey
    • Extra cinnamon

    Storage

    Room Temperature:
    Best enjoyed the same day.

    Refrigerator:
    Store covered for up to 5 days.

    Reheating:
    Warm individual servings in the microwave or oven.


    Nutrition Facts (Approximate)

    Per serving (1 of 8 servings):

    • Calories: 350โ€“450 kcal
    • Protein: 4โ€“6 g
    • Carbohydrates: 55โ€“65 g
    • Fat: 12โ€“18 g
    • Fiber: 3โ€“5 g

    Frequently Asked Questions (Q&A)

    Q: Can I use canned peaches?
    A: Yes! Drain them well and reduce the sugar slightly if they are packed in syrup.

    Q: Can I make peach cobbler ahead of time?
    A: Yes. Reheat before serving for the best texture.

    Q: Why is my cobbler watery?
    A: The peaches may have released extra juice. Cornstarch helps thicken the filling.

    Q: What peaches are best?
    A: Fresh ripe peaches give the best flavor, but frozen or canned work too.

    Q: Can I freeze peach cobbler?
    A: Yes, freeze for up to 3 months. Thaw and reheat before serving.


    Social Media Caption Ideas โค๏ธ

    Option 1:
    “Made this Homemade Peach Cobbler and it was absolutely delicious! ๐Ÿ‘๐Ÿฅง Warm cinnamon peaches, buttery golden topping, and a scoop of vanilla ice cream โ€” the perfect comfort dessert!”

    Option 2:
    “Nothing says homemade like peach cobbler fresh from the oven! ๐Ÿ‘โœจ Sweet peaches, cozy cinnamon flavors, and a golden topping everyone loves.”

    Option 3:
    “Fresh peach cobbler straight from the oven! ๐Ÿ˜๐Ÿ‘ The smell alone brings everyone to the kitchen. Who wants a warm slice with ice cream?”


    ๐Ÿ‘๐Ÿฅง Classic Peach Cobbler is the perfect Southern dessert โ€” sweet peaches, buttery topping, and a warm homemade flavor that feels like a family tradition! โค๏ธ

  • smothered chicken

    (Southern-Style Chicken with Rich Onion Gravy)

    This Smothered Chicken is a classic comfort food made with juicy seasoned chicken thighs cooked low and slow in a rich, creamy onion gravy. Crispy golden chicken, caramelized onions, and savory sauce come together for a meal that tastes like homemade Sunday dinner.


    Ingredients

    For the Chicken:

    • 6 bone-in, skin-on chicken thighs (or chicken breasts)
    • 2 teaspoons salt
    • 1 teaspoon black pepper
    • 2 teaspoons garlic powder
    • 2 teaspoons onion powder
    • 1 teaspoon paprika
    • 1 teaspoon smoked paprika
    • ยฝ teaspoon cayenne pepper (optional)
    • ยฝ cup all-purpose flour (for coating)
    • 3 tablespoons oil

    For the Smothered Gravy:

    • 2 large onions, sliced
    • 4 cloves garlic, minced
    • 3 tablespoons butter
    • 3 tablespoons flour
    • 3 cups chicken broth
    • 1 cup milk or heavy cream
    • 1 tablespoon Worcestershire sauce
    • 1 teaspoon thyme
    • 1 teaspoon parsley
    • ยฝ teaspoon rosemary
    • Salt and pepper to taste

    Optional Additions:

    • Mushrooms ๐Ÿ„
    • Bell peppers
    • Bacon pieces ๐Ÿฅ“
    • Hot sauce
    • Green onions
    • Fresh parsley

    Instructions

    Step 1: Season the Chicken

    Pat chicken dry.

    Season with:

    • Salt
    • Pepper
    • Garlic powder
    • Onion powder
    • Paprika
    • Smoked paprika
    • Cayenne

    Lightly coat with flour.


    Step 2: Brown the Chicken

    Heat oil in a large skillet.

    Sear chicken skin-side down first:

    5โ€“7 minutes

    until golden brown.

    Flip and cook another few minutes.

    Remove chicken and set aside.


    Step 3: Make the Onion Gravy

    In the same skillet add:

    • Butter
    • Sliced onions

    Cook for:

    10โ€“15 minutes

    until soft and golden.

    Add garlic and cook for 30 seconds.

    Sprinkle flour over onions and stir.

    Cook for 1 minute.


    Step 4: Create the Sauce

    Slowly add:

    • Chicken broth
    • Milk or cream
    • Worcestershire sauce

    Stir until smooth.

    Add:

    • Thyme
    • Parsley
    • Rosemary
    • Salt and pepper

    Step 5: Smother & Cook

    Return chicken to the skillet.

    Cover and simmer:

    35โ€“45 minutes

    until chicken is tender and gravy is rich.


    Serving Ideas ๐Ÿฝ๏ธ

    Serve over:

    ๐Ÿš White rice
    ๐Ÿฅ” Mashed potatoes
    ๐Ÿ Egg noodles
    ๐Ÿฅ– Biscuits
    ๐ŸŒฝ Corn
    ๐Ÿฅ— Green beans


    Extra Tips & Secrets โœจ

    โœ… Chicken thighs stay the juiciest, but breasts work too.

    โœ… Brown the chicken first for deeper flavor.

    โœ… Let the onions caramelize โ€” they create the best gravy.

    โœ… Don’t rush the simmering time; slow cooking makes the chicken tender.


    Delicious Variations

    ๐ŸŒถ๏ธ Green Chile Smothered Chicken

    Add:

    • Hatch green chiles
    • Pepper Jack cheese
    • Salsa verde

    ๐Ÿง€ Cheesy Smothered Chicken

    Add:

    • Monterey Jack
    • Cheddar cheese

    ๐Ÿ„ Mushroom Smothered Chicken

    Add:

    • Sautรฉed mushrooms
    • Creamy mushroom gravy

    ๐Ÿฅ“ Bacon Smothered Chicken

    Add:

    • Crispy bacon
    • Bacon drippings for cooking

    ๐Ÿ‹ Garlic Herb Smothered Chicken

    Add:

    • Extra garlic
    • Fresh herbs
    • Lemon zest

    Storage

    Refrigerator:
    Store for up to 4 days.

    Freezer:
    Freeze chicken and gravy for up to 3 months.

    Reheating:
    Warm slowly on the stove with a splash of broth.


    Nutrition Facts (Approximate)

    Per serving (1 chicken thigh with gravy):

    • Calories: 450โ€“600 kcal
    • Protein: 35โ€“45 g
    • Carbohydrates: 10โ€“20 g
    • Fat: 30โ€“40 g
    • Fiber: 2โ€“3 g

    Frequently Asked Questions (Q&A)

    Q: What chicken is best for smothered chicken?
    A: Bone-in chicken thighs give the most flavor and tenderness.

    Q: Can I use boneless chicken?
    A: Yes, reduce cooking time so it stays juicy.

    Q: Why is my gravy lumpy?
    A: Add broth slowly while whisking and make sure the flour cooks before adding liquid.

    Q: Can I make this ahead?
    A: Yes! The flavor gets even better the next day.

    Q: Can I make it spicy?
    A: Add cayenne, hot sauce, or Hatch green chiles.


    Social Media Caption Ideas โค๏ธ

    Option 1:
    “Made this Smothered Chicken and it was pure comfort food! ๐Ÿ—๐Ÿง… Tender chicken covered in rich homemade onion gravy โ€” the kind of meal that brings everyone to the table. Full recipe below!”

    Option 2:
    “Sunday dinner vibes! ๐Ÿ˜ Golden chicken, creamy gravy, and so much flavor in every bite. This Smothered Chicken recipe is a family favorite!”

    Option 3:
    “Nothing beats a plate of homemade comfort food! ๐Ÿ—โœจ This smothered chicken is juicy, flavorful, and covered in the most delicious gravy.”


    ๐Ÿ—๐Ÿง… Smothered Chicken is a timeless Southern comfort dish โ€” tender chicken, rich gravy, and simple ingredients that create an unforgettable homemade meal! โค๏ธ

  • Cajun Shrimp Boil in Garlic Butter Sauce

    (Louisiana-Style Seafood Boil Recipe)

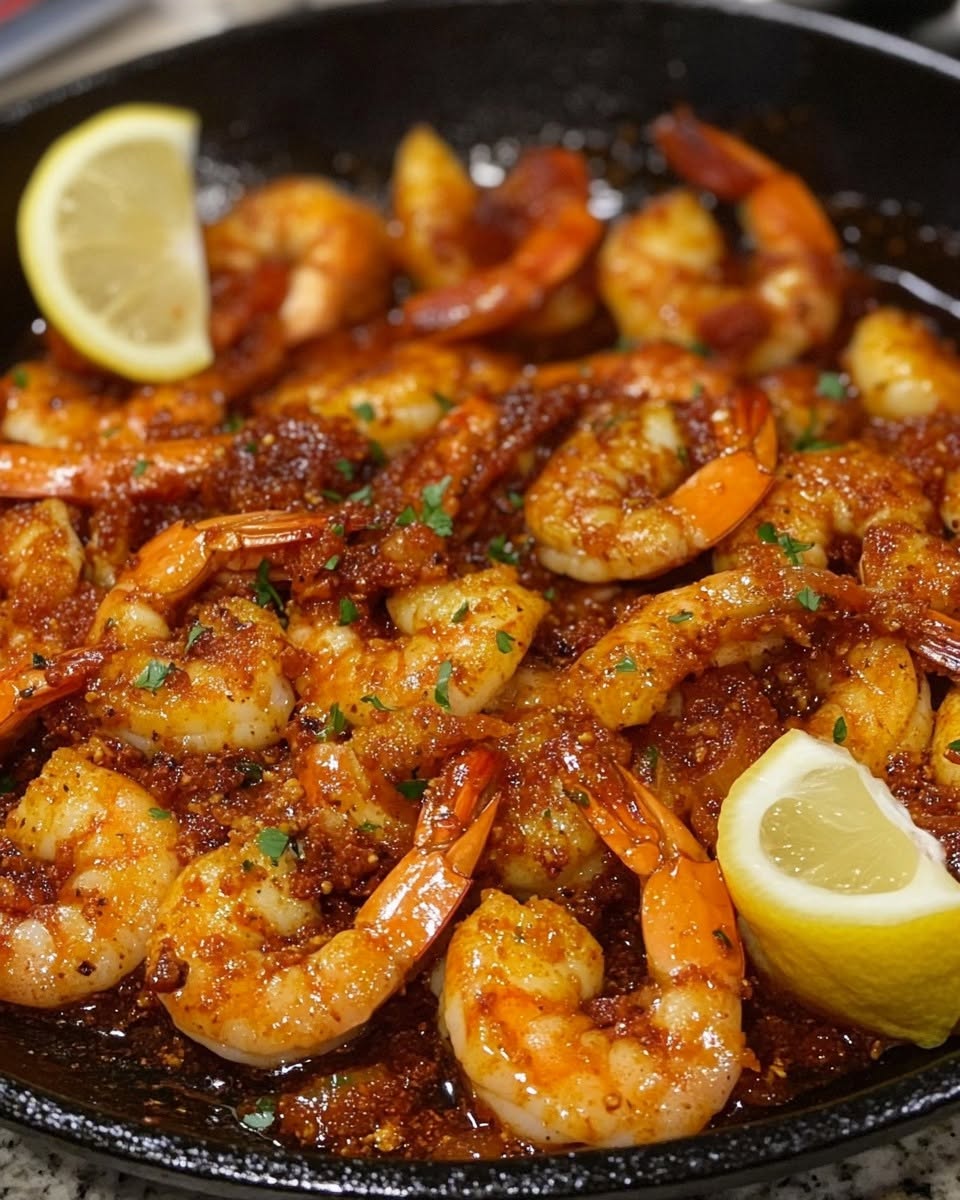
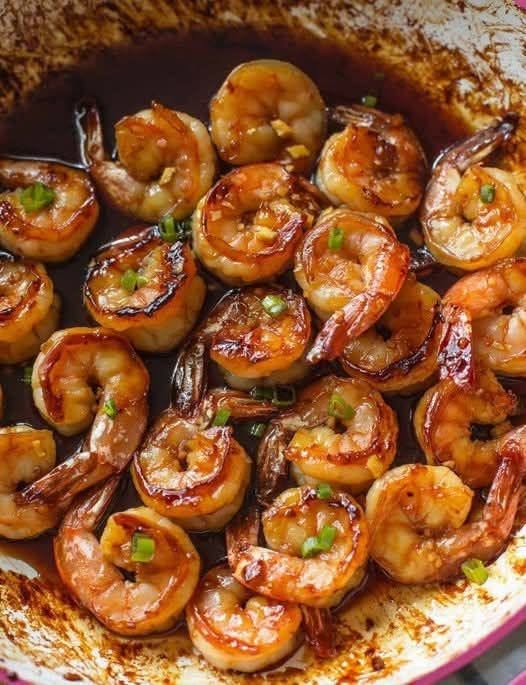
    This Cajun Shrimp Boil in Garlic Butter Sauce is a flavorful Southern feast loaded with juicy shrimp, tender potatoes, sweet corn, and smoky sausage tossed in a rich garlic butter Cajun sauce. Itโ€™s messy, fun, and perfect for family dinners, gatherings, and seafood lovers!


    Ingredients

    For the Shrimp Boil:

    • 2 pounds large shrimp, shell-on (recommended)
    • 1ยฝ pounds baby potatoes, halved
    • 4 ears corn, cut into pieces
    • 1 pound smoked sausage (Andouille or kielbasa), sliced
    • 1 large onion, quartered
    • 1 lemon, sliced
    • 6 cloves garlic, smashed
    • 3 tablespoons Old Bay seasoning
    • 2 tablespoons Cajun seasoning
    • 2 bay leaves
    • 10 cups water

    Garlic Butter Cajun Sauce:

    • 1ยฝ cups unsalted butter
    • 8 cloves garlic, minced
    • 3 tablespoons Cajun seasoning
    • 1 tablespoon Old Bay seasoning
    • 1 teaspoon smoked paprika
    • 1 teaspoon onion powder
    • 1 teaspoon garlic powder
    • 1 tablespoon lemon juice
    • 2 tablespoons hot sauce (optional)
    • 2 tablespoons fresh parsley, chopped

    Optional Additions:

    • Crab legs ๐Ÿฆ€
    • Crawfish
    • Lobster tails
    • Mushrooms
    • Green onions
    • Extra lemon wedges
    • Red pepper flakes ๐ŸŒถ๏ธ

    Instructions

    Step 1: Prepare the Boil

    Fill a large pot with water.

    Add:

    • Lemon slices
    • Garlic
    • Onion
    • Bay leaves
    • Old Bay seasoning
    • Cajun seasoning

    Bring to a boil.


    Step 2: Cook the Potatoes

    Add potatoes first.

    Boil for:

    12โ€“15 minutes

    until they begin to soften.


    Step 3: Add Sausage & Corn

    Add:

    • Smoked sausage
    • Corn

    Cook for:

    5โ€“7 minutes

    until vegetables are tender.


    Step 4: Add Shrimp

    Add shrimp last.

    Cook for:

    3โ€“5 minutes

    until shrimp turn pink and curl.

    Drain everything well.


    Step 5: Make Garlic Butter Sauce

    In a saucepan:

    Melt butter over medium-low heat.

    Add:

    • Garlic

    Cook for 1 minute.

    Stir in:

    • Cajun seasoning
    • Old Bay
    • Smoked paprika
    • Onion powder
    • Garlic powder
    • Lemon juice
    • Hot sauce

    Simmer for:

    2โ€“3 minutes


    Step 6: Toss & Serve

    Place seafood boil ingredients in a large bowl or tray.

    Pour garlic butter sauce over everything.

    Toss until coated.

    Finish with:

    ๐ŸŒฟ Parsley
    ๐Ÿ‹ Lemon wedges
    ๐Ÿ”ฅ Extra Cajun seasoning

    Serve hot!


    Extra Tips & Secrets ๐Ÿฆโœจ

    โœ… Cook shrimp last so they stay juicy and tender.

    โœ… Shell-on shrimp add more flavor to the boil.

    โœ… Use real butter for the richest garlic sauce.

    โœ… Let the boil sit in sauce for 5 minutes before serving so flavors soak in.


    Delicious Variations

    ๐ŸŒถ๏ธ Extra Spicy Cajun Boil

    Add:

    • Extra cayenne
    • Hot sauce
    • Red pepper flakes

    ๐Ÿง„ Creamy Garlic Butter Boil

    Add:

    • Heavy cream
    • Parmesan cheese

    ๐Ÿฆ€ Seafood Loverโ€™s Boil

    Add:

    • Crab legs
    • Crawfish
    • Lobster tails

    ๐Ÿ‹ Lemon Pepper Shrimp Boil

    Add:

    • Extra lemon zest
    • Lemon pepper seasoning

    ๐ŸŒฝ Southwest Green Chile Seafood Boil

    Add:

    • Hatch green chiles
    • Smoked sausage
    • Pepper Jack butter sauce

    Serving Ideas

    Serve with:

    ๐Ÿฅ– Garlic bread
    ๐Ÿฅ— Fresh salad
    ๐Ÿš Cajun rice
    ๐Ÿฅ’ Pickles
    ๐Ÿ‹ Extra lemon
    ๐ŸŒถ๏ธ Hot sauce


    Storage

    Refrigerator:
    Store leftovers in an airtight container for up to 3 days.

    Reheating:
    Warm gently in a skillet with extra butter to avoid overcooking shrimp.


    Nutrition Facts (Approximate)

    Per serving (1 of 6 servings):

    • Calories: 650โ€“850 kcal
    • Protein: 45โ€“55 g
    • Carbohydrates: 45โ€“60 g
    • Fat: 35โ€“50 g
    • Fiber: 5โ€“7 g

    Frequently Asked Questions (Q&A)

    Q: What shrimp are best for a shrimp boil?
    A: Large shell-on shrimp work best because they stay flavorful and juicy.

    Q: Can I use frozen shrimp?
    A: Yes! Thaw completely and drain before cooking.

    Q: How spicy is Cajun shrimp boil?
    A: You can adjust the heat by changing the amount of Cajun seasoning and hot sauce.

    Q: Can I make this in the oven?
    A: Yes! Toss ingredients with garlic butter and bake covered until cooked.

    Q: What sausage is best?
    A: Andouille sausage gives the most authentic Cajun flavor, but kielbasa works too.


    Social Media Caption Ideas โค๏ธ

    Option 1:
    “Made this Cajun Shrimp Boil in Garlic Butter Sauce and it was a seafood feast! ๐Ÿฆ๐Ÿ”ฅ Juicy shrimp, sausage, corn, potatoes, and the most delicious buttery Cajun sauce. Full recipe below!”

    Option 2:
    “Nothing beats a seafood boil night! ๐Ÿฆ€๐Ÿฆ Loaded with bold Cajun flavors, garlic butter, and all the good stuff. Who’s ready for a plate?”

    Option 3:
    “This Cajun Shrimp Boil is messy, buttery, and absolutely delicious! ๐ŸŒฝ๐Ÿฅ”๐Ÿฆ The perfect recipe for gathering with family and friends!”


    ๐Ÿฆ๐Ÿ”ฅ Cajun Shrimp Boil in Garlic Butter Sauce is the ultimate Southern comfort meal โ€” bold spices, fresh seafood, and rich buttery flavor in every bite! โค๏ธ

  • Chicken Salad BLT Sandwich Recipe

    Chicken Salad BLT Sandwich Recipe

    (Creamy Chicken Salad with Crispy Bacon, Lettuce & Tomato)

    This Chicken Salad BLT Sandwich combines the best of two classics โ€” creamy homemade chicken salad and a crispy bacon, lettuce, and tomato sandwich. Tender chicken, crunchy bacon, fresh vegetables, and a flavorful dressing come together for the perfect lunch!


    Ingredients

    For the Chicken Salad:

    • 3 cups cooked shredded or diced chicken
    • ยพ cup mayonnaise
    • ยผ cup sour cream or Greek yogurt
    • 1 tablespoon Dijon mustard
    • 1 tablespoon lemon juice
    • 1 teaspoon garlic powder
    • 1 teaspoon onion powder
    • ยฝ teaspoon smoked paprika
    • Salt and black pepper to taste
    • ยฝ cup celery, finely diced
    • ยผ cup red onion, finely diced
    • ยผ cup green onions, chopped
    • 2 tablespoons fresh parsley, chopped

    For the BLT Sandwich:

    • 8 slices sourdough, brioche, or sandwich bread
    • 8โ€“12 slices crispy bacon
    • Fresh lettuce leaves
    • 2 large tomatoes, sliced
    • 2 tablespoons butter (optional, for toasting bread)
    • Avocado slices (optional)

    Instructions

    Step 1: Prepare the Chicken Salad

    In a large bowl combine:

    • Cooked chicken
    • Mayonnaise
    • Sour cream
    • Dijon mustard
    • Lemon juice

    Add seasonings:

    • Garlic powder
    • Onion powder
    • Smoked paprika
    • Salt and pepper

    Mix well.

    Fold in:

    • Celery
    • Red onion
    • Green onions
    • Parsley

    Cover and chill for:

    30 minutes

    for the best flavor.


    Step 2: Cook the Bacon

    • Cook bacon until crispy.
    • Drain on paper towels.

    Step 3: Toast the Bread

    Lightly butter bread slices.

    Toast in a skillet until golden brown.


    Step 4: Assemble the Sandwich

    Layer:

    1. Toasted bread
    2. Chicken salad
    3. Crispy bacon
    4. Lettuce
    5. Tomato slices
    6. Optional avocado

    Top with another slice of bread.

    Slice and serve!


    Extra Tips & Secrets โœจ

    โœ… Use rotisserie chicken for a quick and flavorful shortcut.

    โœ… Chill the chicken salad before serving โ€” the flavors blend beautifully.

    โœ… Add bacon right before eating to keep it crispy.

    โœ… Use ripe tomatoes for the best BLT flavor.


    Delicious Variations

    ๐Ÿฅ“ Bacon Ranch Chicken Salad BLT

    Add:

    • Ranch seasoning
    • Cheddar cheese

    ๐ŸŒถ๏ธ Green Chile Chicken Salad BLT

    Add:

    • Hatch green chiles
    • Pepper Jack cheese
    • Jalapeรฑos

    ๐Ÿฅ‘ Avocado Chicken BLT

    Add:

    • Mashed avocado
    • Lime juice

    ๐Ÿง€ Cheesy Chicken BLT Melt

    Add:

    • Monterey Jack cheese
    • Grill like a panini

    ๐Ÿฅช Croissant Chicken Salad BLT

    Serve on:

    • Buttery croissants

    Serving Ideas

    Serve with:

    ๐ŸŸ French fries
    ๐Ÿฅ— Side salad
    ๐Ÿฅ’ Pickles
    ๐Ÿฒ Soup
    ๐Ÿฅ” Potato chips
    ๐Ÿ“ Fresh fruit


    Storage

    Chicken Salad:
    Store in the refrigerator for up to 3โ€“4 days.

    Sandwiches:
    Best assembled fresh to keep bread from getting soggy.


    Nutrition Facts (Approximate)

    Per sandwich:

    • Calories: 650โ€“850 kcal
    • Protein: 40โ€“50 g
    • Carbohydrates: 45โ€“60 g
    • Fat: 35โ€“50 g
    • Fiber: 4โ€“6 g

    Frequently Asked Questions (Q&A)

    Q: Can I use canned chicken?
    A: Yes, but freshly cooked or rotisserie chicken gives the best texture.

    Q: What bread works best?
    A: Sourdough, brioche, croissants, and thick sandwich bread are excellent choices.

    Q: How do I keep the sandwich from getting soggy?
    A: Toast the bread and add lettuce between the bread and tomato as a moisture barrier.

    Q: Can I make the chicken salad ahead?
    A: Yes! It actually tastes better after chilling.

    Q: Can I make it healthier?
    A: Replace some mayonnaise with Greek yogurt and use grilled chicken.


    Social Media Caption Ideas โค๏ธ

    Option 1:
    “Made this Chicken Salad BLT Sandwich and it was incredible! ๐Ÿฅช๐Ÿฅ“ Creamy chicken salad, crispy bacon, fresh lettuce, and juicy tomatoes stacked between toasted bread. The perfect lunch!”

    Option 2:
    “Two favorites in one sandwich! ๐Ÿ˜ Chicken salad + classic BLT = the ultimate comfort lunch. Save this recipe!”

    Option 3:
    “This sandwich is loaded! ๐Ÿฅ“๐Ÿ— Crispy bacon, creamy chicken salad, and fresh toppings make every bite delicious. Who would try this?”


    ๐Ÿฅช๐Ÿฅ“๐Ÿ— Chicken Salad BLT Sandwich is the perfect combination of creamy, crunchy, fresh, and savory โ€” a homemade lunch everyone will love! โค๏ธ

  • Easy Yummy Squash

    Easy Yummy Squash

    (Simple Garlic Parmesan Summer Squash Recipe)

    This Easy Yummy Squash recipe is a quick and delicious way to enjoy fresh squash. Tender slices of squash are cooked with butter, garlic, herbs, and melted cheese for a simple side dish that goes perfectly with almost any meal.


    Ingredients

    • 4 medium yellow squash, sliced
    • 2 tablespoons olive oil
    • 2 tablespoons butter
    • 4 cloves garlic, minced
    • ยฝ medium onion, sliced
    • ยฝ teaspoon salt
    • ยฝ teaspoon black pepper
    • 1 teaspoon Italian seasoning
    • ยฝ teaspoon smoked paprika
    • ยฝ cup shredded Parmesan cheese
    • 1 cup shredded mozzarella cheese
    • 2 tablespoons fresh parsley, chopped

    Optional Additions:

    • Sliced zucchini
    • Cherry tomatoes ๐Ÿ…
    • Mushrooms
    • Crispy bacon pieces ๐Ÿฅ“
    • Red pepper flakes ๐ŸŒถ๏ธ
    • Fresh basil
    • Breadcrumb topping

    Instructions

    Step 1: Prepare the Squash

    • Wash and slice squash into rounds or half-moons.
    • Pat dry with a paper towel to remove excess moisture.

    Step 2: Cook the Vegetables

    Heat olive oil and butter in a large skillet.

    Add:

    • Onion

    Cook for 2โ€“3 minutes.

    Add:

    • Garlic

    Cook for 30 seconds until fragrant.


    Step 3: Add Squash

    Add sliced squash and season with:

    • Salt
    • Pepper
    • Italian seasoning
    • Smoked paprika

    Cook for:

    8โ€“10 minutes

    until tender but not mushy.


    Step 4: Add Cheese

    Sprinkle Parmesan and mozzarella over the squash.

    Cover and cook for:

    2โ€“3 minutes

    until cheese melts.


    Step 5: Serve

    Finish with fresh parsley and serve warm!


    Extra Tips & Secrets โœจ

    โœ… Donโ€™t overcook the squash โ€” it should stay slightly firm.

    โœ… Use fresh squash for the best texture and flavor.

    โœ… Let the squash brown slightly for extra delicious caramelized flavor.

    โœ… Add cheese at the end to keep it creamy and melty.


    Delicious Variations

    ๐Ÿง€ Cheesy Squash Casserole

    Add:

    • Eggs
    • Sour cream
    • Breadcrumb topping
    • Bake until golden

    ๐ŸŒถ๏ธ Green Chile Squash

    Add:

    • Hatch green chiles
    • Pepper Jack cheese
    • Cilantro

    ๐Ÿฅ“ Bacon Cheddar Squash

    Add:

    • Crispy bacon
    • Cheddar cheese

    ๐Ÿ… Mediterranean Squash

    Add:

    • Tomatoes
    • Feta cheese
    • Fresh herbs

    ๐Ÿ— Chicken Squash Skillet

    Add:

    • Grilled chicken
    • Extra cheese

    Serving Ideas

    Serve with:

    ๐Ÿฅฉ Grilled steak
    ๐Ÿ— Roasted chicken
    ๐ŸŸ Fish
    ๐Ÿš Rice
    ๐Ÿฅ– Garlic bread
    ๐Ÿฅ— Fresh salad


    Storage

    Refrigerator:
    Store covered for up to 4 days.

    Reheating:
    Warm in a skillet or oven for the best texture.


    Nutrition Facts (Approximate)

    Per serving:

    • Calories: 180โ€“250 kcal
    • Protein: 8โ€“12 g
    • Carbohydrates: 12โ€“18 g
    • Fat: 12โ€“18 g
    • Fiber: 3โ€“5 g

    Frequently Asked Questions (Q&A)

    Q: What kind of squash can I use?
    A: Yellow summer squash, zucchini, or a combination of both works great.

    Q: How do I keep squash from getting watery?
    A: Avoid overcooking and cook uncovered so excess moisture can evaporate.

    Q: Can I make this ahead?
    A: Yes, but itโ€™s best fresh because squash softens as it sits.

    Q: Can I make it spicy?
    A: Add jalapeรฑos, chili flakes, or Hatch green chiles.


    Social Media Caption Ideas โค๏ธ

    Option 1:
    “Made this Easy Yummy Squash and it was so good! ๐Ÿฅ’๐Ÿง€ Tender squash, garlic, butter, and melted cheese make the perfect simple side dish. Full recipe below!”

    Option 2:
    “Sometimes the simplest recipes are the best! ๐Ÿ˜ This cheesy garlic squash is easy, delicious, and packed with flavor.”

    Option 3:
    “Fresh squash turned into the perfect comfort side dish! ๐Ÿงˆ๐Ÿง€ Quick, easy, and absolutely delicious!”


    ๐Ÿฅ’๐Ÿง€ Easy Yummy Squash is a simple, flavorful recipe that turns everyday squash into a cheesy, comforting dish everyone will enjoy! โค๏ธ

  • Seafood Dirty Rice

    (Cajun-Style Seafood Dirty Rice Recipe)

    This Seafood Dirty Rice is a delicious Louisiana-inspired dish made with fluffy rice, shrimp, crab, crawfish, Cajun spices, and the classic โ€œholy trinityโ€ of onion, celery, and bell pepper. Itโ€™s packed with bold flavor, seafood goodness, and makes the perfect comfort meal.


    Ingredients

    For the Seafood Rice:

    • 2 cups long-grain white rice
    • 4 cups chicken or seafood broth
    • 1 pound shrimp, peeled and deveined
    • 1 cup lump crab meat
    • 1 cup crawfish tails (optional)
    • 2 tablespoons butter
    • 2 tablespoons olive oil
    • 1 medium onion, diced
    • 1 green bell pepper, diced
    • 2 celery stalks, diced
    • 5 cloves garlic, minced

    Cajun Seasoning:

    • 2 teaspoons Cajun seasoning
    • 1 teaspoon smoked paprika
    • 1 teaspoon garlic powder
    • 1 teaspoon onion powder
    • 1 teaspoon dried thyme
    • 1 teaspoon oregano
    • ยฝ teaspoon cayenne pepper (optional)
    • Salt and black pepper to taste

    Optional Additions:

    • ยฝ pound smoked sausage (andouille), sliced
    • 1 jalapeรฑo, diced
    • Green onions
    • Fresh parsley
    • Hot sauce
    • Lemon juice
    • Worcestershire sauce

    Instructions

    Step 1: Cook the Rice

    • Rinse rice until water runs clear.
    • Cook rice with seafood or chicken broth.
    • Set aside.

    Step 2: Cook the Vegetables

    Heat butter and olive oil in a large skillet.

    Add:

    • Onion
    • Bell pepper
    • Celery

    Cook for 5โ€“7 minutes until softened.

    Add:

    • Garlic

    Cook for another 30 seconds.


    Step 3: Add Seafood

    Add shrimp and cook until they turn pink, about:

    3โ€“4 minutes

    Add:

    • Crab meat
    • Crawfish (if using)

    Gently mix to combine.


    Step 4: Season Everything

    Add:

    • Cajun seasoning
    • Smoked paprika
    • Garlic powder
    • Onion powder
    • Thyme
    • Oregano
    • Cayenne

    Stir well.


    Step 5: Combine with Rice

    Add cooked rice to the seafood mixture.

    Mix gently until everything is evenly combined.

    Cook for:

    5โ€“10 minutes

    to allow flavors to blend.


    Step 6: Finish & Serve

    Top with:

    ๐ŸŒฟ Fresh parsley
    ๐ŸŒฟ Green onions
    ๐Ÿ‹ Lemon juice
    ๐Ÿ”ฅ Hot sauce

    Serve warm!


    Extra Tips & Secrets ๐Ÿฆโœจ

    โœ… Use seafood stock instead of water for deeper flavor.

    โœ… Don’t overcook shrimp โ€” add them near the end.

    โœ… Cajun seasoning controls the flavor and heat, so adjust to your taste.

    โœ… Let the rice rest for a few minutes before serving for better texture.


    Delicious Variations

    ๐Ÿฆ Shrimp Dirty Rice

    Use:

    • Extra shrimp
    • Seafood broth

    ๐Ÿฆ€ Crab Dirty Rice

    Add:

    • More lump crab meat
    • Lemon butter drizzle

    ๐ŸŒถ๏ธ Spicy Cajun Seafood Rice

    Add:

    • Andouille sausage
    • Cayenne
    • Hot peppers

    ๐Ÿง€ Creamy Seafood Dirty Rice

    Add:

    • Cream cheese
    • Heavy cream
    • Parmesan

    ๐ŸŒฝ Southern Seafood Rice

    Add:

    • Corn
    • Green onions
    • Bell peppers

    Serving Ideas

    Serve with:

    ๐Ÿฅ– Garlic bread
    ๐Ÿฅ— Fresh salad
    ๐ŸŒฝ Corn on the cob
    ๐Ÿ‹ Lemon wedges
    ๐Ÿฅ’ Pickles
    ๐Ÿ”ฅ Hot sauce


    Storage & Meal Prep

    Refrigerator:
    Store in an airtight container for up to 3 days.

    Freezer:
    Freeze for up to 2 months.

    Reheating:
    Warm gently with a splash of broth or water.


    Nutrition Facts (Approximate)

    Per serving (1 of 6 servings):

    • Calories: 450โ€“600 kcal
    • Protein: 30โ€“40 g
    • Carbohydrates: 55โ€“65 g
    • Fat: 15โ€“25 g
    • Fiber: 3โ€“5 g

    Frequently Asked Questions (Q&A)

    Q: Why is it called dirty rice?
    A: Traditional dirty rice gets its name from the brown color created by meat, spices, and seasonings mixed into the rice.

    Q: Can I use frozen seafood?
    A: Yes! Thaw and drain well before cooking.

    Q: What seafood works best?
    A: Shrimp, crab, crawfish, and even scallops work beautifully.

    Q: Can I make this spicy?
    A: Yes! Add cayenne pepper, hot sauce, or spicy sausage.

    Q: What rice is best?
    A: Long-grain white rice is traditional, but jasmine rice also works well.


    Social Media Caption Ideas โค๏ธ

    Option 1:
    “Made this Seafood Dirty Rice and it was full of Cajun flavor! ๐Ÿฆ๐Ÿฆ€๐Ÿš Loaded with shrimp, crab, spices, and fluffy rice โ€” the perfect comfort food for seafood lovers. Full recipe below!”

    Option 2:
    “A bowl of Southern comfort! ๐Ÿ”ฅ๐Ÿš This Seafood Dirty Rice is packed with bold Cajun seasoning, tender seafood, and incredible flavor in every bite.”

    Option 3:
    “Seafood lovers, this one is for you! ๐Ÿฆโœจ Shrimp, crab, and Cajun spices come together in this delicious homemade dirty rice recipe. Who wants a plate?”


    ๐Ÿฆ๐Ÿฆ€๐Ÿš Seafood Dirty Rice is a flavorful Cajun classic โ€” hearty rice, fresh seafood, and bold spices combined into one unforgettable Southern dish! โค๏ธ

  • Cheesy Taco Spaghetti

    (Creamy Taco Beef Spaghetti Bake)

    This Cheesy Taco Spaghetti combines two family favorites โ€” tacos and spaghetti! Itโ€™s loaded with seasoned ground beef, tender pasta, creamy cheese sauce, and bold Mexican-inspired flavors. A quick and comforting dinner thatโ€™s perfect for busy weeknights.


    Ingredients

    For the Taco Spaghetti:

    • 1 pound ground beef
    • 12 ounces spaghetti noodles
    • 1 medium onion, diced
    • 4 cloves garlic, minced
    • 1 can (10 oz) Rotel diced tomatoes with green chiles
    • 1 cup salsa
    • 2 cups beef broth
    • 1 packet taco seasoning (or homemade seasoning)
    • 1 teaspoon cumin
    • 1 teaspoon chili powder
    • ยฝ teaspoon smoked paprika
    • Salt and black pepper to taste

    Cheese Sauce:

    • 4 ounces cream cheese, softened
    • 1 cup sour cream
    • 2 cups shredded cheddar cheese
    • 1 cup Monterey Jack cheese
    • ยฝ cup milk (as needed)

    Optional Additions:

    • 1 can black beans
    • 1 cup corn
    • Diced jalapeรฑos ๐ŸŒถ๏ธ
    • Green onions
    • Fresh cilantro
    • Black olives
    • Bell peppers
    • Crushed tortilla chips

    Instructions

    Step 1: Cook the Spaghetti

    • Boil spaghetti noodles according to package directions.
    • Drain and set aside.

    Step 2: Prepare the Taco Meat

    Heat a large skillet over medium heat.

    Add:

    • Ground beef

    Cook until browned.

    Add:

    • Onion
    • Garlic

    Cook until softened.


    Step 3: Add Taco Flavors

    Stir in:

    • Taco seasoning
    • Cumin
    • Chili powder
    • Smoked paprika

    Add:

    • Rotel tomatoes
    • Salsa
    • Beef broth

    Simmer for 10 minutes.


    Step 4: Make It Cheesy

    Reduce heat.

    Add:

    • Cream cheese
    • Sour cream
    • Cheddar cheese
    • Monterey Jack cheese

    Stir until creamy and melted.


    Step 5: Combine

    Add cooked spaghetti to the taco mixture.

    Mix well until noodles are coated.


    Step 6: Bake (Optional)

    Transfer to a baking dish.

    Top with extra cheese.

    Bake at:

    375ยฐF (190ยฐC) for 15โ€“20 minutes

    until bubbly and golden.


    Topping Ideas ๐ŸŒฎโœจ

    Add:

    ๐Ÿง€ Extra cheese
    ๐ŸŒฟ Cilantro
    ๐Ÿฅ‘ Avocado
    ๐Ÿ… Tomatoes
    ๐ŸŒถ๏ธ Jalapeรฑos
    ๐Ÿฅ„ Sour cream
    ๐Ÿ‹ Lime juice
    ๐ŸŒฝ Corn salsa


    Extra Tips & Secrets

    โœ… Use a cheese blend for the best flavor and creamy texture.

    โœ… Don’t overcook pasta โ€” it will continue cooking in the sauce.

    โœ… Rotel with green chiles adds the perfect taco-style flavor.

    โœ… Make it ahead and bake when ready for an easy dinner.


    Delicious Variations

    ๐ŸŒถ๏ธ Green Chile Taco Spaghetti

    Add:

    • Hatch green chiles
    • Pepper Jack cheese

    ๐Ÿ— Chicken Taco Spaghetti

    Replace beef with:

    • Shredded chicken

    ๐Ÿฅ“ Bacon Taco Spaghetti

    Add:

    • Crispy bacon pieces

    ๐Ÿซ˜ Vegetarian Taco Spaghetti

    Add:

    • Black beans
    • Corn
    • Peppers

    ๐Ÿ”ฅ Spicy Taco Spaghetti

    Add:

    • Hot salsa
    • Jalapeรฑos
    • Serrano peppers

    Serving Ideas

    Serve with:

    ๐ŸŒฝ Mexican street corn
    ๐Ÿฅ— Side salad
    ๐Ÿฅ‘ Guacamole
    ๐Ÿง„ Garlic bread
    ๐ŸŒฎ Tortilla chips and salsa


    Storage & Meal Prep

    Refrigerator:
    Store in an airtight container for up to 4 days.

    Freezer:
    Freeze for up to 3 months.

    Reheating:
    Add a splash of milk before reheating to bring back the creamy sauce.


    Nutrition Facts (Approximate)

    Per serving (1 of 8 servings):

    • Calories: 550โ€“700 kcal
    • Protein: 30โ€“40 g
    • Carbohydrates: 55โ€“65 g
    • Fat: 30โ€“40 g
    • Fiber: 4โ€“6 g

    Frequently Asked Questions (Q&A)

    Q: Can I use different pasta?
    A: Yes! Penne, rotini, or bowtie pasta work great.

    Q: Can I make this less spicy?
    A: Use mild salsa and mild diced tomatoes instead of spicy versions.

    Q: What cheese melts best?
    A: Monterey Jack, cheddar, Pepper Jack, and Mexican cheese blends are excellent.

    Q: Can I make this with chicken?
    A: Absolutely! Shredded chicken is a great substitute.

    Q: Can I add Hatch green chiles?
    A: Yes! They add a smoky Southwest flavor that works perfectly with taco seasoning.


    Social Media Caption Ideas โค๏ธ

    Option 1:
    “Made this Cheesy Taco Spaghetti and it was a hit! ๐ŸŒฎ๐Ÿ Creamy, cheesy, and loaded with taco flavor โ€” the perfect comfort meal for the whole family. Full recipe below!”

    Option 2:
    “When tacos meet spaghettiโ€ฆ magic happens! ๐Ÿ˜๐Ÿง€ This cheesy taco pasta is easy, delicious, and packed with bold Mexican flavors.”

    Option 3:
    “Dinner idea everyone will love! ๐Ÿ”ฅ๐ŸŒฎ Cheesy Taco Spaghetti combines creamy pasta, seasoned beef, and melted cheese into one unforgettable dish!”


    ๐ŸŒฎ๐Ÿง€๐Ÿ Cheesy Taco Spaghetti is the perfect mashup of taco night and pasta night โ€” creamy, cheesy, hearty, and full of flavor! โค๏ธ

  • Pot roast

    (Slow-Cooked Tender Beef Pot Roast)

    This classic pot roast is the ultimate comfort food โ€” tender, juicy beef cooked low and slow with carrots, potatoes, onions, and a rich savory gravy. Itโ€™s a simple old-fashioned recipe that fills the house with amazing aromas and makes the perfect family dinner.


    Ingredients

    For the Pot Roast:

    • 4โ€“5 pounds chuck roast
    • 2 tablespoons olive oil
    • 2 teaspoons salt
    • 1 teaspoon black pepper
    • 2 teaspoons garlic powder
    • 2 teaspoons onion powder
    • 2 teaspoons paprika
    • 1 teaspoon dried thyme
    • 1 teaspoon rosemary

    Vegetables:

    • 1 large onion, sliced
    • 6 cloves garlic, minced
    • 5โ€“6 carrots, cut into chunks
    • 5โ€“6 Yukon Gold potatoes, quartered
    • 2 celery stalks, chopped

    For the Gravy:

    • 3 cups beef broth
    • 1 cup red wine (optional)
    • 2 tablespoons tomato paste
    • 2 tablespoons Worcestershire sauce
    • 2 bay leaves
    • 2 tablespoons flour or cornstarch (optional, for thickening)

    Instructions

    Step 1: Season & Sear the Beef

    • Pat roast dry with paper towels.
    • Season all sides with salt, pepper, garlic powder, onion powder, and paprika.
    • Heat oil in a large Dutch oven.
    • Sear roast for 3โ€“5 minutes per side until browned.

    Remove and set aside.


    Step 2: Build the Flavor

    In the same pot add:

    • Onion
    • Garlic

    Cook for 2โ€“3 minutes.

    Add:

    • Tomato paste

    Cook another minute.


    Step 3: Slow Cook

    Return roast to the pot.

    Add:

    • Beef broth
    • Wine (optional)
    • Worcestershire sauce
    • Herbs
    • Bay leaves

    Cover and cook:

    Oven:

    325ยฐF (165ยฐC) for 3โ€“4 hours

    Slow Cooker:

    LOW for 8โ€“10 hours

    Instant Pot:

    60โ€“75 minutes on high pressure


    Step 4: Add Vegetables

    Add carrots, potatoes, and celery during the last:

    1ยฝโ€“2 hours (oven)
    3โ€“4 hours (slow cooker)

    Cook until vegetables are tender.


    Step 5: Make the Gravy

    Remove roast and vegetables.

    Strain the cooking liquid.

    Thicken with:

    • Flour slurry or cornstarch slurry

    Simmer until rich and smooth.

    Pour gravy over the roast.


    Serving Ideas ๐Ÿฝ๏ธ

    Serve with:

    ๐Ÿฅ” Mashed potatoes
    ๐Ÿฅ– Homemade bread
    ๐ŸŒฝ Corn
    ๐Ÿฅ— Green salad
    ๐Ÿซ˜ Green beans
    ๐Ÿฅ• Roasted vegetables


    Extra Tips & Secrets โœจ

    โœ… Chuck roast is the best cut because it becomes melt-in-your-mouth tender.

    โœ… Always sear the meat first for deeper flavor.

    โœ… Low and slow is the key โ€” don’t rush the cooking time.

    โœ… Make it the next day โ€” leftovers taste even better.


    Delicious Variations

    ๐ŸŒถ๏ธ Green Chile Pot Roast

    Add:

    • Hatch green chiles
    • Jalapeรฑos
    • Pepper Jack cheese

    ๐Ÿ„ Mushroom Pot Roast

    Add:

    • Mushrooms
    • Creamy mushroom gravy

    ๐Ÿง… French Onion Pot Roast

    Add:

    • Caramelized onions
    • Gruyรจre cheese

    ๐Ÿฅ“ Bacon Pot Roast

    Add:

    • Crispy bacon pieces
    • Smoky seasonings

    ๐Ÿท Red Wine Pot Roast

    Add:

    • Extra red wine
    • Fresh herbs

    Storage & Meal Prep

    Refrigerator:
    Store for up to 4 days.

    Freezer:
    Freeze for up to 3 months.

    Reheating:
    Warm slowly with gravy to keep the meat tender.


    Nutrition Facts (Approximate)

    Per serving (1 of 8 servings):

    • Calories: 550โ€“700 kcal
    • Protein: 45โ€“55 g
    • Carbohydrates: 25โ€“35 g
    • Fat: 30โ€“40 g
    • Fiber: 5โ€“7 g

    Frequently Asked Questions (Q&A)

    Q: What is the best meat for pot roast?
    A: Chuck roast is the classic choice because it becomes tender and flavorful when cooked slowly.

    Q: Why is my pot roast tough?
    A: It usually needs more cooking time. Tough meat becomes tender when the collagen breaks down.

    Q: Can I make pot roast without potatoes?
    A: Yes! Serve it with mashed potatoes, rice, or bread instead.

    Q: Can I use a slow cooker?
    A: Absolutely. Slow cooking is one of the best methods for pot roast.

    Q: Can I add green chiles?
    A: Yes! Hatch green chiles add a delicious smoky Southwest twist.


    Social Media Caption Ideas โค๏ธ

    Option 1:
    “Made a classic Homemade Pot Roast today and the whole house smelled amazing! ๐Ÿฅฉ๐Ÿฅ• Tender beef, hearty vegetables, and rich gravy make this the ultimate comfort meal. Full recipe below!”

    Option 2:
    “Nothing says comfort food like a slow-cooked pot roast! ๐Ÿ˜ Melt-in-your-mouth beef, potatoes, carrots, and homemade gravy โ€” a family favorite every time.”

    Option 3:
    “Sunday dinner done right! ๐Ÿฅฉโœจ This pot roast is slow-cooked until perfectly tender and loaded with incredible flavor. Who wants a plate?”


    ๐Ÿฅฉ๐Ÿฅ• Classic Pot Roast is a timeless comfort food โ€” simple ingredients, slow cooking, and incredible flavor make this a meal everyone remembers! โค๏ธ