Category: RECIPES

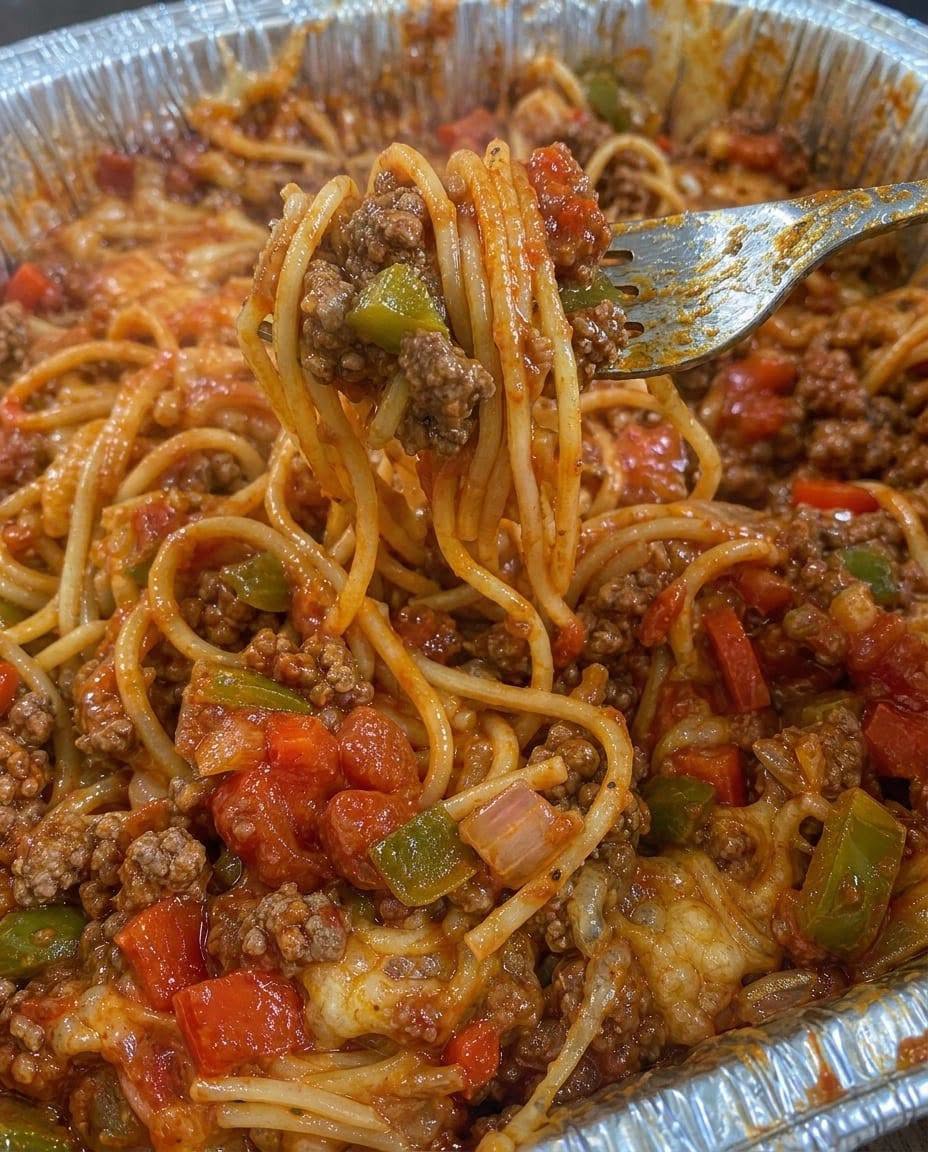
  • Steak with Shell Pasta

    Steak with Shell Pasta

    (Creamy Steak Shell Pasta Dinner)

    Steak with Shell Pasta is a delicious comfort meal combining tender, juicy steak bites with creamy, flavorful shell-shaped pasta. The pasta shells soak up the rich sauce while the steak adds a hearty, restaurant-style flavor to every bite.


    Full Recipe (Ingredients + Instructions)

    Ingredients

    For the Steak:

    • 1ยฝ pounds sirloin steak or ribeye, cut into bite-sized pieces
    • 2 tablespoons olive oil
    • 3 cloves garlic, minced
    • 1 teaspoon smoked paprika
    • 1 teaspoon garlic powder
    • 1 teaspoon onion powder
    • Salt and black pepper, to taste
    • 1 tablespoon butter

    For the Shell Pasta:

    • 12 ounces medium shell pasta
    • 2 tablespoons butter
    • 1 small onion, diced
    • 3 cloves garlic, minced
    • 2 cups heavy cream
    • 1 cup beef broth
    • 1ยฝ cups shredded Parmesan cheese
    • 1 cup shredded mozzarella cheese
    • 1 teaspoon Italian seasoning
    • ยฝ teaspoon red pepper flakes (optional)
    • Salt and pepper, to taste

    Instructions

    Step 1: Cook the Pasta

    Bring a large pot of salted water to a boil.

    Cook shell pasta according to package directions until al dente.

    Drain and set aside.


    Step 2: Cook the Steak

    Season steak pieces with:

    • Salt
    • Pepper
    • Garlic powder
    • Onion powder
    • Smoked paprika

    Heat olive oil in a large skillet.

    Sear steak pieces for:

    2โ€“4 minutes per side

    until browned.

    Add butter and garlic.

    Cook for another minute.

    Remove steak and set aside.


    Step 3: Make the Creamy Sauce

    In the same skillet add butter.

    Cook onion until softened.

    Add garlic and cook briefly.

    Pour in:

    • Heavy cream
    • Beef broth

    Simmer for a few minutes.

    Stir in:

    • Parmesan cheese
    • Mozzarella cheese
    • Italian seasoning

    Cook until smooth and creamy.


    Step 4: Combine Everything

    Add cooked shell pasta into the sauce.

    Stir until coated.

    Return steak pieces to the skillet.

    Mix gently.

    Cook for another 2โ€“3 minutes until heated through.


    Extra Recipe Tips & Variations โœจ

    ๐Ÿฅฉ Garlic Butter Steak Pasta

    Add extra garlic butter and fresh herbs for a richer flavor.

    ๐ŸŒถ๏ธ Spicy Steak Pasta

    Add:

    • Cajun seasoning
    • Jalapeรฑos
    • Red pepper flakes

    ๐Ÿ„ Steak Mushroom Shell Pasta

    Add sautรฉed mushrooms for a steakhouse-style version.

    ๐Ÿง€ Extra Cheesy Version

    Top with mozzarella and bake until bubbly.


    Flavor Upgrades / Secret Tips ๐Ÿ”ฅ

    โœ… Let steak come to room temperature before cooking.
    โœ… Do not overcook steakโ€”keep it juicy.
    โœ… Save some pasta water to make the sauce extra silky.
    โœ… Freshly grated Parmesan melts better.
    โœ… Let the steak rest before mixing into pasta.


    Serving Ideas ๐Ÿฝ๏ธ

    Serve with:

    ๐Ÿฅ— Fresh salad
    ๐Ÿฅ– Garlic bread
    ๐Ÿฅฆ Roasted vegetables
    ๐Ÿท A glass of red wine

    Perfect for:

    • Family dinners
    • Date nights
    • Weekend meals
    • Comfort food cravings

    Nutrition Facts (Approximate)

    Per serving:

    • Calories: 650โ€“800 kcal
    • Protein: 40โ€“50 g
    • Carbohydrates: 55โ€“65 g
    • Fat: 30โ€“40 g

    (Values vary depending on steak cut and sauce.)


    Social Media Caption โค๏ธ

    “Made this creamy Steak Shell Pasta tonight and it was everything! ๐Ÿฅฉ๐Ÿ Tender steak bites, creamy cheesy sauce, and pasta shells that hold all that delicious flavor. A true comfort food dinner the whole family will love!”


    Final Food Description ๐Ÿด

    Steak with Shell Pasta is a rich and comforting dinner made with juicy seasoned steak bites, tender shell pasta, and a creamy cheesy sauce. Every bite is packed with savory steakhouse flavor and homemade comfort. ๐Ÿฅฉ๐Ÿโœจ

  • Shrimp and Grits Breakfast with Pancakes, Sausage & Cheesy Scrambled Eggs

    Shrimp and Grits Breakfast with Pancakes, Sausage & Cheesy Scrambled Eggs

    (The Ultimate Southern Breakfast Platter)

    This Shrimp and Grits Breakfast is a true Southern comfort feast featuring creamy cheesy grits topped with seasoned shrimp, fluffy pancakes, savory sausage, and rich cheesy scrambled eggs. Itโ€™s the perfect combination of sweet, savory, creamy, and satisfying flavors all on one plate.

    A big homemade breakfast like this is made for slow mornings, family gatherings, and special occasions.


    Full Recipe (Ingredients + Instructions)

    ๐Ÿค Southern Shrimp & Grits

    Ingredients:

    • 1 pound large shrimp, peeled and deveined
    • 1 cup stone-ground grits
    • 4 cups chicken broth
    • 1 cup milk
    • 2 tablespoons butter
    • 1 cup shredded cheddar cheese
    • ยฝ cup cream cheese (optional)
    • 5 slices bacon, chopped
    • 3 cloves garlic, minced
    • ยฝ small onion, diced
    • ยฝ bell pepper, diced
    • 1 teaspoon Cajun seasoning
    • ยฝ teaspoon smoked paprika
    • Salt and black pepper, to taste
    • 2 tablespoons fresh parsley or green onions

    Instructions:

    Step 1: Cook the Grits

    Bring chicken broth and milk to a simmer.

    Slowly whisk in grits.

    Cook on low heat for:

    20โ€“30 minutes

    until creamy.

    Stir in:

    • Butter
    • Cheddar cheese
    • Cream cheese

    Season with salt and pepper.


    Step 2: Prepare the Shrimp

    Cook bacon in a skillet until crispy.

    Remove bacon and leave the drippings.

    Add:

    • Onion
    • Bell pepper

    Cook until softened.

    Add garlic and cook for 30 seconds.

    Add shrimp and season with:

    • Cajun seasoning
    • Smoked paprika
    • Black pepper

    Cook until shrimp are pink:

    3โ€“5 minutes

    Top with crispy bacon and parsley.


    ๐Ÿฅž Homemade Pancakes

    Ingredients:

    • 2 cups all-purpose flour
    • 2 tablespoons sugar
    • 2 teaspoons baking powder
    • ยฝ teaspoon baking soda
    • ยฝ teaspoon salt
    • 2 eggs
    • 1ยพ cups buttermilk
    • 4 tablespoons melted butter
    • 1 teaspoon vanilla extract

    Instructions:

    Mix dry ingredients.

    Whisk wet ingredients separately.

    Combine gentlyโ€”do not overmix.

    Cook pancakes on a buttered skillet until golden:

    2โ€“3 minutes per side

    Serve with:

    • Butter
    • Maple syrup
    • Fresh berries

    ๐ŸŒญ Breakfast Sausage

    Ingredients:

    • 1 pound breakfast sausage links or patties

    Cook in a skillet over medium heat until browned and cooked through.


    ๐Ÿง€ Cheesy Scrambled Eggs

    Ingredients:

    • 8 large eggs
    • ยฝ cup shredded cheddar cheese
    • 2 tablespoons milk or cream
    • 1 tablespoon butter
    • Salt and pepper

    Instructions:

    Whisk eggs with milk, salt, and pepper.

    Melt butter over low heat.

    Cook eggs slowly, stirring gently.

    Add cheese just before finishing.

    Cook until creamy.


    Plating the Ultimate Breakfast ๐Ÿฝ๏ธ

    Serve together:

    ๐Ÿค Creamy shrimp and grits
    ๐Ÿฅž Fluffy pancakes
    ๐ŸŒญ Sausage links or patties
    ๐Ÿง€ Cheesy scrambled eggs

    Add:

    • Hot sauce
    • Fresh fruit
    • Green onions
    • Maple syrup

    for the perfect sweet-and-savory balance.


    Extra Recipe Tips & Variations โœจ

    ๐ŸŒถ๏ธ Spicy Cajun Shrimp & Grits

    Add:

    • Extra Cajun seasoning
    • Jalapeรฑos
    • Hot sauce

    ๐Ÿง€ Extra Creamy Grits

    Use:

    • Heavy cream instead of some milk
    • Extra cheese
    • Butter

    ๐Ÿฏ Sweet & Savory Breakfast Plate

    Serve pancakes with crispy bacon instead of sausage and drizzle with hot honey.


    ๐Ÿฆ Low Country Style

    Add:

    • Andouille sausage
    • Corn
    • Green onions

    for a deeper Southern flavor.


    Flavor Upgrades / Secret Tips ๐Ÿ”ฅ

    โœ… Use stone-ground grits for the best texture.

    โœ… Cook shrimp quickly so they stay tender.

    โœ… Low heat makes creamy scrambled eggs.

    โœ… Add cheese to hot grits right at the end for maximum creaminess.

    โœ… Season every part of the plate for restaurant-quality flavor.


    Serving Ideas ๐Ÿฝ๏ธ

    Perfect with:

    โ˜• Fresh coffee
    ๐ŸŠ Orange juice
    ๐Ÿ“ Fresh berries
    ๐Ÿฅ Biscuits
    ๐Ÿฏ Honey butter

    Great for:

    • Weekend brunch
    • Holiday breakfast
    • Family gatherings
    • Southern-style feasts

    Storage Tips ๐Ÿฅก

    Shrimp & Grits:

    Store separately in the refrigerator for up to 3 days.

    Pancakes:

    Freeze between parchment sheets for up to 2 months.

    Eggs:

    Best eaten fresh but can be refrigerated for up to 2 days.


    Nutrition Facts (Approximate)

    Per large breakfast serving:

    • Calories: 900โ€“1200 kcal
    • Protein: 45โ€“60 g
    • Carbohydrates: 80โ€“100 g
    • Fat: 45โ€“60 g

    (Values vary depending on portions and toppings.)


    Frequently Asked Questions (Q&A)

    Q: Are shrimp and grits only for dinner?
    A: No! They are a classic Southern breakfast and brunch favorite.

    Q: What kind of grits are best?
    A: Stone-ground or old-fashioned grits give the best flavor and texture.

    Q: Can I make shrimp and grits ahead?
    A: Yes. Reheat slowly with a little milk or broth to bring back creaminess.

    Q: What cheese works best in grits?
    A: Cheddar, Monterey Jack, and smoked Gouda all work beautifully.


    Social Media Captions โค๏ธ

    Facebook Style:

    “This is what I call a breakfast feast! ๐Ÿค๐Ÿฅž Shrimp and grits, fluffy pancakes, sausage, and cheesy scrambled eggs all on one plate. Southern comfort food at its finest!”

    Instagram Style:

    “Sweet, savory, creamy, cheesyโ€ฆ the ultimate Southern breakfast platter. ๐Ÿ˜๐Ÿค๐Ÿฅž”

    Short Viral Caption:

    “Breakfast goals on one plate! ๐Ÿ”ฅ๐Ÿค๐Ÿฅž”

    Family Memory Style:

    “Some breakfasts become memories. โค๏ธ A big table filled with shrimp and grits, pancakes, and family laughter is what homemade cooking is all about.”


    Final Food Description ๐Ÿด

    Shrimp and Grits Breakfast with Pancakes, Sausage, and Cheesy Scrambled Eggs is the ultimate Southern comfort meal. Creamy Cajun shrimp and cheesy grits paired with fluffy pancakes, savory sausage, and rich scrambled eggs create a hearty breakfast experience full of flavor and tradition. ๐Ÿค๐Ÿฅž๐Ÿง€โœจ

  • Crispy Southern Fried Chicken

    Crispy Southern Fried Chicken

    (Classic Buttermilk-Soaked, Golden & Crunchy Homemade Fried Chicken)

    Crispy Southern Fried Chicken is a timeless comfort food made with juicy, seasoned chicken coated in a flavorful crispy crust and fried until perfectly golden brown. This classic recipe uses a seasoned buttermilk marinade to keep the chicken tender while creating that irresistible crunchy coating everyone loves.

    Perfect for Sunday dinners, family gatherings, picnics, and comfort food cravings!

    Full Recipe (Ingredients + Instructions)
    Ingredients
    For the Chicken:
    4โ€“5 pounds chicken pieces
    (legs, thighs, wings, breasts)
    2 cups buttermilk
    2 tablespoons hot sauce (optional)
    2 teaspoons salt
    1 teaspoon black pepper
    1 teaspoon garlic powder
    1 teaspoon onion powder
    1 teaspoon paprika
    For the Crispy Coating:
    3 cups all-purpose flour
    ยฝ cup cornstarch
    (secret for extra crispiness)
    2 teaspoons salt
    2 teaspoons paprika
    2 teaspoons garlic powder
    1 teaspoon onion powder
    1 teaspoon black pepper
    1 teaspoon cayenne pepper (optional)
    1 teaspoon smoked paprika
    1 teaspoon dried thyme
    1 teaspoon dried oregano
    For Frying:
    Vegetable oil, peanut oil, or canola oil
    Instructions
    Step 1: Marinate the Chicken

    In a large bowl combine:

    Buttermilk
    Hot sauce
    Salt
    Pepper
    Garlic powder
    Onion powder
    Paprika

    Add chicken and coat well.

    Cover and refrigerate:

    At least 4 hours
    (overnight gives the best flavor)

    Step 2: Prepare the Coating

    In a large bowl mix:

    Flour
    Cornstarch
    Seasonings

    For extra crispy chicken:

    Add a few spoonfuls of the buttermilk marinade into the flour mixture and mix with your fingers until small clumps form.

    These create crunchy bits on the chicken.

    Step 3: Coat the Chicken

    Remove chicken from marinade.

    Let excess drip off.

    Press chicken firmly into the flour mixture until fully coated.

    Place coated chicken on a rack and let rest:

    10โ€“15 minutes

    This helps the crust stick.

    Step 4: Fry the Chicken

    Heat oil to:

    350ยฐF (175ยฐC)

    Fry chicken in batches.

    Cook until:

    โœจ Deep golden brown
    โœจ Crispy outside
    โœจ Juicy inside

    Approximate cooking times:

    Wings: 8โ€“10 minutes
    Drumsticks: 12โ€“15 minutes
    Thighs: 15โ€“18 minutes
    Breasts: 15โ€“20 minutes

    Chicken should reach:

    165ยฐF (74ยฐC) internal temperature.

    Step 5: Rest & Serve

    Place fried chicken on a wire rack.

    Avoid paper towels if possibleโ€”they can make the crust softer.

    Let rest for a few minutes before serving.

    Extra Recipe Tips & Variations โœจ
    ๐ŸŒถ๏ธ Spicy Southern Fried Chicken

    Add:

    Extra cayenne
    Hot sauce
    Crushed red pepper
    ๐Ÿฏ Honey Butter Fried Chicken

    Drizzle with warm honey butter before serving.

    ๐Ÿง„ Garlic Herb Fried Chicken

    Add:

    Fresh garlic
    Rosemary
    Thyme

    to the marinade.

    ๐Ÿง€ Nashville Hot Style

    Brush crispy chicken with spicy oil made from:

    Cayenne
    Paprika
    Brown sugar
    Garlic powder
    ๐Ÿ— Extra Crunchy Version

    Double dip:

    Flour coating
    Buttermilk
    Flour coating again

    for a thicker crust.

    Flavor Upgrades / Secret Tips ๐Ÿ”ฅ

    โœ… Buttermilk tenderizes the chicken and adds flavor.

    โœ… Cornstarch makes the crust lighter and crunchier.

    โœ… Season every layerโ€”the chicken and coating.

    โœ… Let coated chicken rest before frying.

    โœ… Keep oil temperature steady for crispy results.

    Serving Ideas ๐Ÿฝ๏ธ

    Serve with:

    ๐Ÿฅ” Mashed potatoes and gravy
    ๐Ÿฅ— Coleslaw
    ๐Ÿž Biscuits
    ๐ŸŒฝ Corn on the cob
    ๐Ÿง€ Mac and cheese
    ๐Ÿฅ’ Pickles
    ๐Ÿฏ Honey butter

    Perfect for:

    Sunday family dinners
    Picnics
    Holidays
    Potlucks
    Storage & Reheating Tips ๐Ÿฅก
    Refrigerator:

    Store fried chicken for up to 4 days.

    Reheating:

    Best reheated in:

    Oven at 375ยฐF
    Air fryer

    to bring back the crispiness.

    Nutrition Facts (Approximate)

    Per piece:

    Calories: 350โ€“500 kcal
    Protein: 30โ€“40 g
    Carbohydrates: 15โ€“25 g
    Fat: 20โ€“30 g

    (Values vary by chicken piece and cooking method.)

    Frequently Asked Questions (Q&A)

    Q: How do I keep fried chicken crispy?
    A: Drain it on a wire rack and avoid covering it while hot.

    Q: Can I use boneless chicken?
    A: Yes! Adjust frying time because boneless pieces cook faster.

    Q: Why does my coating fall off?
    A: Let the coated chicken rest before frying and press the flour mixture firmly onto the chicken.

    Q: What oil is best for frying chicken?
    A: Peanut, vegetable, and canola oil all work well because they handle high heat.

    Social Media Captions โค๏ธ
    Facebook Style:

    “Nothing says comfort food like a plate of crispy Southern Fried Chicken! ๐Ÿ— Golden, crunchy, juicy, and made with the kind of flavor that brings everyone to the table.”

    Instagram Style:

    “That golden crunch, juicy center, and homemade flavorโ€ฆ fried chicken perfection! ๐Ÿ—โœจ”

    Short Viral Caption:

    “The secret to the crispiest fried chicken is finally here! ๐Ÿ”ฅ๐Ÿ—”

    Family Memory Style:

    “Some recipes are more than foodโ€”theyโ€™re memories. โค๏ธ The smell of fried chicken in the kitchen brings back Sunday dinners, family laughter, and traditions passed down through generations.”

    Final Food Description ๐Ÿด

    Crispy Southern Fried Chicken is the ultimate comfort food featuring tender chicken soaked in seasoned buttermilk, coated in a perfectly spiced crunchy crust, and fried until golden brown. Juicy, flavorful, and irresistibly crispy, this homemade classic is a recipe the whole family will love. ๐Ÿ—โœจ

  • Creamy Chile Relleno Casserole

    Creamy Chile Relleno Casserole

    (A Cheesy, Comforting Twist on Classic Chile Rellenos)

    Creamy Chile Relleno Casserole brings all the flavors of traditional Mexican chile rellenos into an easy baked dish. Roasted green chiles are layered with melted cheese and a creamy egg batter, creating a fluffy, cheesy casserole thatโ€™s perfect for breakfast, brunch, dinner, or family gatherings.

    Itโ€™s rich, comforting, and full of roasted chile flavorโ€”just like the classic dish without all the frying!


    Full Recipe (Ingredients + Instructions)

    Ingredients

    • 12 whole roasted green chiles
      (Hatch, Anaheim, or poblano peppers)
    • 3 cups shredded Monterey Jack cheese
    • 1 cup shredded cheddar cheese
    • 4 ounces cream cheese, softened
    • 5 large eggs
    • 1 cup whole milk
    • ยฝ cup heavy cream
    • ยฝ cup all-purpose flour
    • 1 teaspoon baking powder
    • 1 teaspoon cumin
    • 1 teaspoon garlic powder
    • 1 teaspoon onion powder
    • ยฝ teaspoon Mexican oregano
    • Salt and black pepper, to taste

    Optional Additions:

    • 1 pound cooked ground beef
    • Shredded chicken
    • Roasted corn
    • Diced tomatoes
    • Fresh cilantro
    • Jalapeรฑos for extra heat

    Instructions

    Step 1: Prepare the Chiles

    If using fresh chiles:

    Roast until skins are blistered.

    Place in a covered bowl for:

    10โ€“15 minutes

    Peel skins and remove seeds.

    Pat dry.


    Step 2: Prepare the Creamy Batter

    In a large bowl whisk together:

    • Eggs
    • Milk
    • Heavy cream
    • Flour
    • Baking powder
    • Cumin
    • Garlic powder
    • Onion powder
    • Oregano
    • Salt and pepper

    Mix until smooth.


    Step 3: Layer the Casserole

    Grease a 9×13-inch baking dish.

    Layer:

    1. Roasted green chiles
    2. Cream cheese pieces
    3. Monterey Jack and cheddar cheese
    4. Another layer of chiles
    5. Remaining cheese

    Pour egg mixture evenly over the top.


    Step 4: Bake

    Bake at:

    350ยฐF (175ยฐC)

    for:

    40โ€“50 minutes

    until the center is set and the top is golden.

    Let rest for:

    10 minutes

    before slicing.


    Extra Recipe Tips & Variations โœจ

    ๐ŸŒถ๏ธ Hatch Green Chile Version

    Use roasted Hatch green chile for an authentic New Mexico flavor.


    ๐Ÿฅฉ Beef Chile Relleno Casserole

    Add seasoned ground beef between layers for a hearty dinner.


    ๐Ÿ— Chicken Chile Relleno Casserole

    Add shredded chicken with the cheese layers.


    ๐Ÿง€ Extra Cheesy Version

    Mix in:

    • Oaxaca cheese
    • Chihuahua cheese
    • Pepper Jack

    for a perfect cheese pull.


    ๐ŸŒฝ Corn & Chile Casserole

    Add roasted corn kernels for sweetness and texture.


    Flavor Upgrades / Secret Tips ๐Ÿ”ฅ

    โœ… Roast your chiles for the best smoky flavor.

    โœ… Pat chiles dry so the casserole isnโ€™t watery.

    โœ… Let the casserole rest before slicing for cleaner pieces.

    โœ… Freshly shredded cheese melts better than packaged cheese.

    โœ… Add a little lime juice or cilantro before serving for freshness.


    Serving Ideas ๐Ÿฝ๏ธ

    Serve with:

    ๐ŸŒฎ Warm tortillas
    ๐Ÿš Mexican rice
    ๐Ÿซ˜ Refried beans
    ๐Ÿฅ‘ Guacamole
    ๐Ÿ… Pico de gallo
    ๐Ÿฅ— Fresh salad

    Perfect for:

    • Breakfast gatherings
    • Brunch
    • Potlucks
    • Holiday meals
    • Family dinners

    Storage Tips ๐Ÿฅก

    Refrigerator:

    Store covered for up to 4 days.

    Freezer:

    Freeze individual portions for up to 2 months.

    Reheating:

    Warm in the oven at 325ยฐF until heated through.


    Nutrition Facts (Approximate)

    Per serving:

    • Calories: 350โ€“450 kcal
    • Protein: 20โ€“28 g
    • Carbohydrates: 15โ€“25 g
    • Fat: 25โ€“32 g

    (Values vary depending on cheese and additions.)


    Frequently Asked Questions (Q&A)

    Q: What peppers are best for chile relleno casserole?
    A: Hatch green chile, Anaheim, or poblano peppers all work well.

    Q: Is this casserole spicy?
    A: The heat depends on the chile variety. Mild peppers give flavor without too much spice.

    Q: Can I make this ahead of time?
    A: Yes! Assemble it, refrigerate overnight, and bake when ready.

    Q: Can I make it without flour?
    A: Yes. The texture will be slightly softer but still delicious.


    Social Media Captions โค๏ธ

    Facebook Style:

    “Creamy Chile Relleno Casserole is comfort food at its best! ๐ŸŒถ๏ธ๐Ÿง€ Roasted green chiles, creamy cheese, and a fluffy baked filling make this dish a family favorite.”

    Instagram Style:

    “All the flavors of chile rellenos in an easy cheesy casserole. ๐ŸŒถ๏ธโœจ”

    Short Viral Caption:

    “The chile relleno recipe everyone needs! ๐Ÿ˜๐Ÿง€”

    Family Memory Style:

    “Some recipes remind us of home. โค๏ธ The smell of roasted chile and melted cheese filling the kitchen is a memory worth sharing.”


    Final Food Description ๐Ÿด

    Creamy Chile Relleno Casserole is a delicious baked version of the beloved Mexican chile relleno. Made with roasted green chiles, layers of melted cheese, and a creamy egg batter, this comforting casserole delivers bold Southwest flavor in every cheesy bite. ๐ŸŒถ๏ธ๐Ÿง€โœจ

  • Grannyโ€™s Crispy Tacos

    Grannyโ€™s Crispy Tacos

    (Traditional Homemade Mexican Fried Tacos)

    Grannyโ€™s Crispy Tacos are the kind of recipe that brings back memories of family kitchens, warm tortillas, and meals made with love. These classic Mexican-style tacos feature crispy fried tortillas filled with seasoned meat, topped with fresh lettuce, cheese, salsa, and all your favorite toppings.

    Golden, crunchy, and full of homemade flavorโ€”this is comfort food at its best.


    Full Recipe (Ingredients + Instructions)

    Ingredients

    For the Taco Filling:

    • 1ยฝ pounds ground beef
      (or shredded beef/chicken)
    • 1 small onion, finely diced
    • 3 cloves garlic, minced
    • 2 tablespoons tomato sauce
    • 1 teaspoon cumin
    • 1 teaspoon chili powder
    • 1 teaspoon Mexican oregano
    • ยฝ teaspoon smoked paprika
    • Salt and black pepper, to taste
    • ยผ cup beef broth (as needed)

    For the Crispy Tacos:

    • 20โ€“24 corn tortillas
    • Vegetable oil, for frying

    Traditional Toppings:

    • Shredded lettuce
    • Diced tomatoes
    • Shredded cheddar or queso fresco
    • Sour cream or Mexican crema
    • Chopped onion
    • Fresh cilantro
    • Salsa roja or salsa verde
    • Sliced avocado

    Instructions

    Step 1: Prepare the Meat Filling

    Heat a skillet over medium heat.

    Cook ground beef with onion until browned.

    Add garlic and cook for 1 minute.

    Stir in:

    • Cumin
    • Chili powder
    • Oregano
    • Smoked paprika
    • Salt
    • Pepper
    • Tomato sauce

    Add a splash of broth if needed.

    Simmer for:

    10โ€“15 minutes

    until flavorful and slightly thickened.


    Step 2: Warm the Tortillas

    Warm corn tortillas on a hot skillet or griddle until soft and flexible.

    Keep covered with a towel so they donโ€™t dry out.


    Step 3: Fill the Tacos

    Place a small amount of meat filling on one side of each tortilla.

    Fold tortilla over to create a taco shape.

    Secure with a toothpick if needed.


    Step 4: Fry Until Crispy

    Heat oil to about:

    350ยฐF (175ยฐC)

    Fry tacos until:

    โœจ Golden brown
    โœจ Crispy outside
    โœจ Warm inside

    About 2โ€“3 minutes per side.

    Drain on paper towels.


    Step 5: Add Toppings

    Fill crispy shells with:

    ๐Ÿฅฌ Lettuce
    ๐Ÿ… Tomatoes
    ๐Ÿง€ Cheese
    ๐ŸŒฟ Cilantro
    ๐ŸŒถ๏ธ Salsa

    Serve immediately.


    Extra Recipe Tips & Variations โœจ

    ๐ŸŒฎ Potato Crispy Tacos (Tacos Dorados de Papa)

    Replace meat with seasoned mashed potatoes and cheese.


    ๐Ÿ” Chicken Crispy Tacos

    Use shredded chicken simmered with tomatoes, onion, and spices.


    ๐Ÿฅ” Grandmaโ€™s Budget-Friendly Version

    Mix ground beef with potatoes for a classic filling that feeds the whole family.


    ๐Ÿง€ Extra Cheesy Tacos

    Add Oaxaca cheese inside before frying.


    ๐ŸŒถ๏ธ Spicy Grannyโ€™s Salsa

    Serve with homemade salsa roja made with roasted tomatoes and chiles.


    Flavor Upgrades / Secret Tips ๐Ÿ”ฅ

    โœ… Fry tortillas just until goldenโ€”donโ€™t overcook.

    โœ… Season the filling well; crispy tacos need bold flavor.

    โœ… Warm tortillas before folding to prevent cracking.

    โœ… Drain fried tacos on a rack to keep them crispy.

    โœ… Make homemade salsa for the most authentic taste.


    Serving Ideas ๐Ÿฝ๏ธ

    Serve with:

    ๐Ÿซ˜ Refried beans
    ๐Ÿš Mexican rice
    ๐Ÿฅ‘ Guacamole
    ๐ŸŒฝ Elote
    ๐Ÿฅ— Fresh salad
    ๐ŸŒถ๏ธ Pickled jalapeรฑos

    Perfect for:

    • Family dinners
    • Taco nights
    • Celebrations
    • Weekend gatherings

    Storage & Reheating Tips ๐Ÿฅก

    Filling:

    Store in the refrigerator for up to 4 days.

    Crispy Shells:

    Best eaten fresh.

    Reheating:

    Re-crisp in an oven or air fryer.


    Nutrition Facts (Approximate)

    Per taco:

    • Calories: 180โ€“250 kcal
    • Protein: 10โ€“15 g
    • Carbohydrates: 15โ€“20 g
    • Fat: 10โ€“15 g

    (Values vary depending on filling and toppings.)


    Frequently Asked Questions (Q&A)

    Q: What are crispy tacos called in Mexico?
    A: They are commonly called tacos dorados or flautas depending on the shape and size.

    Q: Can I bake them instead of frying?
    A: Yes. Brush lightly with oil and bake at 425ยฐF until crispy.

    Q: Why do my tortillas crack when folding?
    A: They need to be warmed and softened first.

    Q: Can I make these ahead?
    A: Prepare the filling ahead, then fry the tacos fresh before serving.


    Social Media Captions โค๏ธ

    Facebook Style:

    “Grannyโ€™s Crispy Tacos are more than a recipeโ€”theyโ€™re a memory. โค๏ธ Golden tortillas, savory filling, fresh toppings, and the taste of a homemade Mexican kitchen.”

    Instagram Style:

    “Crunchy, cheesy, and made with love just like grandma used to make. ๐ŸŒฎโค๏ธ”

    Short Viral Caption:

    “The crispy tacos that taste like home! ๐Ÿ˜๐ŸŒฎ”

    Family Memory Style:

    “Every family has that one recipe that brings everyone back to the kitchen. โค๏ธ These crispy tacos remind us of laughter, love, and meals shared around the table.”


    Final Food Description ๐Ÿด

    Grannyโ€™s Crispy Tacos are classic homemade Mexican tacos featuring golden fried corn tortillas filled with flavorful seasoned meat and topped with fresh ingredients. Crunchy, comforting, and made with love, this recipe captures the warmth and tradition of family cooking. ๐ŸŒฎโค๏ธโœจ

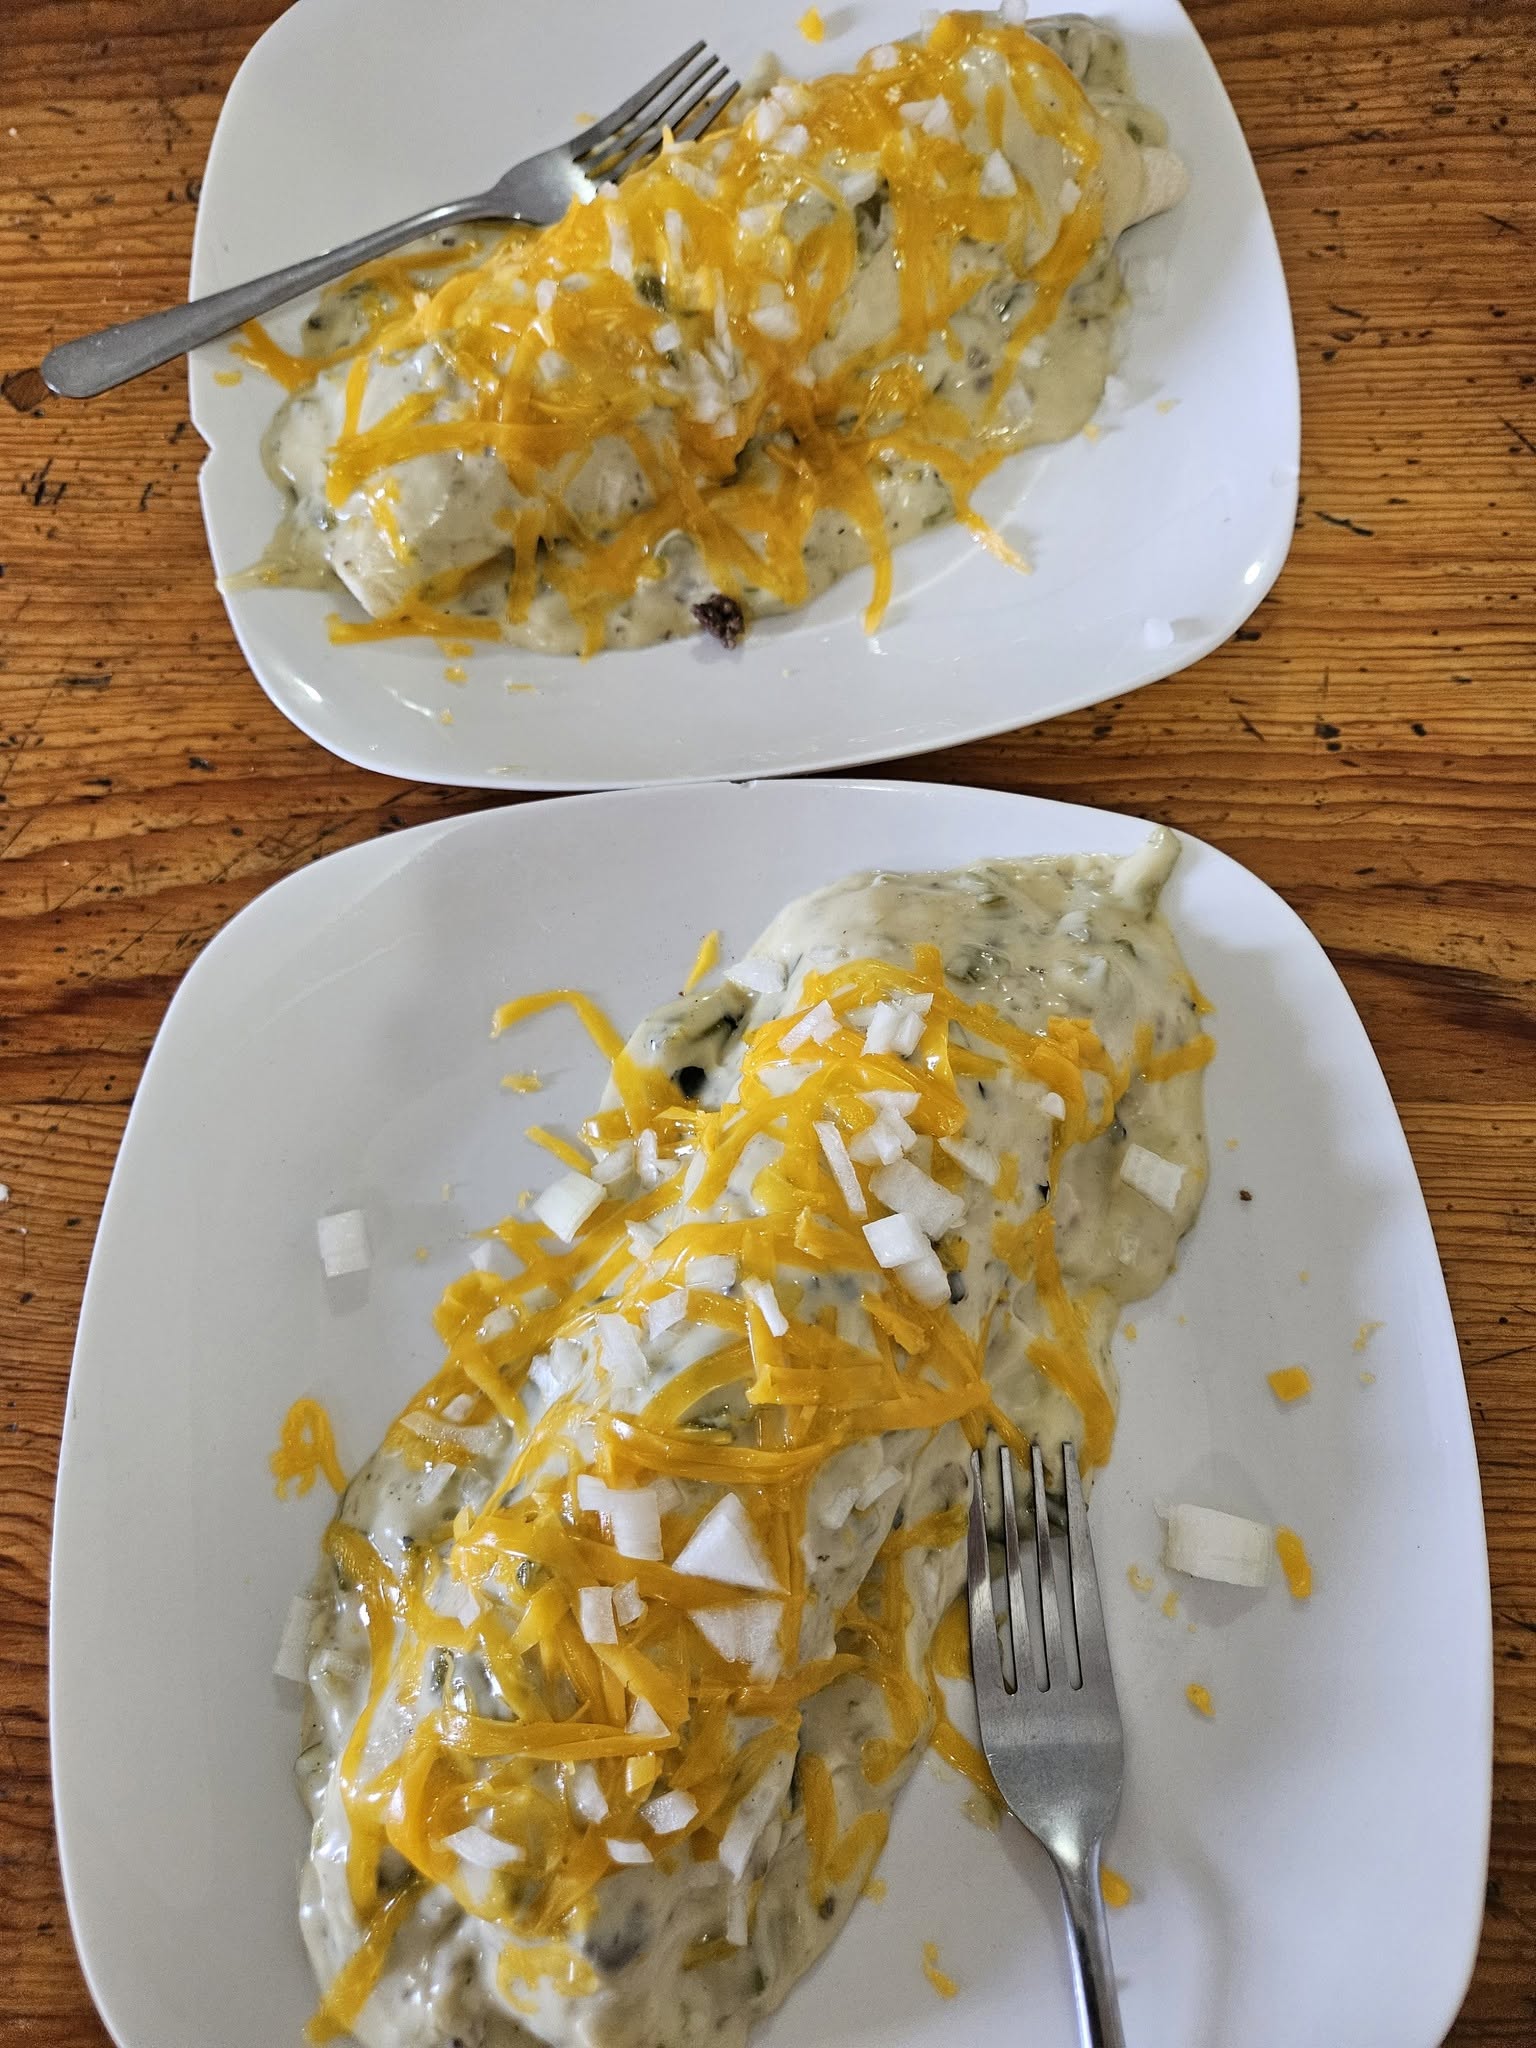
  • Hot Green Chile and Cheese Smothered Burritos

    Hot Green Chile and Cheese Smothered Burritos

    (New Mexico Style Smothered Burritos with Hatch Green Chile)

    Hot Green Chile and Cheese Smothered Burritos are a beloved New Mexico comfort food featuring a warm flour tortilla stuffed with seasoned meat, beans, and cheese, then covered in a rich, spicy green chile sauce and topped with even more melted cheese.

    This dish is the ultimate combination of creamy, spicy, cheesy, and satisfying flavorsโ€”perfect for breakfast, lunch, dinner, or a late-night craving.


    Full Recipe (Ingredients + Instructions)

    Ingredients

    For the Burritos:

    • 8 large flour tortillas (burrito size)
    • 2 pounds ground beef or shredded pork
    • 1 medium onion, diced
    • 4 cloves garlic, minced
    • 1ยฝ teaspoons cumin
    • 1 teaspoon Mexican oregano
    • 1 teaspoon chili powder
    • 1 teaspoon garlic powder
    • Salt and black pepper, to taste
    • 2 cups cooked pinto beans or refried beans
    • 3 cups shredded cheese
      (Monterey Jack, Cheddar, Oaxaca, or Mexican blend)

    For the Hatch Green Chile Sauce:

    • 3 cups roasted New Mexico Hatch green chile, chopped
    • 2 tablespoons butter or oil
    • 3 tablespoons all-purpose flour
    • 3 cups chicken broth
    • 2 cloves garlic, minced
    • ยฝ onion, finely diced
    • 1 teaspoon cumin
    • 1 teaspoon Mexican oregano
    • Salt and pepper, to taste

    Optional Toppings:

    • Sour cream
    • Diced onions
    • Fresh cilantro
    • Avocado slices
    • Pico de gallo
    • Queso fresco
    • Jalapeรฑos

    Instructions

    Step 1: Make the Green Chile Sauce

    Heat butter or oil in a saucepan.

    Add:

    • Onion
    • Garlic

    Cook until softened.

    Stir in flour and cook for 1โ€“2 minutes.

    Slowly whisk in chicken broth.

    Add:

    • Green chile
    • Cumin
    • Oregano
    • Salt
    • Pepper

    Simmer for:

    15โ€“20 minutes

    until thick and flavorful.


    Step 2: Prepare the Filling

    Cook ground beef in a skillet until browned.

    Add onion and garlic.

    Season with:

    • Cumin
    • Chili powder
    • Oregano
    • Garlic powder
    • Salt and pepper

    Stir in beans and warm through.


    Step 3: Assemble the Burritos

    Warm tortillas slightly so they are easy to roll.

    Fill each tortilla with:

    ๐ŸŒฏ Meat mixture
    ๐Ÿซ˜ Beans
    ๐Ÿง€ Cheese

    Fold in the sides and roll tightly.

    Place seam-side down in a baking dish.


    Step 4: Smother & Bake

    Pour hot green chile sauce generously over the burritos.

    Cover with shredded cheese.

    Bake at:

    375ยฐF (190ยฐC)

    for:

    20โ€“25 minutes

    until bubbly and golden.


    Step 5: Serve

    Top with:

    ๐ŸŒฟ Cilantro
    ๐Ÿฅ‘ Avocado
    ๐Ÿฅฃ Sour cream
    ๐Ÿง… Fresh onions

    Serve hot with extra green chile on the side.


    Extra Recipe Tips & Variations โœจ

    ๐Ÿ– Colorado/New Mexico Pork Version

    Use slow-cooked shredded pork for a traditional chile verde style burrito.


    ๐Ÿณ Breakfast Smothered Burrito

    Add:

    • Scrambled eggs
    • Potatoes
    • Bacon
    • Sausage

    ๐Ÿง€ Extra Cheesy Version

    Add cheese inside, on top, and mix some into the green chile sauce.


    ๐ŸŒถ๏ธ Hot Hatch Chile Version

    Use hot Hatch green chile and add serrano peppers for serious heat.


    ๐Ÿซ˜ Vegetarian Version

    Fill with:

    • Pinto beans
    • Potatoes
    • Cheese
    • Roasted vegetables

    Flavor Upgrades / Secret Tips ๐Ÿ”ฅ

    โœ… Roast fresh Hatch chile for authentic smoky flavor.

    โœ… Use freshly shredded cheeseโ€”it melts better than pre-shredded.

    โœ… Make the green chile sauce a day ahead for deeper flavor.

    โœ… Add a splash of lime juice at the end to brighten the sauce.

    โœ… Let burritos rest for a few minutes after baking so the sauce settles.


    Serving Ideas ๐Ÿฝ๏ธ

    Serve with:

    ๐ŸŒฎ Chips and salsa
    ๐Ÿš Spanish rice
    ๐Ÿซ˜ Pinto beans
    ๐Ÿฅ‘ Guacamole
    ๐ŸŒฝ Mexican street corn
    ๐Ÿฅ— Fresh salad

    Perfect for:

    • Family dinners
    • Weekend breakfasts
    • Game days
    • Mexican food cravings

    Storage & Meal Prep Tips ๐Ÿฅก

    Refrigerator:

    Store covered for up to 4 days.

    Freezer:

    Wrap individual burritos before adding sauce and freeze for up to 3 months.

    Reheating:

    Warm in the oven or microwave, then add fresh green chile sauce and cheese.


    Nutrition Facts (Approximate)

    Per serving:

    • Calories: 650โ€“800 kcal
    • Protein: 35โ€“45 g
    • Carbohydrates: 55โ€“70 g
    • Fat: 30โ€“40 g

    (Values vary depending on fillings and cheese amount.)


    Frequently Asked Questions (Q&A)

    Q: What makes a burrito โ€œsmotheredโ€?
    A: A burrito becomes smothered when it is covered completely with sauce and usually topped with melted cheese.

    Q: What chile is best for this recipe?
    A: New Mexico Hatch green chile is the classic choice for authentic flavor.

    Q: Can I make these ahead?
    A: Yes! Assemble burritos ahead, refrigerate, then smother and bake when ready.

    Q: Are these spicy?
    A: The heat depends on the chile variety. Mild Hatch chile gives great flavor without too much spice.


    Social Media Captions โค๏ธ

    Facebook Style:

    “Nothing beats a hot, cheesy Green Chile Smothered Burrito! ๐ŸŒถ๏ธ๐Ÿง€ A New Mexico favorite loaded with flavor, covered in homemade Hatch chile sauce, and baked until perfectly melty.”

    Instagram Style:

    “When your burrito gets covered in green chile and cheeseโ€ฆ it becomes a masterpiece. ๐ŸŒฏ๐Ÿ”ฅ”

    Short Viral Caption:

    “The smothered burrito youโ€™ll dream about! ๐Ÿ˜๐ŸŒถ๏ธ”

    Family Memory Style:

    “Some meals bring everyone running to the kitchen. โค๏ธ A pan of cheesy green chile burritos is the kind of comfort food made for sharing.”


    Final Food Description ๐Ÿด

    Hot Green Chile and Cheese Smothered Burritos are a classic Southwest comfort meal featuring warm flour tortillas stuffed with savory filling, covered in spicy Hatch green chile sauce, and topped with melted cheese. Rich, cheesy, and full of New Mexico flavor, this dish is pure homemade comfort. ๐ŸŒถ๏ธ๐ŸŒฏ๐Ÿง€โœจ

  • Smoked Salmon Avocado Toast

    Smoked Salmon Avocado Toast

    (Creamy Avocado, Smoky Salmon & Fresh Toppings on Crispy Toast)

    Smoked Salmon Avocado Toast is a simple yet elegant meal combining creamy avocado, rich smoked salmon, and crunchy toasted bread. With fresh lemon, herbs, and flavorful toppings, this recipe is perfect for breakfast, brunch, a light lunch, or a healthy snack.

    Itโ€™s a cafรฉ-style favorite you can easily make at home in just minutes!


    Full Recipe (Ingredients + Instructions)

    Ingredients

    For the Toast:

    • 4 slices sourdough bread or artisan bread
    • 1 ripe avocado
    • 4โ€“6 ounces smoked salmon
    • 1 tablespoon fresh lemon juice
    • 1 teaspoon lemon zest (optional)
    • Salt, to taste
    • Freshly cracked black pepper

    Toppings:

    • 2 tablespoons cream cheese (optional)
    • Fresh dill
    • Thinly sliced red onion
    • Capers
    • Cucumber slices
    • Cherry tomatoes
    • Microgreens or arugula
    • Red pepper flakes (optional)

    Instructions

    Step 1: Toast the Bread

    Toast bread slices until:

    โœจ Golden brown
    โœจ Crispy on the edges
    โœจ Soft in the center

    For extra flavor, brush lightly with olive oil before toasting.


    Step 2: Prepare the Avocado Spread

    Mash avocado in a bowl with:

    • Lemon juice
    • Salt
    • Pepper

    Leave slightly chunky for the best texture.


    Step 3: Assemble the Toast

    Spread avocado mixture over toasted bread.

    Add:

    ๐ŸŸ Smoked salmon
    ๐Ÿง… Red onion
    ๐ŸŒฟ Dill
    ๐Ÿฅ’ Cucumber
    โœจ Capers

    Finish with fresh lemon juice and black pepper.


    Extra Recipe Tips & Variations โœจ

    ๐Ÿฅš Smoked Salmon Breakfast Toast

    Add a poached or soft-boiled egg on top.


    ๐Ÿง€ Creamy Bagel-Inspired Version

    Spread cream cheese under the avocado for a bagel-style flavor.


    ๐ŸŒถ๏ธ Spicy Salmon Toast

    Add:

    • Chili flakes
    • Sriracha
    • Jalapeรฑo slices

    ๐Ÿฅ’ Mediterranean Style

    Add:

    • Feta cheese
    • Cucumber
    • Tomatoes
    • Olive oil drizzle

    ๐Ÿณ Protein-Packed Version

    Add scrambled eggs or cottage cheese for extra protein.


    Flavor Upgrades / Secret Tips ๐Ÿ”ฅ

    โœ… Use ripe avocado for the creamiest texture.

    โœ… A squeeze of lemon keeps avocado fresh and bright.

    โœ… Toast thick bread so it holds the toppings.

    โœ… High-quality smoked salmon makes a big difference.

    โœ… Add fresh herbs at the end for maximum flavor.


    Serving Ideas ๐Ÿฝ๏ธ

    Serve with:

    ๐Ÿ“ Fresh fruit
    ๐Ÿฅ— Side salad
    โ˜• Coffee
    ๐Ÿงƒ Fresh juice
    ๐Ÿฅš Boiled eggs

    Perfect for:

    • Weekend brunch
    • Quick breakfasts
    • Healthy lunches
    • Entertaining guests

    Storage Tips ๐Ÿฅก

    Best served fresh.

    For meal prep:

    • Store mashed avocado with lemon juice in the refrigerator for up to 1 day.
    • Keep smoked salmon refrigerated and assemble just before eating.

    Nutrition Facts (Approximate)

    Per serving:

    • Calories: 350โ€“450 kcal
    • Protein: 18โ€“25 g
    • Carbohydrates: 30โ€“40 g
    • Fat: 20โ€“28 g

    (Values vary depending on bread and toppings.)


    Frequently Asked Questions (Q&A)

    Q: What bread is best for avocado toast?
    A: Sourdough, rye, whole grain, or artisan bread work best because they are sturdy.

    Q: Can I use fresh salmon instead of smoked salmon?
    A: Yes, but the flavor will be different. Smoked salmon gives the classic taste.

    Q: Is smoked salmon avocado toast healthy?
    A: Yes. It provides healthy fats from avocado and protein from salmon.

    Q: Can I make this dairy-free?
    A: Absolutely. Simply skip the cream cheese.


    Social Media Captions โค๏ธ

    Facebook Style:

    “A beautiful breakfast that feels fancy but is so easy to make! ๐Ÿฅ‘๐ŸŸ Smoked Salmon Avocado Toast is creamy, fresh, and packed with delicious flavors.”

    Instagram Style:

    “Brunch perfection on a slice of toast. ๐Ÿฅ‘โœจ๐ŸŸ”

    Short Viral Caption:

    “The cafรฉ favorite you can make at home! ๐Ÿ˜”

    Healthy Lifestyle Caption:

    “Simple ingredients, fresh flavors, and a nourishing start to the day. ๐Ÿฅ‘๐ŸŒฟ”


    Final Food Description ๐Ÿด

    Smoked Salmon Avocado Toast is a delicious combination of creamy avocado, smoky salmon, crisp artisan bread, and fresh toppings. Elegant, nutritious, and easy to prepare, this recipe brings restaurant-style brunch flavor straight to your kitchen. ๐Ÿฅ‘๐ŸŸโœจ

  • Peach Blondies

    Peach Blondies

    (Soft, Buttery & Chewy Peach Dessert Bars)

    Peach Blondies are a delicious twist on classic blondies, combining a rich buttery brown sugar base with juicy peaches for a sweet, fruity dessert. These soft and chewy bars have a warm vanilla flavor with bursts of fresh peach in every bite.

    Perfect for summer gatherings, picnics, bake sales, afternoon coffee, or a simple homemade treat.


    Full Recipe (Ingredients + Instructions)

    Ingredients

    For the Peach Blondies:

    • 1 cup unsalted butter, melted
    • 1ยฝ cups brown sugar, packed
    • 2 large eggs
    • 2 teaspoons vanilla extract
    • 2 cups all-purpose flour
    • 1 teaspoon baking powder
    • ยฝ teaspoon salt
    • 1 teaspoon cinnamon
    • 1ยฝ cups fresh peaches, diced
    • 1 tablespoon flour (for coating peaches)

    Optional Additions:

    • ยฝ cup white chocolate chips
    • ยฝ cup chopped pecans
    • 1 teaspoon almond extract
    • Powdered sugar for dusting

    Instructions

    Step 1: Prepare the Pan

    Preheat oven to:

    350ยฐF (175ยฐC)

    Line a 9×13-inch baking pan with parchment paper and lightly grease.


    Step 2: Make the Blondie Batter

    In a large bowl whisk together:

    • Melted butter
    • Brown sugar

    until smooth.

    Add:

    • Eggs
    • Vanilla extract

    and mix well.


    Step 3: Add Dry Ingredients

    Stir in:

    • Flour
    • Baking powder
    • Salt
    • Cinnamon

    Mix just until combined.

    Do not overmix.


    Step 4: Add Peaches

    Toss diced peaches with 1 tablespoon flour.

    Gently fold peaches into the batter.

    Add white chocolate chips or pecans if desired.


    Step 5: Bake

    Spread batter evenly into prepared pan.

    Bake for:

    30โ€“35 minutes

    until the edges are golden and the center is set.

    Cool completely before slicing.


    Extra Recipe Tips & Variations โœจ

    ๐Ÿ‘ Peach Cobbler Blondies

    Add a crumb topping made with:

    • Flour
    • Brown sugar
    • Butter
    • Cinnamon

    before baking.


    ๐Ÿฆ Peach Dessert Bars

    Serve warm with vanilla ice cream and caramel sauce.


    ๐Ÿ‹ Peach Lemon Blondies

    Add lemon zest and a lemon glaze for a fresh flavor.


    ๐ŸŒฐ Peach Pecan Blondies

    Add toasted pecans for a Southern-inspired version.


    ๐Ÿฅฅ Peach Coconut Blondies

    Add shredded coconut for a tropical twist.


    Flavor Upgrades / Secret Tips ๐Ÿ”ฅ

    โœ… Use ripe peaches for the best flavor.

    โœ… Coat peaches lightly with flour to prevent them from sinking.

    โœ… Do not overbakeโ€”soft blondies should stay chewy.

    โœ… Let them cool before cutting for clean squares.

    โœ… A pinch of cinnamon enhances the peach flavor beautifully.


    Serving Ideas ๐Ÿฝ๏ธ

    Serve with:

    ๐Ÿฆ Vanilla ice cream
    โ˜• Coffee
    ๐Ÿต Tea
    ๐Ÿฏ Caramel drizzle
    ๐Ÿ“ Fresh berries

    Perfect for:

    • Summer parties
    • Family gatherings
    • Potlucks
    • Dessert tables

    Storage Tips ๐Ÿฅก

    Room Temperature:

    Store in an airtight container for up to 3 days.

    Refrigerator:

    Keep fresh for up to 1 week.

    Freezer:

    Freeze individual bars for up to 3 months.


    Nutrition Facts (Approximate)

    Per blondie:

    • Calories: 280โ€“350 kcal
    • Protein: 3โ€“5 g
    • Carbohydrates: 40โ€“50 g
    • Fat: 12โ€“16 g

    (Values vary depending on size and additions.)


    Frequently Asked Questions (Q&A)

    Q: Can I use frozen peaches?
    A: Yes. Use frozen peaches without thawing and add a few extra minutes to baking time.

    Q: Why are my blondies cakey instead of chewy?
    A: Too much flour or overmixing can create a cake-like texture.

    Q: Can I use canned peaches?
    A: Yes, but drain them very well before adding.

    Q: Can I make these ahead of time?
    A: Yes! They often taste even better the next day as the flavors develop.


    Social Media Captions โค๏ธ

    Facebook Style:

    “These Peach Blondies are sunshine in dessert form! ๐Ÿ‘โœจ Soft, buttery, and packed with juicy peaches, theyโ€™re the perfect homemade treat for sharing with family and friends.”

    Instagram Style:

    “Sweet peach flavor in every chewy bite. ๐Ÿ‘๐Ÿค”

    Short Viral Caption:

    “The peach dessert everyone needs this summer! ๐Ÿ˜๐Ÿ‘”

    Family Memory Style:

    “Some desserts remind us of simple momentsโ€”fresh fruit, homemade baking, and family gathered around the table. โค๏ธ These Peach Blondies are pure comfort.”


    Final Food Description ๐Ÿด

    Peach Blondies are soft, chewy dessert bars made with a rich brown sugar blondie base and filled with juicy peaches and warm cinnamon flavor. Sweet, buttery, and full of summer goodness, these homemade bars are the perfect treat for any occasion. ๐Ÿ‘โœจ

  • Lentil Hummus

    Lentil Hummus

    (Creamy, Healthy & Flavorful Twist on Classic Hummus)

    Lentil Hummus is a delicious alternative to traditional chickpea hummus, made with tender lentils blended with tahini, garlic, lemon, and warm spices. It is creamy, protein-rich, budget-friendly, and perfect as a dip, spread, or healthy snack.

    This Mediterranean-inspired recipe is packed with flavor and pairs beautifully with fresh vegetables, pita bread, crackers, or wraps.


    Full Recipe (Ingredients + Instructions)

    Ingredients

    • 2 cups cooked lentils (green, brown, or black lentils)
    • ยผ cup tahini
    • 3 tablespoons fresh lemon juice
    • 2โ€“3 cloves garlic, minced
    • 3 tablespoons olive oil
    • ยฝ teaspoon ground cumin
    • ยฝ teaspoon smoked paprika
    • ยฝ teaspoon salt (adjust to taste)
    • ยผ teaspoon black pepper
    • 3โ€“5 tablespoons cold water (as needed for texture)

    For Garnish:

    • Extra virgin olive oil
    • Sprinkle of paprika
    • Fresh parsley
    • Sesame seeds
    • Lemon slices

    Instructions

    Step 1: Cook the Lentils

    If using dried lentils:

    • Rinse 1 cup lentils
    • Simmer in water for about 20โ€“25 minutes until tender
    • Drain and cool

    (You can also use canned lentils for a quicker version.)


    Step 2: Blend the Ingredients

    Add to a food processor:

    • Cooked lentils
    • Tahini
    • Lemon juice
    • Garlic
    • Olive oil
    • Cumin
    • Paprika
    • Salt
    • Pepper

    Blend until smooth.


    Step 3: Adjust Texture

    Add cold water a tablespoon at a time until the hummus becomes:

    โœจ Creamy
    โœจ Smooth
    โœจ Easy to spread

    Taste and adjust seasoning.


    Step 4: Serve

    Spoon into a bowl.

    Drizzle with olive oil and garnish with:

    ๐ŸŒฟ Parsley
    ๐ŸŒถ๏ธ Paprika
    ๐Ÿ‹ Lemon zest

    Serve chilled or at room temperature.


    Extra Recipe Tips & Variations โœจ

    ๐ŸŒถ๏ธ Spicy Lentil Hummus

    Add:

    • Cayenne pepper
    • Chili flakes
    • Harissa paste

    ๐Ÿง„ Roasted Garlic Lentil Hummus

    Replace raw garlic with roasted garlic for a sweeter, richer flavor.


    ๐Ÿฅ• Roasted Vegetable Version

    Blend with:

    • Roasted red peppers
    • Carrots
    • Sweet potatoes

    ๐ŸŒฟ Fresh Herb Hummus

    Add:

    • Cilantro
    • Parsley
    • Basil

    ๐Ÿฅ‘ Creamy Avocado Lentil Hummus

    Add half an avocado for extra creaminess.


    Flavor Upgrades / Secret Tips ๐Ÿ”ฅ

    โœ… Warm lentils blend smoother than cold ones.

    โœ… Add lemon gradually and adjust to your taste.

    โœ… Use good-quality olive oil for richer flavor.

    โœ… Let hummus rest 30 minutes before serving so flavors develop.

    โœ… A pinch of cumin gives it that classic hummus taste.


    Serving Ideas ๐Ÿฝ๏ธ

    Serve with:

    ๐Ÿฅ• Carrot sticks
    ๐Ÿฅ’ Cucumber slices
    ๐Ÿซ“ Warm pita bread
    ๐Ÿฅจ Crackers
    ๐ŸŒฏ Wraps and sandwiches
    ๐Ÿฅ— Salad bowls

    Perfect for:

    • Healthy snacks
    • Meal prep
    • Lunch boxes
    • Party appetizers

    Storage Tips ๐Ÿฅก

    Refrigerator:

    Store in an airtight container for up to 5 days.

    Freezer:

    Freeze for up to 3 months.

    Thaw in the refrigerator and stir before serving.


    Nutrition Facts (Approximate)

    Per serving (ยผ cup):

    • Calories: 140โ€“180 kcal
    • Protein: 7โ€“9 g
    • Carbohydrates: 18โ€“22 g
    • Fat: 6โ€“9 g
    • Fiber: 6โ€“8 g

    (Values vary depending on ingredients.)


    Frequently Asked Questions (Q&A)

    Q: Does lentil hummus taste like regular hummus?
    A: It has a similar creamy texture but a slightly earthier, richer flavor.

    Q: What type of lentils are best?
    A: Brown or green lentils work best because they create a creamy texture while holding their flavor.

    Q: Can I make it without tahini?
    A: Yes. Replace tahini with peanut butter, sunflower seed butter, or extra olive oil.

    Q: Is lentil hummus good for meal prep?
    A: Yes! It stays fresh for several days and is easy to add to meals.


    Social Media Captions โค๏ธ

    Facebook Style:

    “A creamy, flavorful dip made with simple ingredients! ๐Ÿซ˜โœจ This Lentil Hummus is a healthy twist on classic hummus and the perfect snack for any day.”

    Instagram Style:

    “Creamy, nutritious, and packed with Mediterranean flavor. ๐Ÿซ˜๐ŸŒฟ”

    Short Viral Caption:

    “You need to try this protein-packed hummus twist! ๐Ÿ˜”

    Family Memory Style:

    “The best recipes are the ones that bring people together. โค๏ธ A bowl of homemade hummus, fresh bread, and good company makes every moment special.”


    Final Food Description ๐Ÿด

    Lentil Hummus is a creamy, flavorful dip made from wholesome lentils, tahini, garlic, lemon, and spices. Rich in protein and fiber, this healthy Mediterranean-inspired spread is a delicious way to enjoy a classic favorite with a nutritious twist. ๐Ÿซ˜โœจ

  • Herb & Cheese Quick Bread

    Herb & Cheese Quick Bread

    (Savory, Soft & Easy Homemade Bread Without Yeast)

    Herb & Cheese Quick Bread is a deliciously savory loaf packed with melted cheese, fresh herbs, and a tender buttery crumb. Since it uses baking powder instead of yeast, thereโ€™s no kneading or waiting for dough to riseโ€”just mix, bake, and enjoy!

    Perfect alongside soups, salads, pasta dishes, or simply toasted with butter.


    Full Recipe (Ingredients + Instructions)

    Ingredients

    For the Bread:

    • 2 cups all-purpose flour
    • 2 teaspoons baking powder
    • ยฝ teaspoon baking soda
    • 1 teaspoon salt
    • ยฝ teaspoon black pepper
    • 1 teaspoon garlic powder
    • 1 tablespoon fresh parsley, chopped
    • 1 tablespoon fresh rosemary, chopped
    • 1 tablespoon fresh thyme leaves
    • 1ยฝ cups shredded cheese
      (cheddar, mozzarella, Parmesan, or a mix)
    • 2 large eggs
    • 1 cup buttermilk
    • ยผ cup olive oil or melted butter

    Instructions

    Step 1: Prepare the Pan

    Preheat oven to:

    350ยฐF (175ยฐC)

    Grease and line a 9×5-inch loaf pan with parchment paper.


    Step 2: Mix Dry Ingredients

    In a large bowl combine:

    • Flour
    • Baking powder
    • Baking soda
    • Salt
    • Pepper
    • Garlic powder
    • Herbs

    Stir well.


    Step 3: Add Cheese

    Fold shredded cheese into the flour mixture.

    This helps distribute the cheese evenly throughout the loaf.


    Step 4: Add Wet Ingredients

    In another bowl whisk:

    • Eggs
    • Buttermilk
    • Olive oil or melted butter

    Pour into dry ingredients.

    Mix gently until just combined.

    Do not overmix.


    Step 5: Bake

    Pour batter into prepared loaf pan.

    Top with extra cheese and herbs if desired.

    Bake for:

    45โ€“55 minutes

    until golden and a toothpick comes out clean.

    Cool for 10โ€“15 minutes before slicing.


    Extra Recipe Tips & Variations โœจ

    ๐Ÿง„ Garlic Herb Cheese Bread

    Add roasted garlic or extra garlic powder for deeper flavor.


    ๐ŸŒถ๏ธ Spicy Cheese Bread

    Add:

    • Jalapeรฑos
    • Red pepper flakes
    • Green chiles

    ๐Ÿฅ“ Bacon Cheddar Version

    Mix in crispy cooked bacon pieces for a hearty loaf.


    ๐Ÿง… Onion & Herb Bread

    Add caramelized onions for a sweet savory flavor.


    ๐Ÿซ’ Mediterranean Style

    Add:

    • Feta cheese
    • Olives
    • Oregano

    Flavor Upgrades / Secret Tips ๐Ÿ”ฅ

    โœ… Use freshly grated cheese for the best melt.

    โœ… Fresh herbs create a much brighter flavor.

    โœ… Do not overmixโ€”the bread stays softer.

    โœ… Let the bread cool slightly before slicing for cleaner pieces.

    โœ… Brush the top with melted butter after baking for extra flavor.


    Serving Ideas ๐Ÿฝ๏ธ

    Serve with:

    ๐Ÿฒ Tomato soup
    ๐Ÿฅฃ Potato soup
    ๐Ÿ Pasta dishes
    ๐Ÿฅ— Fresh salads
    ๐Ÿณ Eggs and breakfast plates
    ๐Ÿงˆ Herb butter

    Perfect for:

    • Family dinners
    • Holiday tables
    • Brunch
    • Homemade bread baskets

    Storage Tips ๐Ÿฅก

    Room Temperature:

    Store covered for up to 3 days.

    Refrigerator:

    Keep fresh for up to 5 days.

    Freezer:

    Freeze slices for up to 3 months.

    Toast before serving for the best texture.


    Nutrition Facts (Approximate)

    Per slice:

    • Calories: 220โ€“280 kcal
    • Protein: 8โ€“10 g
    • Carbohydrates: 25โ€“30 g
    • Fat: 10โ€“15 g

    (Values vary depending on cheese and additions.)


    Frequently Asked Questions (Q&A)

    Q: Can I use dried herbs instead of fresh?
    A: Yes. Use about one-third the amount of dried herbs.

    Q: What cheese works best?
    A: Cheddar, Parmesan, mozzarella, Gruyรจre, and Monterey Jack all work beautifully.

    Q: Can I make muffins instead of a loaf?
    A: Yes! Bake in a muffin tin for about 18โ€“22 minutes.

    Q: Why is my quick bread dense?
    A: Overmixing the batter can make it heavy. Mix only until ingredients come together.


    Social Media Captions โค๏ธ

    Facebook Style:

    “Freshly baked Herb & Cheese Quick Bread straight from the oven! ๐Ÿง€๐ŸŒฟ Soft, savory, and full of cheesy goodnessโ€”this easy homemade bread is perfect with any meal.”

    Instagram Style:

    “No yeast, no waitingโ€ฆ just cheesy homemade goodness! ๐Ÿง€โœจ”

    Short Viral Caption:

    “The bread recipe everyone needs! ๐ŸŒฟ๐Ÿง€”

    Family Memory Style:

    “Nothing brings people to the table like the smell of homemade bread. โค๏ธ This Herb & Cheese Quick Bread is simple, comforting, and made for sharing.”


    Final Food Description ๐Ÿด

    Herb & Cheese Quick Bread is a soft, savory homemade loaf filled with flavorful herbs and melted cheese. Easy to make and full of comforting flavors, this no-yeast bread is the perfect addition to soups, dinners, breakfasts, and gatherings with family and friends. ๐Ÿง€๐ŸŒฟโœจ