Category: RECIPES

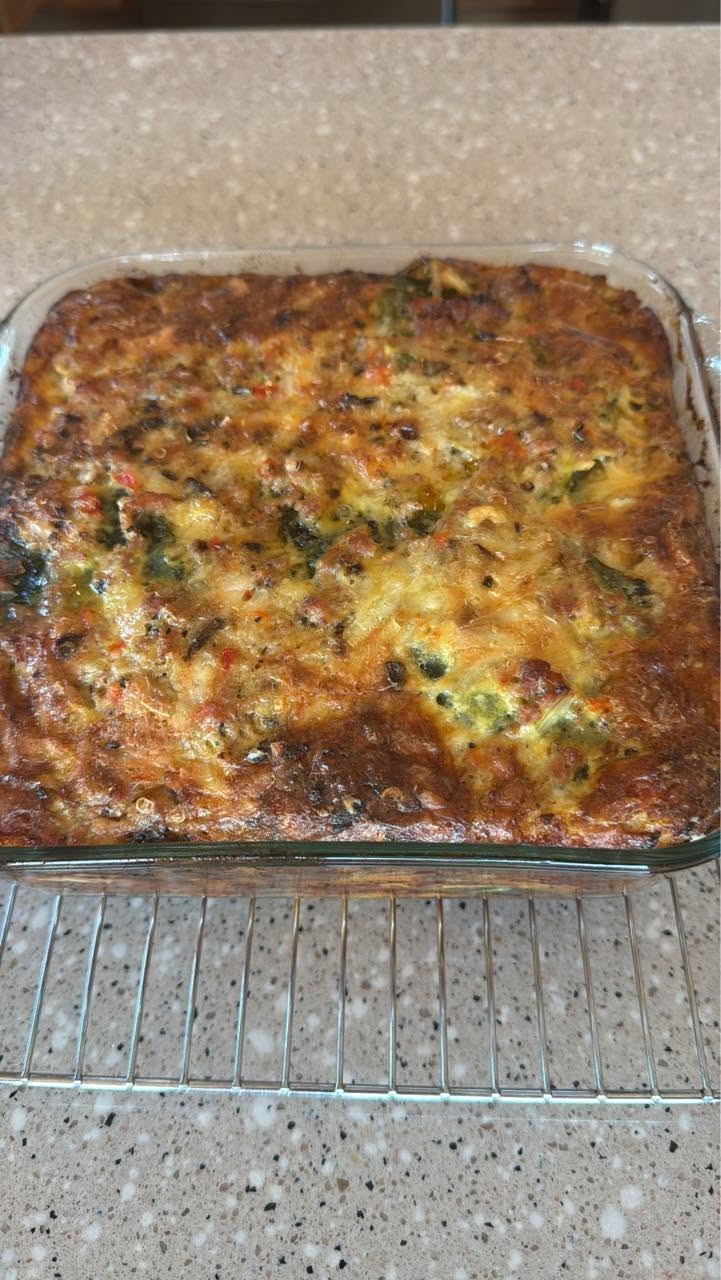
  • Sausage Cream Cheese Casserole (Only 3 Ingredients)

    Sausage Cream Cheese Casserole (Only 3 Ingredients)

    (Easy, Creamy & Perfect for Breakfast or Brunch)

    This 3-Ingredient Sausage Cream Cheese Casserole is the ultimate easy comfort dish! Made with savory sausage, creamy cheese, and fluffy eggs, this simple recipe is perfect for busy mornings, holiday breakfasts, potlucks, or meal prep.

    With minimal ingredients and maximum flavor, it’s a recipe you’ll want to make again and again.


    Full Recipe (Ingredients + Instructions)

    Ingredients (Only 3)

    • 1 pound breakfast sausage (mild or hot)
    • 8 ounces cream cheese, softened
    • 6 large eggs

    Instructions

    Step 1: Cook the Sausage

    Preheat oven to 350ยฐF (175ยฐC).

    Brown the sausage in a skillet over medium heat until fully cooked.

    Drain excess grease.


    Step 2: Combine Ingredients

    In a large bowl:

    • Beat the eggs until smooth.
    • Add softened cream cheese and mix until combined.
    • Stir in the cooked sausage.

    (Small pieces of cream cheese are okayโ€”they melt into the casserole while baking.)


    Step 3: Bake

    Pour the mixture into a greased 8×8-inch baking dish.

    Bake for:

    30โ€“40 minutes, until the center is set and the top is lightly golden.

    Let rest for 5 minutes before slicing.


    Extra Recipe Tips & Variations โœจ

    ๐Ÿง€ Cheesy Version

    Add 1 cup shredded cheddar, Monterey Jack, or pepper jack cheese.

    ๐ŸŒถ๏ธ Spicy Version

    Use hot sausage and add diced jalapeรฑos or red pepper flakes.

    ๐Ÿฅฌ Veggie Loaded

    Add:

    • Spinach
    • Bell peppers
    • Mushrooms
    • Green onions

    ๐Ÿฅ“ Meat Lovers

    Mix in cooked bacon or diced ham.

    ๐Ÿฅ” Hearty Breakfast Casserole

    Add frozen hash browns or diced potatoes for a complete meal.


    Flavor Upgrades / Secret Tips ๐Ÿ”ฅ

    โœ… Use full-fat cream cheese for the creamiest texture.

    โœ… Let cream cheese soften before mixing so it blends easier.

    โœ… Try maple breakfast sausage for a sweet-savory flavor.

    โœ… Add fresh herbs like chives or parsley for freshness.

    โœ… Let the casserole rest before cutting so the slices hold together.


    Serving Ideas ๐Ÿฝ๏ธ

    Serve with:

    ๐Ÿ“ Fresh fruit
    ๐Ÿฅ Biscuits
    ๐Ÿฅ— Green salad
    ๐Ÿฅ‘ Avocado slices
    ๐Ÿ… Fresh tomatoes
    โ˜• Coffee or orange juice

    Perfect for:

    • Christmas morning
    • Brunch gatherings
    • Weekend breakfasts
    • Potlucks
    • Make-ahead meals

    Storage & Meal Prep Tips ๐Ÿฅก

    Refrigerator:

    Store leftovers in an airtight container for up to 4 days.

    Freezer:

    Freeze individual slices for up to 2 months.

    Reheating:

    Microwave individual portions for 30โ€“60 seconds or warm in the oven until heated through.


    Nutrition Facts (Approximate)

    Per serving:

    • Calories: 280โ€“350 kcal
    • Protein: 18โ€“22 g
    • Carbohydrates: 2โ€“4 g
    • Fat: 22โ€“28 g

    (Values vary depending on sausage and serving size.)


    Frequently Asked Questions (Q&A)

    Q: Can I make this casserole the night before?
    A: Yes! Prepare it, cover, refrigerate overnight, and bake fresh in the morning.

    Q: Can I use turkey sausage?
    A: Absolutely. Turkey sausage works well for a lighter version.

    Q: Why is my casserole watery?
    A: Extra grease or moisture from sausage can cause this. Drain sausage well before adding it.

    Q: Can I double the recipe?
    A: Yes! Bake in a larger dish and add extra baking time until the center is fully set.

    Q: Can I add bread or biscuits?
    A: Yes. Cubed bread or biscuit pieces turn it into a more traditional breakfast casserole.


    Social Media Captions โค๏ธ

    Facebook Style:

    “Only 3 ingredients and SO much flavor! ๐ŸŒญ๐Ÿง€ This Sausage Cream Cheese Casserole is creamy, hearty, and the perfect easy breakfast for busy mornings or family gatherings.”

    Instagram Style:

    “Three ingredients. One amazing breakfast. ๐Ÿ˜โœจ”

    Short Viral Caption:

    “The easiest breakfast casserole you’ll ever make! ๐Ÿง€๐Ÿ”ฅ”

    Family Memory Style:

    “The best recipes are sometimes the simplest ones. โค๏ธ This creamy sausage casserole brings everyone to the table with just a few humble ingredients.”


    Final Food Description ๐Ÿด

    Sausage Cream Cheese Casserole is a simple yet delicious breakfast dish made with savory sausage, rich cream cheese, and fluffy eggs. With only three ingredients, it’s creamy, satisfying, and perfect for feeding a crowd with minimal effort. ๐ŸŒญ๐Ÿง€๐Ÿฅšโœจ

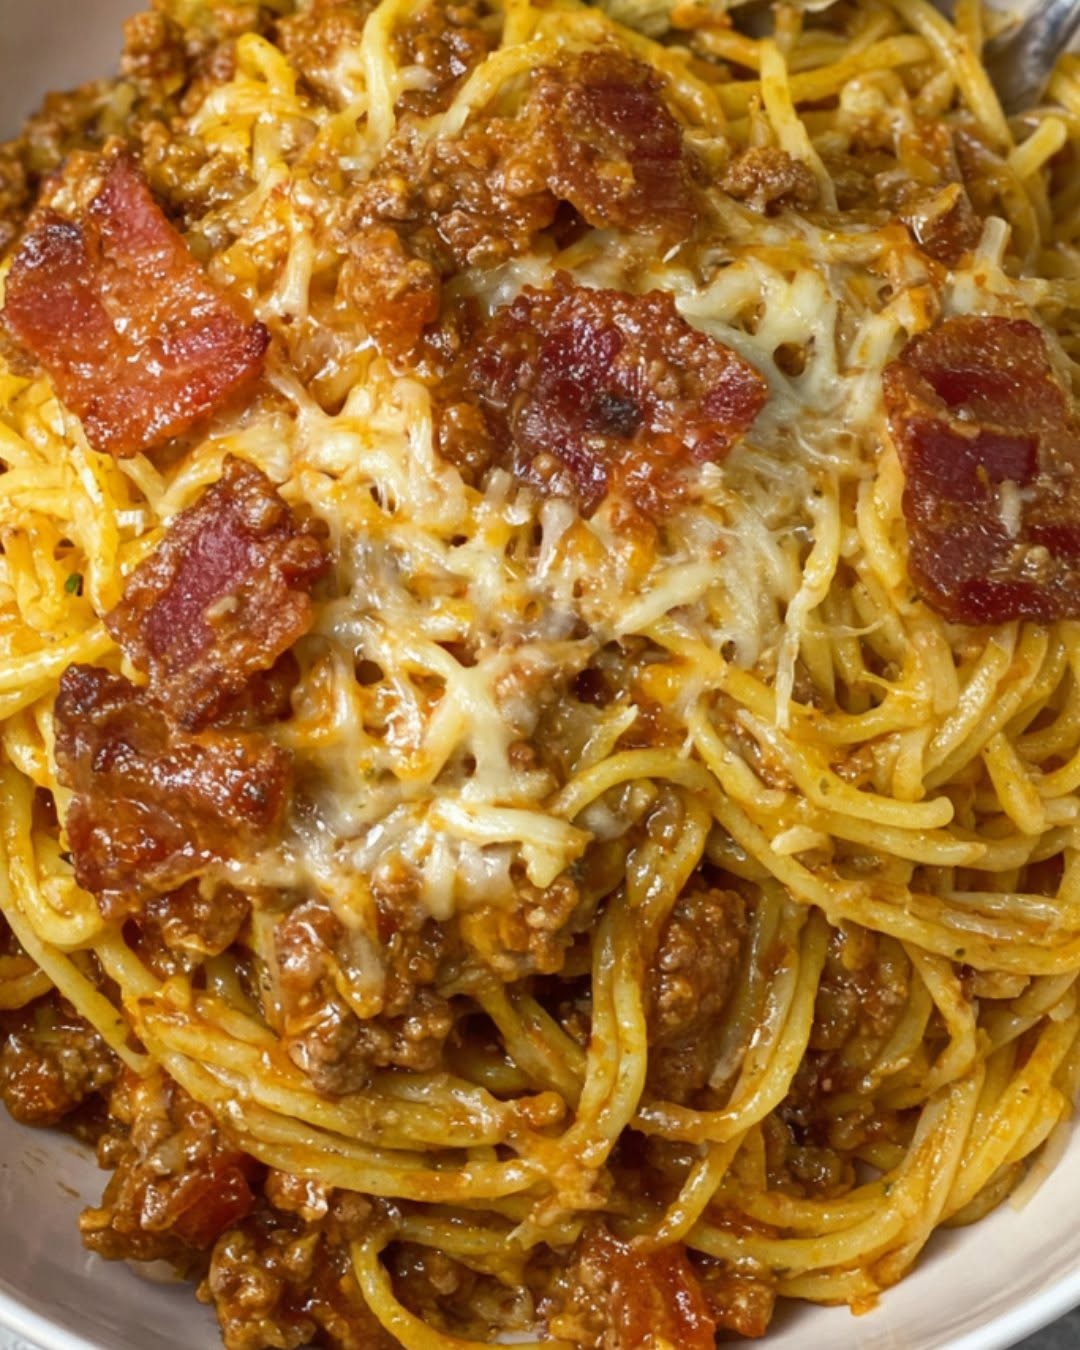
  • Mexican Red Spaghetti (Espagueti Rojo)

    Mexican Red Spaghetti (Espagueti Rojo)

    (Creamy Tomato Mexican Spaghetti โ€“ A Classic Side Dish)

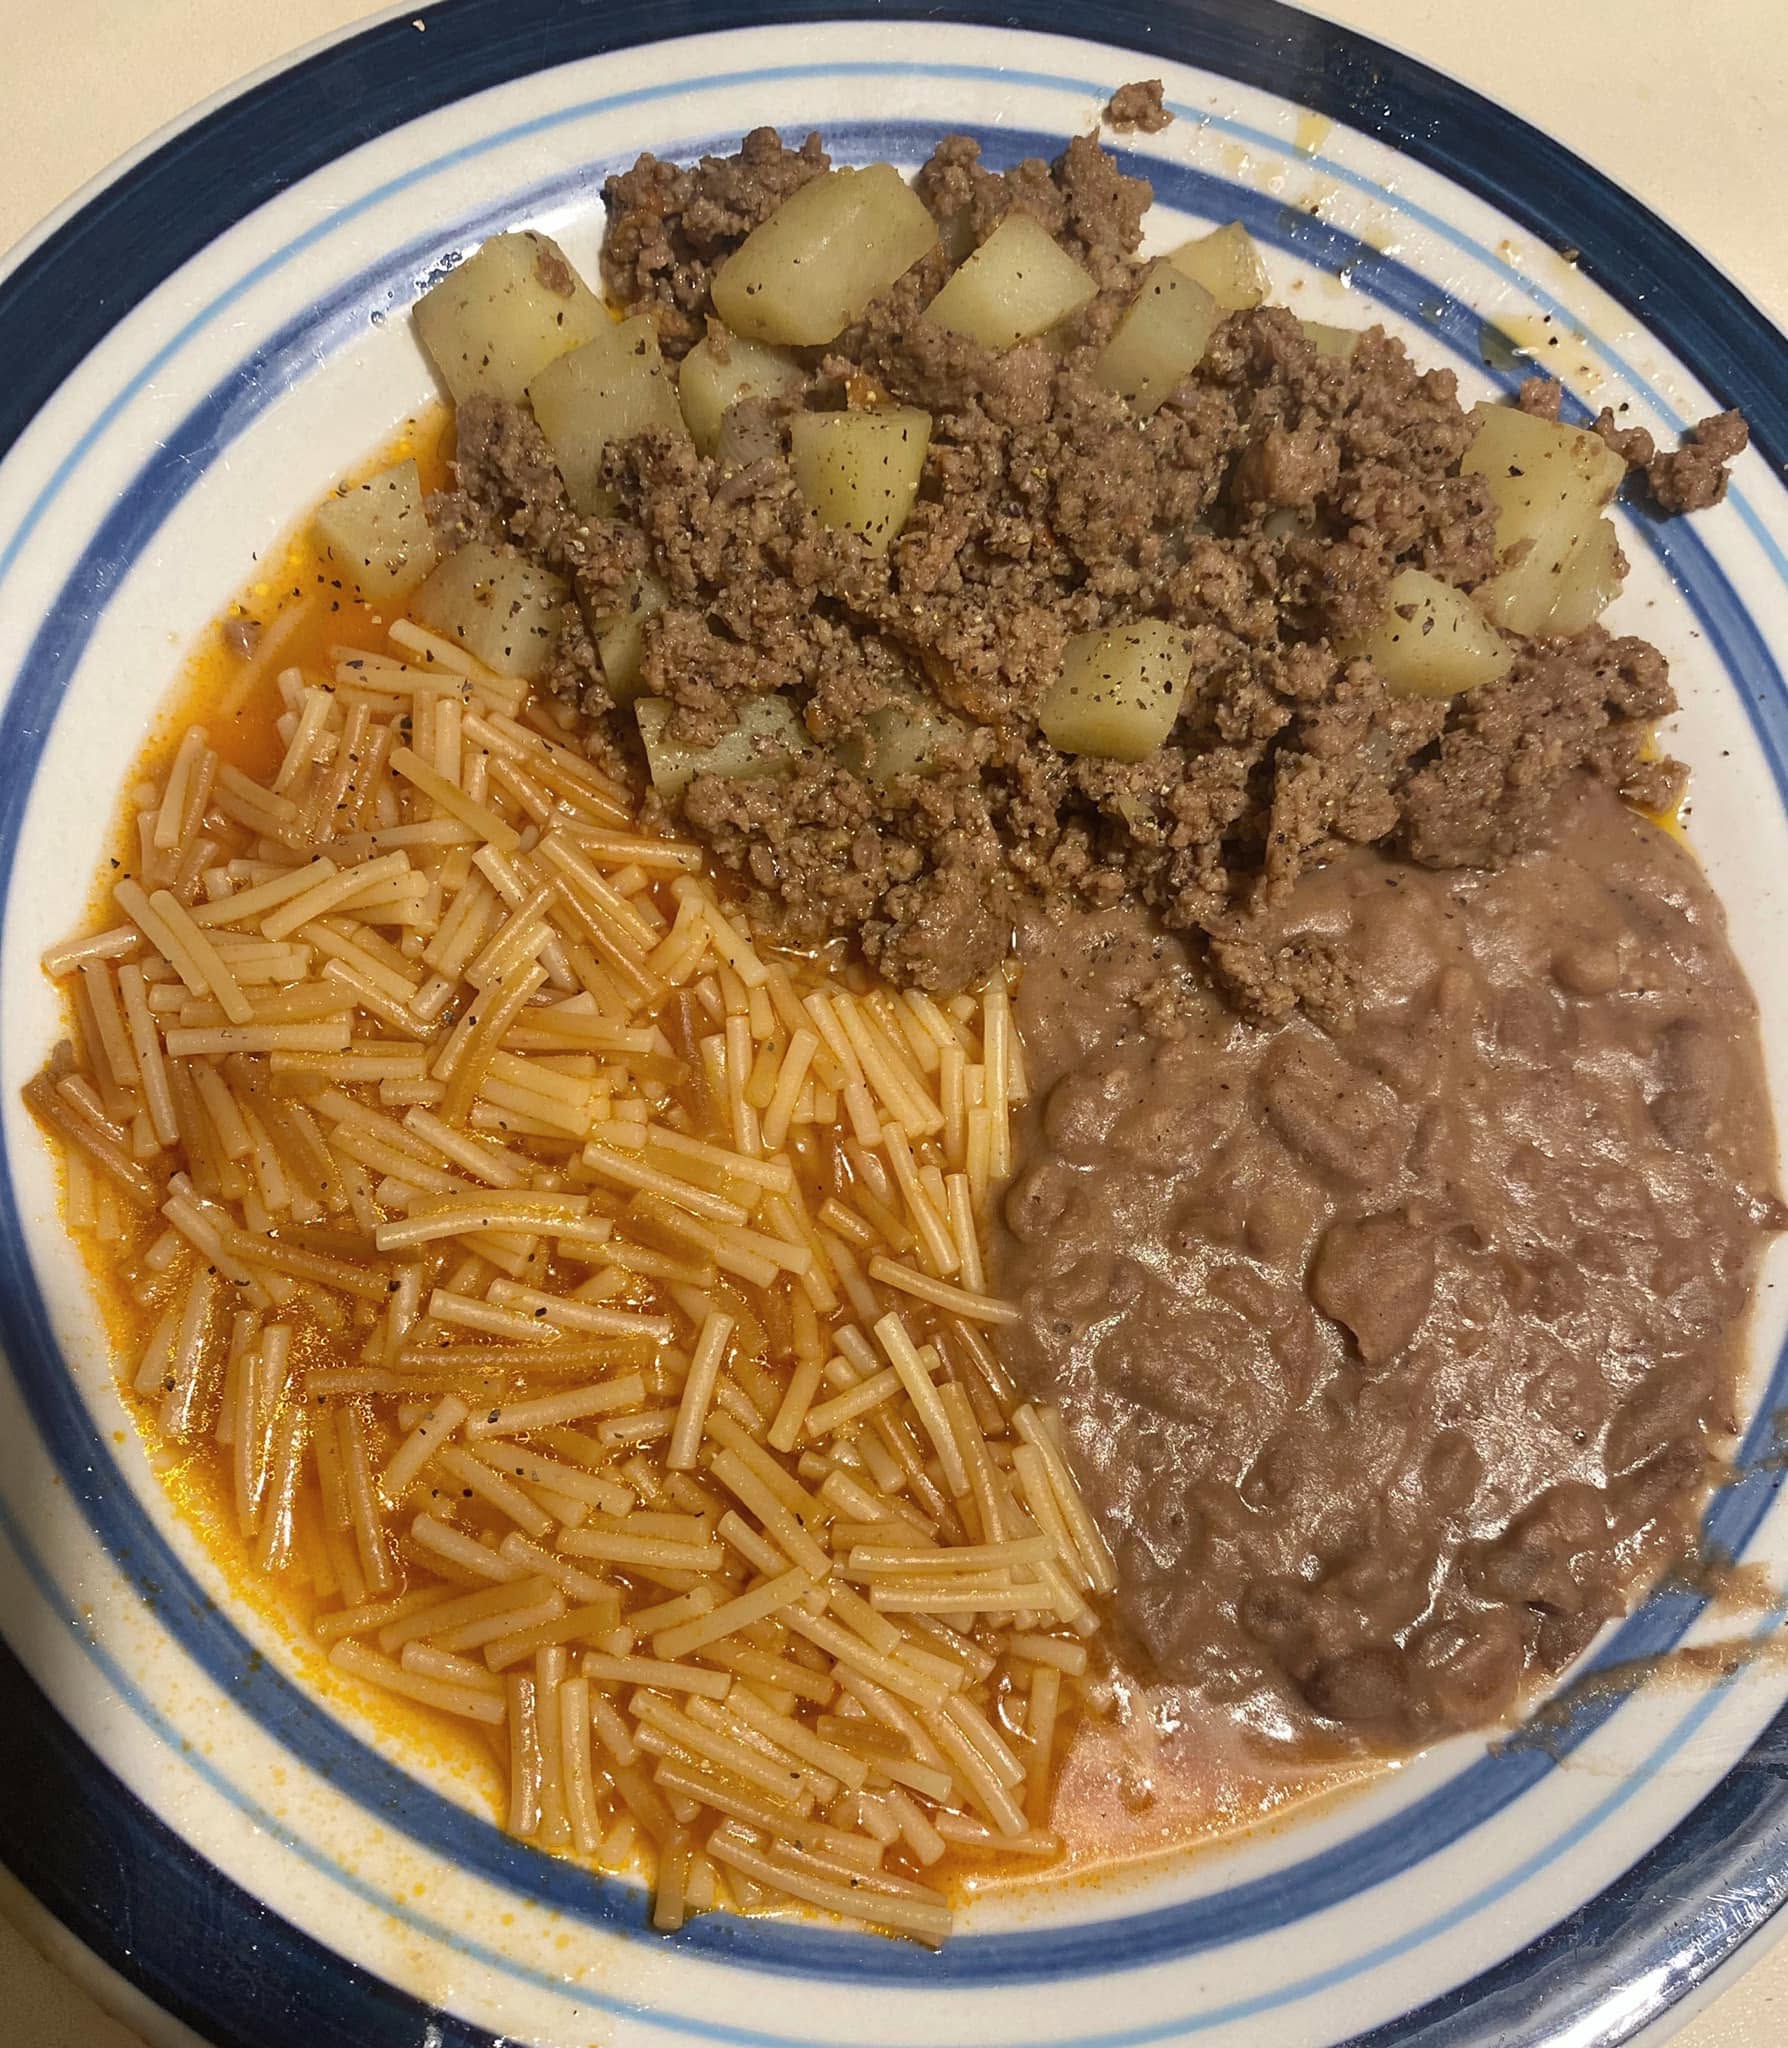
    Espagueti Rojo is a beloved Mexican comfort food made with spaghetti tossed in a rich, creamy tomato sauce blended with tomatoes, onion, garlic, and Mexican crema. It’s commonly served alongside grilled meats, milanesas, chicken, or at family celebrations, and it’s just as delicious as a main dish.


    Full Recipe (Ingredients + Instructions)

    Ingredients

    For the Pasta:

    • 1 pound spaghetti
    • Water for boiling
    • 1 tablespoon salt

    For the Red Sauce:

    • 5 Roma tomatoes
    • ยผ medium white onion
    • 3 cloves garlic
    • 1 cup chicken broth
    • 1 tablespoon tomato paste
    • 2 tablespoons butter
    • 1 tablespoon vegetable oil
    • 1 teaspoon chicken bouillon powder
    • ยฝ teaspoon black pepper
    • ยฝ teaspoon salt (adjust to taste)

    To Make It Creamy:

    • ยฝ cup Mexican crema (or heavy cream)
    • ยฝ cup evaporated milk

    Optional Garnishes:

    • Crumbled queso fresco
    • Chopped fresh parsley
    • Fresh cilantro
    • Extra Mexican crema

    Instructions

    Step 1: Cook the Spaghetti

    Bring a large pot of salted water to a boil.

    Cook the spaghetti until al dente, according to the package directions.

    Drain well and set aside.


    Step 2: Blend the Sauce

    In a blender combine:

    • Roma tomatoes
    • Onion
    • Garlic
    • Chicken broth
    • Tomato paste

    Blend until completely smooth.


    Step 3: Cook the Sauce

    Heat butter and oil in a large skillet.

    Pour in the blended tomato mixture.

    Add:

    • Chicken bouillon
    • Salt
    • Black pepper

    Simmer for 10โ€“15 minutes, stirring occasionally, until slightly thickened.


    Step 4: Make It Creamy

    Reduce the heat to low.

    Stir in:

    • Mexican crema
    • Evaporated milk

    Cook for 2โ€“3 minutes, but do not let the sauce boil after adding the dairy.


    Step 5: Combine

    Add the cooked spaghetti to the sauce.

    Toss until every strand is evenly coated.

    Cook for another 2 minutes.

    Serve hot.


    Extra Recipe Tips & Variations โœจ

    ๐Ÿง€ Cheesy Version

    Mix in:

    • Oaxaca cheese
    • Mozzarella
    • Monterey Jack

    until melted.


    ๐ŸŒถ๏ธ Spicy Espagueti Rojo

    Blend in one roasted jalapeรฑo or chipotle pepper for a smoky kick.


    ๐Ÿ— Chicken Version

    Top with grilled or shredded chicken for a complete meal.


    ๐Ÿฅ“ Bacon Twist

    Add crispy chopped bacon for extra flavor.


    ๐Ÿฅฌ Veggie Version

    Stir in peas, corn, carrots, or sautรฉed mushrooms.


    Flavor Upgrades / Secret Tips ๐Ÿ”ฅ

    โœ… Roast the tomatoes before blending for a deeper, sweeter flavor.

    โœ… Use Mexican crema for the most authentic taste.

    โœ… Add a little reserved pasta water if the sauce becomes too thick.

    โœ… Finish with crumbled queso fresco and fresh parsley.

    โœ… Let the spaghetti rest for 5 minutes before serving so it absorbs the sauce.


    Serving Ideas ๐Ÿฝ๏ธ

    Serve with:

    ๐Ÿ— Grilled chicken
    ๐Ÿฅฉ Carne asada
    ๐Ÿ– Pork chops
    ๐Ÿค Garlic shrimp
    ๐Ÿฅ— Fresh green salad
    ๐ŸŒฝ Warm tortillas or bolillo bread

    Perfect for:

    • Family dinners
    • Potlucks
    • Holiday meals
    • BBQs
    • Weeknight comfort food

    Storage & Reheating Tips ๐Ÿฅก

    Refrigerator:

    Store in an airtight container for up to 4 days.

    Freezer:

    Freeze for up to 2 months.

    Reheating:

    Warm gently on the stovetop or microwave with a splash of milk or broth to keep the sauce creamy.


    Nutrition Facts (Approximate)

    Per serving:

    • Calories: 430โ€“520 kcal
    • Protein: 11โ€“14 g
    • Carbohydrates: 55โ€“65 g
    • Fat: 18โ€“22 g

    (Values vary depending on the dairy products used.)


    Frequently Asked Questions (Q&A)

    Q: Can I use canned tomatoes?
    A: Yes. Substitute one 14-ounce can of whole peeled or diced tomatoes if fresh tomatoes aren’t available.

    Q: What is Mexican crema?
    A: Mexican crema is a slightly tangy, pourable cream that’s richer and thinner than sour cream. If you can’t find it, use heavy cream or a mixture of sour cream and a little milk.

    Q: Can I make this without evaporated milk?
    A: Yes. Replace it with additional Mexican crema or heavy cream.

    Q: Is Espagueti Rojo spicy?
    A: Traditionally, no. It’s mild and family-friendly, but you can add jalapeรฑos or chipotle peppers for heat.

    Q: Can I make it ahead of time?
    A: Yes! The flavors develop even more after a few hours, making it a great make-ahead side dish.


    Social Media Captions โค๏ธ

    Facebook Style:

    “Nothing says comfort food like a bowl of homemade Mexican Red Spaghetti! ๐Ÿ๐Ÿ‡ฒ๐Ÿ‡ฝ Creamy, rich tomato sauce wrapped around perfectly cooked spaghettiโ€”simple, delicious, and always a family favorite.”

    Instagram Style:

    “Creamy, comforting, and full of authentic Mexican flavor. ๐Ÿ…๐Ÿโœจ”

    Short Viral Caption:

    “The Mexican pasta dish everyone needs to try! ๐Ÿ˜๐Ÿ‡ฒ๐Ÿ‡ฝ”

    Family Memory Style:

    “Some recipes never go out of style. โค๏ธ A warm plate of Espagueti Rojo brings family together with every comforting bite.”


    Final Food Description ๐Ÿด

    Mexican Red Spaghetti (Espagueti Rojo) is a creamy, comforting pasta dish made with tender spaghetti coated in a rich tomato sauce blended with garlic, onion, Mexican crema, and evaporated milk. A classic side dish in Mexican homes, it’s delicious enough to enjoy as the main course and pairs perfectly with grilled meats or roasted chicken. ๐Ÿ๐Ÿ‡ฒ๐Ÿ‡ฝโœจ

  • Strawberry Ginger

    Strawberry Ginger

    (Refreshing Homemade Strawberry Ginger Cooler)

    This Strawberry Ginger Drink is bright, refreshing, and naturally flavorful. Sweet strawberries blend beautifully with the gentle warmth of fresh ginger, creating a drink that’s perfect for warm days, brunches, or whenever you need a refreshing pick-me-up.

    Serve it over ice with sparkling water for a fizzy twist or enjoy it still for a simple, fruity refreshment.


    Full Recipe (Ingredients + Instructions)

    Ingredients

    • 2 cups fresh strawberries, hulled
    • 1โ€“2 tablespoons fresh ginger, peeled and grated
    • 3 cups cold water
    • 2 tablespoons honey or maple syrup (adjust to taste)
    • 2 tablespoons fresh lemon juice
    • Ice cubes

    Optional Garnish:

    • Fresh strawberry slices
    • Lemon slices
    • Fresh mint leaves

    Instructions

    Step 1: Blend

    Add to a blender:

    • Strawberries
    • Fresh ginger
    • Water
    • Honey
    • Lemon juice

    Blend until smooth.


    Step 2: Strain (Optional)

    For a smoother drink, pour the mixture through a fine-mesh strainer.

    If you prefer a thicker, smoothie-style drink, skip this step.


    Step 3: Chill

    Refrigerate for 30 minutes, or serve immediately over plenty of ice.


    Step 4: Garnish

    Top with:

    ๐Ÿ“ Fresh strawberry slices
    ๐Ÿ‹ Lemon slices
    ๐ŸŒฟ Mint leaves

    For a sparkling version, replace 1 cup of the water with chilled sparkling water just before serving.


    Extra Recipe Tips & Variations โœจ

    ๐Ÿซง Sparkling Strawberry Ginger

    Use sparkling water instead of part of the still water.

    ๐ŸŠ Citrus Twist

    Add fresh orange juice for extra sweetness and flavor.

    ๐ŸŒฟ Herbal Version

    Blend in a few basil or mint leaves.

    ๐Ÿฅญ Tropical Cooler

    Add mango or pineapple chunks before blending.

    ๐ŸŒถ๏ธ Spicy Kick

    Use a little extra ginger or a pinch of cayenne for a warming finish.


    Flavor Upgrades / Secret Tips ๐Ÿ”ฅ

    โœ… Use ripe, sweet strawberries for the best flavor.

    โœ… Fresh ginger gives a brighter taste than ground ginger.

    โœ… Chill all ingredients before blending for an extra-refreshing drink.

    โœ… Adjust the sweetness depending on how ripe your strawberries are.


    Serving Ideas ๐Ÿฝ๏ธ

    Perfect for:

    โ˜€๏ธ Summer afternoons
    ๐Ÿฅž Brunch
    ๐ŸŽ‰ Parties
    ๐Ÿ“ Picnics
    ๐Ÿฅ— Light lunches

    Pair with:

    • Fruit salad
    • Tea sandwiches
    • Grilled chicken
    • Fresh pastries

    Storage Tips ๐Ÿฅก

    Refrigerator: Store in a sealed pitcher or jar for up to 2 days. Stir or shake before serving, as natural separation may occur.

    Freezer: Freeze into ice cube trays and blend later for a frozen slush.


    Nutrition Facts (Approximate)

    Per serving:

    • Calories: 70โ€“100 kcal
    • Protein: 1 g
    • Carbohydrates: 18โ€“22 g
    • Fat: 0 g

    (Values vary depending on the sweetener used.)


    Frequently Asked Questions (Q&A)

    Q: Can I use frozen strawberries?
    A: Yes! Let them thaw slightly or blend with a little extra water.

    Q: Is the drink very spicy?
    A: No. One tablespoon of fresh ginger adds a mild warmth. Add more if you like a stronger ginger flavor.

    Q: Can I make it without sweetener?
    A: Absolutely. If your strawberries are very ripe, you may not need any added sweetener.

    Q: Can I make this into a smoothie?
    A: Yes! Add a banana or Greek yogurt for a thicker, creamier drink.

    Q: Can I prepare it ahead of time?
    A: Yes. Store it in the refrigerator and stir well before serving.


    Social Media Captions โค๏ธ

    Facebook Style:

    “Fresh, fruity, and incredibly refreshing! ๐Ÿ“๐Ÿซš This homemade Strawberry Ginger Drink is the perfect balance of sweet strawberries and zesty gingerโ€”ideal for hot summer days.”

    Instagram Style:

    “Sweet strawberries + fresh ginger = the ultimate refreshing sip! ๐Ÿ“โœจ”

    Short Viral Caption:

    “The drink you’ll want all summer long! ๐Ÿน๐Ÿ“”

    Family Memory Style:

    “Simple ingredients, fresh flavors, and moments shared together. โค๏ธ This Strawberry Ginger Drink is as refreshing as it is beautiful.”


    Final Food Description ๐Ÿด

    Strawberry Ginger Drink is a refreshing homemade beverage made with juicy strawberries, fresh ginger, lemon juice, and a touch of natural sweetness. Light, fruity, and full of vibrant flavor, it’s the perfect drink to enjoy on warm days or serve at any gathering. ๐Ÿ“๐Ÿซš๐Ÿ‹โœจ

  • Bang Bang Chicken Fried Rice

    Bang Bang Chicken Fried Rice

    (Spicy, Creamy & Better Than Takeout!)

    This Bang Bang Chicken Fried Rice is loaded with juicy chicken, fluffy fried rice, colorful vegetables, and a creamy, sweet-and-spicy Bang Bang sauce. It’s a quick one-pan meal that’s packed with bold flavor and ready in just 30 minutesโ€”perfect for busy weeknights or meal prep.


    Full Recipe (Ingredients + Instructions)

    Ingredients

    For the Chicken:

    • 1ยฝ pounds boneless, skinless chicken breasts or thighs, cut into bite-sized pieces
    • 1 tablespoon vegetable oil
    • 1 teaspoon garlic powder
    • 1 teaspoon onion powder
    • 1 teaspoon smoked paprika
    • ยฝ teaspoon salt
    • ยฝ teaspoon black pepper

    For the Fried Rice:

    • 4 cups cooked and chilled jasmine rice (day-old rice works best)
    • 2 tablespoons vegetable oil
    • 2 eggs, lightly beaten
    • 1 cup frozen peas and carrots
    • ยฝ cup diced onion
    • 3 cloves garlic, minced
    • 2 green onions, sliced
    • 2 tablespoons soy sauce
    • 1 tablespoon sesame oil

    Bang Bang Sauce:

    • ยฝ cup mayonnaise
    • ยผ cup sweet chili sauce
    • 1 tablespoon Sriracha (or more to taste)
    • 1 tablespoon honey
    • 1 teaspoon rice vinegar

    Whisk together until smooth.


    Garnish:

    • Green onions
    • Sesame seeds
    • Extra Bang Bang sauce
    • Red pepper flakes (optional)

    Instructions

    Step 1: Cook the Chicken

    Season the chicken with:

    • Garlic powder
    • Onion powder
    • Smoked paprika
    • Salt
    • Black pepper

    Heat vegetable oil in a large skillet over medium-high heat.

    Cook the chicken for 6โ€“8 minutes, stirring occasionally, until golden and fully cooked.

    Transfer to a plate.


    Step 2: Cook the Eggs

    In the same skillet, pour in the beaten eggs.

    Scramble until just set, then remove and set aside.


    Step 3: Make the Fried Rice

    Add a little more oil if needed.

    Sautรฉ:

    • Onion
    • Garlic
    • Peas and carrots

    Cook for 3โ€“4 minutes.

    Add the chilled rice and stir-fry for 4โ€“5 minutes.

    Mix in:

    • Soy sauce
    • Sesame oil

    Step 4: Combine Everything

    Return the chicken and scrambled eggs to the skillet.

    Pour in about half of the Bang Bang sauce and toss everything together until evenly coated and heated through.


    Step 5: Serve

    Top with:

    ๐ŸŒฟ Green onions
    ๐Ÿฅข Sesame seeds
    ๐ŸŒถ๏ธ Extra Bang Bang sauce
    ๐Ÿ”ฅ Red pepper flakes (optional)

    Serve hot and enjoy!


    Extra Recipe Tips & Variations โœจ

    ๐ŸŒถ๏ธ Extra Spicy

    Add more Sriracha, chili garlic sauce, or crushed red pepper flakes.


    ๐Ÿฆ Seafood Version

    Replace the chicken with shrimp for Bang Bang Shrimp Fried Rice.


    ๐Ÿฅฆ Veggie-Packed

    Add broccoli, bell peppers, mushrooms, corn, or snap peas.


    ๐Ÿง€ Cheesy Twist

    Sprinkle with shredded mozzarella for a fun fusion version.


    ๐Ÿ Sweet & Savory

    Add diced pineapple for a tropical flavor.


    Flavor Upgrades / Secret Tips ๐Ÿ”ฅ

    โœ… Use day-old cold rice for the best fried rice texture.

    โœ… Cook over high heat for a lightly smoky flavor.

    โœ… Don’t overcrowd the panโ€”cook in batches if needed.

    โœ… Drizzle extra Bang Bang sauce on top just before serving.

    โœ… Finish with a squeeze of fresh lime juice for extra brightness.


    Serving Ideas ๐Ÿฝ๏ธ

    Pair with:

    ๐ŸฅŸ Egg rolls
    ๐Ÿฅ— Asian cucumber salad
    ๐Ÿฅฆ Steamed broccoli
    ๐Ÿฅข Crab Rangoon
    ๐Ÿฅฌ Lettuce wraps

    Perfect for:

    • Weeknight dinners
    • Meal prep
    • Family meals
    • Potlucks
    • Takeout-inspired nights

    Storage & Reheating Tips ๐Ÿฅก

    Refrigerator:

    Store in an airtight container for up to 4 days.

    Freezer:

    Freeze for up to 2 months.

    Reheating:

    Warm in a skillet over medium heat or microwave until heated through. Add a splash of water if the rice seems dry.


    Nutrition Facts (Approximate)

    Per serving:

    • Calories: 540โ€“620 kcal
    • Protein: 30โ€“35 g
    • Carbohydrates: 45โ€“55 g
    • Fat: 24โ€“30 g

    (Values vary depending on ingredients and sauce used.)


    Frequently Asked Questions (Q&A)

    Q: Can I use freshly cooked rice?
    A: Yes, but let it cool completely first. Chilled day-old rice gives the best texture.

    Q: Can I use rotisserie chicken?
    A: Absolutely! Simply add it when combining the rice and sauce.

    Q: Is Bang Bang sauce very spicy?
    A: It’s mildly spicy, but you can easily adjust the heat by adding more or less Sriracha.

    Q: Can I make it gluten-free?
    A: Yesโ€”use gluten-free soy sauce or tamari and check that your sweet chili sauce is gluten-free.

    Q: What’s the best rice for fried rice?
    A: Jasmine rice is ideal, but long-grain white rice also works well.


    Social Media Captions โค๏ธ

    Facebook Style:

    “This Bang Bang Chicken Fried Rice is packed with bold flavor! ๐Ÿ—๐Ÿš๐Ÿ”ฅ Juicy chicken, perfectly fried rice, colorful veggies, and a creamy sweet-and-spicy sauce make this one-pan meal even better than takeout.”

    Instagram Style:

    “Creamy, spicy, and loaded with flavorโ€”this is fried rice at its best! ๐Ÿš๐Ÿ”ฅโœจ”

    Short Viral Caption:

    “Skip the takeoutโ€”make this instead! ๐Ÿ˜๐Ÿ—”

    Family Memory Style:

    “The best dinners are the ones everyone looks forward to. โค๏ธ This Bang Bang Chicken Fried Rice is quick, comforting, and guaranteed to disappear fast!”


    Final Food Description ๐Ÿด

    Bang Bang Chicken Fried Rice is a delicious one-pan meal featuring tender seasoned chicken, fluffy fried rice, colorful vegetables, scrambled eggs, and a creamy sweet-and-spicy Bang Bang sauce. It’s a quick, satisfying recipe that delivers restaurant-quality flavor in every bite. ๐Ÿ—๐Ÿš๐Ÿ”ฅโœจ

  • Amish Baked Custard

    Amish Baked Custard

    This Amish Baked Custard is a timeless old-fashioned dessert that’s silky smooth, creamy, and delicately sweet. Made with simple pantry ingredients like eggs, milk, sugar, and vanilla, this comforting classic is baked in a gentle water bath to create a rich, velvety texture. It’s perfect served warm or chilled and topped with a sprinkle of freshly grated nutmeg.


    โฑ Prep Time

    • Prep Time: 10 minutes
    • Cook Time: 45โ€“50 minutes
    • Total Time: 1 hour
    • Servings: 6

    ๐Ÿ›’ Ingredients

    • 4 large eggs
    • ยฝ cup granulated sugar
    • ยผ teaspoon salt
    • 2 teaspoons pure vanilla extract
    • 3 cups whole milk, warmed
    • ยผ teaspoon ground cinnamon (optional)
    • Freshly grated nutmeg, for topping

    Optional Toppings

    • Whipped cream
    • Fresh berries
    • Caramel sauce
    • Ground cinnamon
    • Toasted pecans

    ๐Ÿ‘ฉโ€๐Ÿณ Instructions

    Step 1: Preheat the Oven

    Preheat your oven to 325ยฐF (163ยฐC).

    Bring a kettle of water to a boil for the water bath.

    Lightly grease six 6-ounce ramekins or a 1ยฝ-quart baking dish.


    Step 2: Make the Custard

    In a large mixing bowl, whisk together:

    • Eggs
    • Sugar
    • Salt

    Whisk until the sugar has dissolved and the mixture is smooth.

    Stir in the vanilla extract.

    Slowly pour the warm milk into the egg mixture while whisking constantly. This helps prevent the eggs from scrambling.

    If using cinnamon, stir it in now.


    Step 3: Fill the Dishes

    Divide the custard evenly among the ramekins.

    Sprinkle a light dusting of freshly grated nutmeg over the top of each one.


    Step 4: Prepare the Water Bath

    Place the filled ramekins into a large baking dish.

    Carefully pour hot water into the baking dish until it reaches about halfway up the sides of the ramekins.

    The water bath helps the custard bake gently and prevents it from curdling.


    Step 5: Bake

    Bake for 45โ€“50 minutes, or until the custard is just set.

    The centers should still have a slight jiggle when gently shaken.

    A knife inserted near the center should come out mostly clean.


    Step 6: Cool

    Carefully remove the ramekins from the water bath.

    Let them cool for about 20 minutes.

    Serve warm, or refrigerate for at least 2 hours for a chilled dessert.


    ๐Ÿฝ Serving Suggestions

    This creamy custard is delicious served with:

    • Fresh whipped cream
    • Sliced strawberries or blueberries
    • Warm caramel sauce
    • Crushed cinnamon cookies
    • Toasted pecans or almonds
    • A cup of hot coffee or tea

    ๐Ÿ‘ฉโ€๐Ÿณ Amish Baking Tips

    โœ… Warm the milk before mixingโ€”it creates a smoother custard.

    โœ… Don’t overbeat the eggs, or the custard may become airy instead of silky.

    โœ… Bake in a water bath to ensure gentle, even cooking.

    โœ… Remove the custard while the center still has a slight wobble; it will continue to set as it cools.

    โœ… Freshly grated nutmeg gives the most authentic Amish flavor.


    ๐ŸŒŸ Flavor Variations

    • Add 1 teaspoon almond extract for a subtle nutty flavor.
    • Stir in a pinch of pumpkin pie spice for a cozy fall twist.
    • Top with homemade fruit preserves before serving.
    • Add a thin layer of caramel to the bottom of each ramekin before pouring in the custard.
    • Sprinkle with brown sugar and briefly broil for a lightly caramelized top.

    ๐Ÿฅฃ Storage

    Store covered in the refrigerator for up to 4 days.

    Do not freeze, as the texture may become grainy after thawing.

    Serve chilled straight from the refrigerator or let sit at room temperature for 10โ€“15 minutes before serving.


    ๐Ÿ“Š Nutrition (Per Serving)

    • Calories: 190
    • Protein: 8g
    • Carbohydrates: 18g
    • Fat: 9g
    • Saturated Fat: 5g
    • Cholesterol: 145mg
    • Sodium: 150mg
    • Sugar: 17g

    โ“ Frequently Asked Questions

    Can I use 2% milk instead of whole milk?
    Yes, but whole milk creates a richer, creamier custard.

    Why is my custard watery?
    It may be underbaked. The edges should be set, while the center should only jiggle slightly.

    Can I make it ahead of time?
    Absolutely! Baked custard tastes even better after chilling for several hours.

    Why use a water bath?
    A water bath helps the custard cook gently and evenly, preventing it from curdling or cracking.


    โค๏ธ Final Description

    Rich, silky, and delicately sweet, Amish Baked Custard is a comforting dessert that celebrates the beauty of simple ingredients. With its smooth texture, warm vanilla flavor, and a hint of freshly grated nutmeg, this classic Amish favorite is perfect for family dinners, holiday gatherings, or anytime you crave an old-fashioned homemade treat.

  • Spicy Garlic Butter Shrimp Skillet

    Spicy Garlic Butter Shrimp Skillet

    This Spicy Garlic Butter Shrimp Skillet is packed with juicy shrimp, rich buttery garlic sauce, and just the right amount of heat. It’s a quick restaurant-quality meal that comes together in under 20 minutes, making it perfect for busy weeknights. Serve it with crusty bread, rice, pasta, or mashed potatoes to soak up every drop of the delicious sauce.


    โฑ Prep Time

    • Prep Time: 10 minutes
    • Cook Time: 8 minutes
    • Total Time: 18 minutes
    • Servings: 4

    ๐Ÿ›’ Ingredients

    For the Shrimp

    • 2 pounds large shrimp, peeled and deveined
    • 1 teaspoon salt
    • ยฝ teaspoon black pepper
    • 1 teaspoon smoked paprika
    • ยฝ teaspoon onion powder
    • ยฝ teaspoon garlic powder
    • ยผ teaspoon cayenne pepper (optional for extra heat)

    For the Garlic Butter Sauce

    • 6 tablespoons unsalted butter
    • 8 garlic cloves, minced
    • 1 tablespoon olive oil
    • 1 teaspoon crushed red pepper flakes
    • 1 teaspoon Italian seasoning
    • Juice of 1 lemon
    • Zest of ยฝ lemon
    • 2 tablespoons chopped fresh parsley
    • 2 tablespoons grated Parmesan cheese (optional)

    ๐Ÿ‘ฉโ€๐Ÿณ Instructions

    Step 1: Season the Shrimp

    Pat the shrimp dry with paper towels.

    In a large bowl, toss the shrimp with:

    • Salt
    • Black pepper
    • Smoked paprika
    • Onion powder
    • Garlic powder
    • Cayenne pepper

    Mix until evenly coated.


    Step 2: Heat the Skillet

    Heat a large cast-iron skillet over medium-high heat.

    Add olive oil and 2 tablespoons of butter.

    Once the butter has melted, swirl the pan to coat the bottom.


    Step 3: Cook the Shrimp

    Arrange the shrimp in a single layer.

    Cook for 1ยฝโ€“2 minutes per side until pink and opaque.

    Do not overcook.

    Transfer the shrimp to a plate.


    Step 4: Make the Sauce

    Reduce heat to medium.

    Add the remaining butter.

    Stir in:

    • Minced garlic
    • Red pepper flakes
    • Italian seasoning

    Cook for about 1 minute, just until fragrant.

    Do not let the garlic brown.


    Step 5: Finish the Dish

    Return the shrimp to the skillet.

    Pour in the lemon juice.

    Add lemon zest.

    Toss everything gently until coated in the buttery garlic sauce.

    Sprinkle with fresh parsley and Parmesan cheese if using.

    Serve immediately.


    ๐Ÿฝ Serving Ideas

    This shrimp pairs perfectly with:

    • Garlic bread
    • Buttered pasta
    • Steamed white rice
    • Creamy mashed potatoes
    • Roasted vegetables
    • Cauliflower rice
    • Fresh garden salad

    ๐Ÿ‘จโ€๐Ÿณ Chef’s Tips

    โœ… Use fresh shrimp whenever possible.

    โœ… Pat the shrimp dry before seasoning for a better sear.

    โœ… Fresh garlic provides the best flavor.

    โœ… Add a splash of white wine to the sauce for extra depth.

    โœ… Finish with extra butter for an even richer sauce.


    ๐ŸŒถ Flavor Variations

    • Add sliced mushrooms.
    • Stir in fresh spinach at the end.
    • Mix in cherry tomatoes.
    • Sprinkle with crispy bacon bits.
    • Add cooked asparagus or broccoli.
    • Toss with fettuccine for a delicious shrimp pasta.
    • Finish with a drizzle of hot honey for a sweet-and-spicy twist.

    ๐Ÿฅฃ Storage

    Store leftovers in an airtight container in the refrigerator for up to 3 days.

    Reheat gently in a skillet over low heat with a splash of butter or broth.

    Freezing is not recommended, as shrimp can become rubbery after thawing.


    ๐Ÿ“Š Nutrition (Per Serving)

    • Calories: 385
    • Protein: 35g
    • Carbohydrates: 3g
    • Fat: 26g
    • Saturated Fat: 14g
    • Cholesterol: 310mg
    • Sodium: 820mg
    • Fiber: 0g
    • Sugar: 0g

    โ“ Frequently Asked Questions

    Can I use frozen shrimp?
    Yes. Thaw completely and pat dry before cooking.

    Can I make it less spicy?
    Absolutely! Simply reduce or omit the cayenne pepper and red pepper flakes.

    What type of shrimp works best?
    Large or jumbo shrimp (21โ€“25 count) are ideal because they stay juicy and cook quickly.

    Can I make this dairy-free?
    Yes. Replace the butter with a dairy-free butter alternative or use extra olive oil.


    โค๏ธ Final Description

    Tender, juicy shrimp are seared to perfection and coated in a rich garlic butter sauce with a hint of lemon and just the right kick of spice. This easy one-pan meal is bursting with bold flavor, ready in under 20 minutes, and perfect for serving over rice, pasta, or with warm crusty bread for an unforgettable dinner.

  • Honey Cajun Garlic Shrimp

    Honey Cajun Garlic Shrimp

    (Sweet, Spicy & Buttery Shrimp Ready in 20 Minutes)

    This Honey Cajun Garlic Shrimp is packed with bold Cajun spices, rich garlic butter, and a touch of sweet honey that perfectly balances the heat. Juicy shrimp are quickly seared until tender, then coated in a glossy, flavorful sauce that’s perfect over rice, pasta, or with crusty bread.

    It’s an easy one-pan recipe that’s perfect for busy weeknights but impressive enough for guests.


    Full Recipe (Ingredients + Instructions)

    Ingredients

    For the Shrimp:

    • 1ยฝ pounds large shrimp, peeled and deveined
    • 2 tablespoons olive oil
    • 2 tablespoons unsalted butter
    • 5 cloves garlic, minced
    • 1 tablespoon Cajun seasoning
    • 1 teaspoon smoked paprika
    • ยฝ teaspoon onion powder
    • ยผ teaspoon cayenne pepper (optional)
    • Salt and black pepper, to taste

    For the Honey Garlic Sauce:

    • ยผ cup honey
    • 2 tablespoons fresh lemon juice
    • 1 tablespoon soy sauce
    • 1 tablespoon butter
    • 1 teaspoon hot sauce (optional)
    • 1 teaspoon chopped fresh parsley

    For Garnish:

    • Fresh parsley
    • Lemon wedges
    • Red pepper flakes (optional)

    Instructions

    Step 1: Season the Shrimp

    Pat the shrimp dry with paper towels.

    Season with:

    • Cajun seasoning
    • Smoked paprika
    • Onion powder
    • Salt
    • Black pepper
    • Cayenne (if using)

    Toss until evenly coated.


    Step 2: Sear the Shrimp

    Heat olive oil and butter in a large skillet over medium-high heat.

    Add the shrimp in a single layer.

    Cook for 2 minutes per side, or until pink and just cooked through.

    Transfer shrimp to a plate.


    Step 3: Make the Sauce

    Reduce heat to medium.

    Add:

    • Butter
    • Garlic

    Cook for 30โ€“60 seconds, until fragrant.

    Stir in:

    • Honey
    • Lemon juice
    • Soy sauce
    • Hot sauce (optional)

    Simmer for 2โ€“3 minutes until slightly thickened.


    Step 4: Combine

    Return the shrimp to the skillet.

    Toss to coat in the sauce and cook for 1 minute.

    Sprinkle with fresh parsley.


    Step 5: Serve

    Serve immediately with:

    ๐Ÿš Steamed rice
    ๐Ÿ Buttered pasta
    ๐Ÿฅฆ Roasted vegetables
    ๐Ÿฅ– Crusty bread


    Extra Recipe Tips & Variations โœจ

    ๐ŸŒถ๏ธ Extra Spicy

    Add more cayenne pepper or a pinch of crushed red pepper flakes.


    ๐Ÿฅฅ Creamy Cajun Shrimp

    Stir in ยฝ cup heavy cream for a rich Cajun cream sauce.


    ๐ŸŒฎ Cajun Shrimp Tacos

    Serve in warm tortillas with shredded cabbage and avocado.


    ๐Ÿš Cajun Shrimp Rice Bowls

    Pair with rice, black beans, corn, and sliced avocado.


    ๐Ÿฅฆ Low-Carb Version

    Serve over cauliflower rice or zucchini noodles.


    Flavor Upgrades / Secret Tips ๐Ÿ”ฅ

    โœ… Pat the shrimp dry before seasoning for a better sear.

    โœ… Don’t overcook the shrimpโ€”they only need a few minutes.

    โœ… Use fresh garlic for the best flavor.

    โœ… Add a squeeze of fresh lemon juice just before serving.

    โœ… Adjust the honey and Cajun seasoning to suit your preferred balance of sweet and spicy.


    Serving Ideas ๐Ÿฝ๏ธ

    Perfect with:

    • Garlic mashed potatoes
    • Buttered rice
    • Creamy grits
    • Caesar salad
    • Grilled asparagus
    • Corn on the cob

    Great for:

    • Weeknight dinners
    • Date nights
    • BBQs
    • Family meals
    • Meal prep

    Storage & Reheating Tips ๐Ÿฅก

    Refrigerator:

    Store in an airtight container for up to 3 days.

    Reheating:

    Warm gently in a skillet over low heat for a few minutes. Avoid overcooking.

    Freezer:

    Not recommended, as shrimp can become rubbery after thawing.


    Nutrition Facts (Approximate)

    Per serving:

    • Calories: 320โ€“380 kcal
    • Protein: 30โ€“35 g
    • Carbohydrates: 15โ€“20 g
    • Fat: 14โ€“18 g

    (Values vary depending on ingredients and serving size.)


    Frequently Asked Questions (Q&A)

    Q: Can I use frozen shrimp?
    A: Yes. Thaw completely and pat dry before seasoning and cooking.

    Q: Is Cajun seasoning very spicy?
    A: Most blends are mildly spicy. You can increase or reduce the heat by adjusting the cayenne pepper.

    Q: Can I use pre-cooked shrimp?
    A: Yes, but only add them to the sauce at the end and heat briefly to avoid overcooking.

    Q: What size shrimp works best?
    A: Large or jumbo shrimp provide the juiciest results.

    Q: Can I make this dairy-free?
    A: Yes. Replace the butter with olive oil or a dairy-free butter alternative.


    Social Media Captions โค๏ธ

    Facebook Style:

    “Made this Honey Cajun Garlic Shrimp tonight and it was absolutely incredible! ๐Ÿค๐Ÿ”ฅ๐Ÿฏ Juicy shrimp coated in a sweet, buttery garlic sauce with just the right amount of Cajun spice. Better than takeout and ready in no time!”

    Instagram Style:

    “Sweet. Spicy. Buttery. Every bite is packed with flavor! ๐Ÿคโœจ”

    Short Viral Caption:

    “One skillet. Twenty minutes. Endless flavor! ๐Ÿ˜๐Ÿ”ฅ”

    Family Memory Style:

    “The best meals are the ones that bring everyone together. โค๏ธ This Honey Cajun Garlic Shrimp is simple to make, full of bold flavor, and perfect for sharing around the table.”


    Final Food Description for Posting ๐Ÿด

    Honey Cajun Garlic Shrimp is a quick and flavorful one-pan dish featuring juicy shrimp coated in a buttery garlic sauce with sweet honey, bold Cajun spices, and a splash of fresh lemon. Ready in just 20 minutes, this irresistible recipe is perfect served over rice, pasta, or with warm crusty bread. ๐Ÿค๐Ÿ”ฅ๐Ÿฏโœจ

  • Cheesecake Fruit Salad

    Cheesecake Fruit Salad

    (Creamy, Dreamy Fruit Dessert Salad with Cheesecake Flavor)

    This Cheesecake Fruit Salad is the perfect combination of fresh fruit and creamy cheesecake sweetness! Juicy berries, tropical fruit, and a fluffy cheesecake-inspired dressing come together to create an irresistible dessert thatโ€™s perfect for holidays, potlucks, BBQs, and family gatherings.

    It tastes like a slice of cheesecake mixed with a refreshing fruit saladโ€”easy, beautiful, and always a crowd favorite.


    Full Recipe (Ingredients + Instructions)

    Ingredients

    For the Creamy Cheesecake Mixture:

    • 8 ounces cream cheese, softened
    • 1 cup powdered sugar
    • 1 teaspoon vanilla extract
    • 1 cup heavy whipping cream
    • 1 cup Greek yogurt or sour cream (optional)
    • 1 teaspoon lemon juice

    For the Fruit:

    • 2 cups strawberries, sliced
    • 1 cup blueberries
    • 1 cup raspberries
    • 1 cup blackberries
    • 2 cups grapes, halved
    • 2 bananas, sliced (add right before serving)
    • 1 cup pineapple chunks
    • 1 cup mandarin oranges, drained

    Optional Toppings:

    • Mini marshmallows
    • Shredded coconut
    • Chopped pecans
    • White chocolate chips
    • Fresh mint leaves

    Instructions

    Step 1: Prepare the Cheesecake Dressing

    Beat softened cream cheese until smooth.

    Add:

    • Powdered sugar
    • Vanilla extract
    • Lemon juice

    Mix until creamy.

    Slowly add heavy whipping cream and beat until fluffy.

    Fold in Greek yogurt or sour cream if using.


    Step 2: Prepare the Fruit

    Wash and dry all fruit.

    Cut larger fruits into bite-sized pieces.

    Keep bananas separate until ready to serve to prevent browning.


    Step 3: Combine

    Gently fold fruit into the cheesecake mixture.

    Mix carefully so the fruit stays intact.


    Step 4: Chill

    Cover and refrigerate for:

    1โ€“2 hours

    before serving.

    Add bananas and delicate fruit just before serving.


    Extra Recipe Tips & Variations โœจ

    ๐Ÿ“ Strawberry Cheesecake Salad

    Use extra strawberries with graham cracker crumbs sprinkled on top.


    ๐Ÿซ Chocolate Cheesecake Fruit Salad

    Add mini chocolate chips or chocolate shavings.


    ๐Ÿฅฅ Tropical Version

    Use:

    • Mango
    • Pineapple
    • Coconut

    for a tropical twist.


    ๐Ÿช Cheesecake Crunch Version

    Add crushed graham crackers right before serving for a cheesecake crust flavor.


    ๐Ÿ’ Cherry Cheesecake Salad

    Add cherry pie filling for a classic cherry cheesecake taste.


    Flavor Upgrades / Secret Tips ๐Ÿ”ฅ

    โœ… Use cold heavy cream for the fluffiest texture.

    โœ… Dry fruit well so the salad doesnโ€™t become watery.

    โœ… Soften cream cheese completely for a smooth dressing.

    โœ… Add graham cracker crumbs on top for true cheesecake flavor.

    โœ… Chill before servingโ€”the flavors blend beautifully.


    Serving Ideas ๐Ÿฝ๏ธ

    Perfect for:

    ๐Ÿ“ Summer BBQs
    ๐ŸŽ‰ Parties
    ๐Ÿฆƒ Thanksgiving
    ๐ŸŽ„ Christmas gatherings
    ๐Ÿฅ‚ Brunches
    ๐Ÿ‘จโ€๐Ÿ‘ฉโ€๐Ÿ‘ง Family dinners

    Serve in:

    • A large glass bowl
    • Individual dessert cups
    • Small mason jars

    Storage Tips ๐Ÿฅก

    Refrigerator:

    Store covered for 2โ€“3 days.

    For best texture, add bananas and crunchy toppings right before serving.

    Freezing:

    Not recommended because the creamy dressing and fruit texture change after thawing.


    Nutrition Facts (Approximate)

    Per serving:

    • Calories: 250โ€“350 kcal
    • Protein: 5โ€“7 g
    • Carbohydrates: 35โ€“45 g
    • Fat: 12โ€“18 g

    (Depends on fruit and dressing ingredients.)


    Frequently Asked Questions (Q&A)

    Q: Can I make cheesecake fruit salad ahead of time?
    A: Yes! Make it a few hours ahead and keep it chilled.

    Q: What fruit works best?
    A: Berries, grapes, pineapple, and mandarin oranges hold up well.

    Q: Can I use Cool Whip instead of whipped cream?
    A: Yes, it makes the recipe quicker and lighter.

    Q: How do I keep fruit salad from getting watery?
    A: Wash fruit ahead and dry it completely before mixing.

    Q: Can I make it without cream cheese?
    A: Yes, but youโ€™ll lose the cheesecake flavor.


    Social Media Captions โค๏ธ

    Facebook Style:

    “Made this Cheesecake Fruit Salad today and it disappeared so fast! ๐Ÿ“๐Ÿฐโœจ Fresh fruit wrapped in a creamy cheesecake fillingโ€”itโ€™s the perfect sweet treat for any gathering.”

    Instagram Style:

    “Fruit salad got a cheesecake makeover and Iโ€™m obsessed ๐Ÿ“๐Ÿคโœจ”

    Short Viral Caption:

    “The dessert salad everyone asks for! ๐Ÿ˜๐Ÿฐ”

    Family Memory Style:

    “Some recipes are made for sharing โค๏ธ Sweet fruit, creamy cheesecake flavor, and memories created around the table with the people you love.”


    Final Food Description for Posting ๐Ÿด

    Cheesecake Fruit Salad is a creamy, refreshing dessert made with fresh seasonal fruit folded into a sweet cheesecake-inspired filling. With juicy berries, tropical flavors, and a rich creamy texture, this easy no-bake treat is perfect for celebrations, holidays, and summer gatherings. ๐Ÿ“๐Ÿฐโœจ

  • Easy Shrimp Alfredo

    Easy Shrimp Alfredo

    (Creamy Garlic Alfredo Pasta with Juicy Shrimp)

    This Easy Shrimp Alfredo is a restaurant-style dinner made right at home! Tender shrimp are cooked with garlic and tossed with fettuccine pasta in a rich, creamy Parmesan Alfredo sauce.

    Simple ingredients, incredible flavor, and ready in under an hourโ€”this is the perfect cozy dinner for busy weeknights or special occasions.


    Full Recipe (Ingredients + Instructions)

    Ingredients

    For the Shrimp:

    • 1ยฝ pounds large shrimp, peeled and deveined
    • 2 tablespoons olive oil
    • 2 tablespoons butter
    • 3 cloves garlic, minced
    • 1 teaspoon paprika
    • ยฝ teaspoon Italian seasoning
    • ยฝ teaspoon salt
    • ยฝ teaspoon black pepper
    • 1 tablespoon lemon juice (optional)

    For the Alfredo Sauce:

    • 4 tablespoons butter
    • 4 cloves garlic, minced
    • 2 cups heavy cream
    • 1ยฝ cups freshly grated Parmesan cheese
    • ยฝ cup cream cheese (optional, for extra creaminess)
    • ยฝ teaspoon Italian seasoning
    • Salt and black pepper, to taste
    • Pinch of nutmeg (optional)

    Pasta:

    • 12 ounces fettuccine pasta
    • Reserved pasta water (ยฝโ€“1 cup)

    For Garnish:

    • Fresh parsley, chopped
    • Extra Parmesan cheese
    • Red pepper flakes (optional)

    Instructions

    Step 1: Cook the Pasta

    Bring a large pot of salted water to a boil.

    Cook fettuccine according to package directions until al dente.

    Reserve about 1 cup of pasta water before draining.


    Step 2: Cook the Shrimp

    Pat shrimp dry.

    Season with:

    • Paprika
    • Italian seasoning
    • Salt
    • Pepper

    Heat olive oil and butter in a large skillet.

    Add shrimp and cook:

    2โ€“3 minutes per side

    until pink and cooked through.

    Remove shrimp and set aside.


    Step 3: Make the Alfredo Sauce

    In the same skillet, melt butter.

    Add garlic and cook for:

    30 seconds

    until fragrant.

    Pour in heavy cream.

    Simmer gently for:

    3โ€“5 minutes

    Add:

    • Parmesan cheese
    • Cream cheese (if using)
    • Italian seasoning
    • Black pepper
    • Nutmeg

    Stir until smooth and creamy.


    Step 4: Combine Everything

    Add cooked pasta to the sauce.

    Toss until coated.

    Add pasta water as needed to reach the perfect creamy consistency.

    Return shrimp to the pan.


    Step 5: Serve

    Top with:

    โœจ Fresh parsley
    โœจ Parmesan cheese
    โœจ Red pepper flakes

    Serve immediately.


    Extra Recipe Tips & Variations โœจ

    ๐Ÿ— Chicken Alfredo

    Replace shrimp with grilled or roasted chicken.


    ๐Ÿฅฆ Shrimp Broccoli Alfredo

    Add steamed broccoli for a complete meal.


    ๐ŸŒถ๏ธ Cajun Shrimp Alfredo

    Season shrimp with Cajun seasoning for a spicy twist.


    ๐Ÿ„ Mushroom Alfredo

    Add sautรฉed mushrooms for extra flavor.


    ๐Ÿง€ Three Cheese Alfredo

    Add mozzarella and Romano cheese for a richer sauce.


    Flavor Upgrades / Secret Tips ๐Ÿ”ฅ

    โœ… Use freshly grated Parmesanโ€”it melts much better than pre-shredded.

    โœ… Donโ€™t boil the cream sauce too hard; gentle heat keeps it smooth.

    โœ… Cook shrimp separately so they stay tender.

    โœ… Add pasta water to make the sauce silky and restaurant-quality.

    โœ… Fresh garlic makes a huge difference.


    Serving Ideas ๐Ÿฝ๏ธ

    Serve with:

    ๐Ÿฅ– Garlic bread
    ๐Ÿฅ— Caesar salad
    ๐Ÿท White wine
    ๐Ÿฅฆ Roasted vegetables
    ๐Ÿ‹ Lemon wedges

    Perfect for:

    • Date night
    • Family dinner
    • Weekend meals
    • Dinner parties
    • Special occasions

    Storage & Reheating Tips ๐Ÿฅก

    Refrigerator:

    Store leftovers in an airtight container for 3 days.

    Reheating:

    Warm gently on the stove with a splash of milk or cream.

    Freezing:

    Not recommendedโ€”the cream sauce may separate.


    Nutrition Facts (Approximate)

    Per serving:

    • Calories: 650โ€“750 kcal
    • Protein: 35โ€“45 g
    • Carbohydrates: 55โ€“65 g
    • Fat: 35โ€“45 g

    (Varies depending on pasta and sauce amount.)


    Frequently Asked Questions (Q&A)

    Q: Can I use frozen shrimp?
    A: Yes. Thaw completely and pat dry before cooking.

    Q: What pasta works best with Alfredo?
    A: Fettuccine is classic, but linguine, penne, or spaghetti also work.

    Q: How do I keep Alfredo sauce creamy?
    A: Use low heat and add pasta water if it becomes too thick.

    Q: Can I make Alfredo without heavy cream?
    A: Yes, use half-and-half, but the sauce will be slightly lighter.

    Q: Why is my Alfredo sauce grainy?
    A: High heat or low-quality cheese can cause separation. Use fresh Parmesan and gentle heat.


    Social Media Captions โค๏ธ

    Facebook Style:

    “Made this Easy Shrimp Alfredo tonight and it tasted like a restaurant favorite! ๐Ÿค๐Ÿโœจ Creamy garlic sauce, tender shrimp, and perfectly cooked pastaโ€”comfort food at its best.”

    Instagram Style:

    “Creamy Alfredo + juicy shrimp = the dinner everyone loves ๐Ÿค๐Ÿค”

    Short Viral Caption:

    “A restaurant meal made right at home! ๐Ÿ˜๐Ÿ”

    Family Memory Style:

    “Some recipes bring everyone to the table โค๏ธ This homemade Shrimp Alfredo is creamy, comforting, and made for sharing with the people you love.”


    Final Food Description for Posting ๐Ÿด

    Easy Shrimp Alfredo is a creamy, comforting pasta dish made with tender garlic-seasoned shrimp, silky Parmesan Alfredo sauce, and perfectly cooked fettuccine. Rich, flavorful, and easy enough for a weeknight dinner, this homemade recipe brings restaurant-quality flavor straight to your table. ๐Ÿค๐Ÿโœจ

  • Crispy Chicken Tenders with Dipping Sauce

    Crispy Chicken Tenders with Dipping Sauce

    (Golden, Crunchy Homemade Chicken Strips with the Perfect Sauce)

    These Crispy Chicken Tenders are better than takeout! Juicy strips of chicken are coated in a seasoned crispy breading and fried or baked until golden brown. Served with a creamy homemade dipping sauce, theyโ€™re a family favorite for dinner, game day, or an easy weeknight meal.


    Full Recipe (Ingredients + Instructions)

    Ingredients

    For the Chicken Tenders:

    • 2 pounds chicken tenders (or chicken breasts cut into strips)
    • 1 cup buttermilk
    • 1 large egg
    • 1 tablespoon hot sauce (optional)
    • 2 teaspoons salt
    • 1 teaspoon black pepper
    • 1 teaspoon garlic powder
    • 1 teaspoon paprika
    • ยฝ teaspoon onion powder

    For the Crispy Coating:

    • 2 cups all-purpose flour
    • ยฝ cup cornstarch (for extra crispiness)
    • 2 teaspoons paprika
    • 1 teaspoon garlic powder
    • 1 teaspoon onion powder
    • 1 teaspoon salt
    • 1 teaspoon black pepper
    • ยฝ teaspoon cayenne pepper (optional)

    For Frying:

    • Vegetable oil

    Homemade Dipping Sauce

    Creamy Honey Mustard Sauce:

    • ยฝ cup mayonnaise
    • 3 tablespoons honey
    • 2 tablespoons yellow mustard
    • 1 tablespoon Dijon mustard
    • 1 teaspoon lemon juice
    • Pinch of salt and pepper

    Mix everything together until smooth.


    Instructions

    Step 1: Marinate the Chicken

    In a bowl combine:

    • Buttermilk
    • Egg
    • Hot sauce
    • Salt
    • Pepper
    • Garlic powder
    • Paprika
    • Onion powder

    Add chicken tenders and coat well.

    Cover and refrigerate:

    30 minutesโ€“4 hours

    (Overnight gives even more flavor.)


    Step 2: Prepare the Coating

    Mix together:

    • Flour
    • Cornstarch
    • Seasonings

    Remove chicken from marinade and coat thoroughly in the flour mixture.

    For extra crunch:

    Dip back into buttermilk mixture and coat again.


    Step 3: Cook the Chicken

    Frying Method:

    Heat oil to:

    350ยฐF (175ยฐC)

    Fry tenders for:

    4โ€“6 minutes

    until golden and cooked through.


    Air Fryer Method:

    Spray coated tenders with oil.

    Cook at:

    400ยฐF (200ยฐC)

    for:

    10โ€“14 minutes

    flipping halfway.


    Baking Method:

    Bake at:

    425ยฐF (220ยฐC)

    for:

    18โ€“22 minutes

    until crispy.


    Step 4: Serve

    Serve hot with dipping sauce.

    Enjoy with:

    ๐ŸŸ Fries
    ๐Ÿฅ— Salad
    ๐Ÿฅ’ Pickles
    ๐ŸŒฝ Coleslaw


    Extra Recipe Tips & Variations โœจ

    ๐ŸŒถ๏ธ Spicy Chicken Tenders

    Add cayenne, chili powder, and hot sauce to the coating.


    ๐Ÿง€ Parmesan Chicken Tenders

    Add grated Parmesan cheese to the breading.


    ๐Ÿฏ Sweet & Spicy Sauce

    Mix honey, hot sauce, and a little garlic.


    ๐Ÿฅ’ Ranch Chicken Tenders

    Add ranch seasoning to the flour mixture and serve with ranch dip.


    ๐Ÿ— Nashville Hot Style

    Brush fried tenders with spicy seasoned oil.


    Flavor Upgrades / Secret Tips ๐Ÿ”ฅ

    โœ… Buttermilk tenderizes the chicken and keeps it juicy.

    โœ… Cornstarch makes the coating extra crispy.

    โœ… Double coating creates that restaurant-style crunch.

    โœ… Let coated chicken rest 10 minutes before cooking so the breading sticks.

    โœ… Keep oil temperature steady for crispy results.


    Serving Ideas ๐Ÿฝ๏ธ

    Serve with:

    ๐ŸŸ French fries
    ๐Ÿฅ” Mashed potatoes
    ๐Ÿฅ— Coleslaw
    ๐ŸŒฝ Corn on the cob
    ๐Ÿฅ– Garlic bread

    Perfect for:

    • Family dinners
    • Kidsโ€™ meals
    • Game day
    • Parties
    • Meal prep

    Storage & Reheating Tips ๐Ÿฅก

    Refrigerator:

    Store cooked tenders for 3โ€“4 days.

    Reheating:

    Use an air fryer or oven at 375ยฐF (190ยฐC) to bring back the crispiness.

    Freezer:

    Freeze cooked tenders for up to 3 months.


    Nutrition Facts (Approximate)

    Per serving:

    • Calories: 400โ€“550 kcal
    • Protein: 35โ€“45 g
    • Carbohydrates: 30โ€“40 g
    • Fat: 18โ€“25 g

    (Depends on cooking method.)


    Frequently Asked Questions (Q&A)

    Q: How do I keep chicken tenders crispy?
    A: Use cornstarch in the coating and avoid covering them while hot because steam softens the crust.

    Q: Can I use chicken breast instead of tenders?
    A: Yes! Slice chicken breast into even strips.

    Q: Can I make these ahead?
    A: Yes. Prepare and refrigerate the coated chicken, then cook when ready.

    Q: Can I freeze homemade chicken tenders?
    A: Yes. Freeze after cooking and reheat in an oven or air fryer.

    Q: What dipping sauce goes best with chicken tenders?
    A: Honey mustard, ranch, barbecue sauce, and spicy mayo are all great choices.


    Social Media Captions โค๏ธ

    Facebook Style:

    “Made these Crispy Chicken Tenders tonight and they disappeared fast! ๐Ÿ—โœจ Juicy chicken, golden crunchy coating, and the perfect homemade dipping sauceโ€”better than any restaurant!”

    Instagram Style:

    “Crunchy outside, juicy insideโ€ฆ the chicken tender dreams are made of ๐Ÿ—๐Ÿ”ฅ”

    Short Viral Caption:

    “The crispy chicken everyone asks for! ๐Ÿ˜๐Ÿ—”

    Family Memory Style:

    “Some recipes bring everyone running to the kitchen โค๏ธ These homemade chicken tenders are simple, comforting, and made for sharing.”


    Final Food Description for Posting ๐Ÿด

    Crispy Chicken Tenders with Dipping Sauce are golden strips of juicy chicken coated in a perfectly seasoned crunchy breading and served with a creamy homemade sauce. Easy, flavorful, and loved by both kids and adults, this recipe is the ultimate homemade comfort meal. ๐Ÿ—โœจ