Category: RECIPES

  • Chiles Rellenos Cornbread

    (Cheesy Green Chile Stuffed Cornbread)

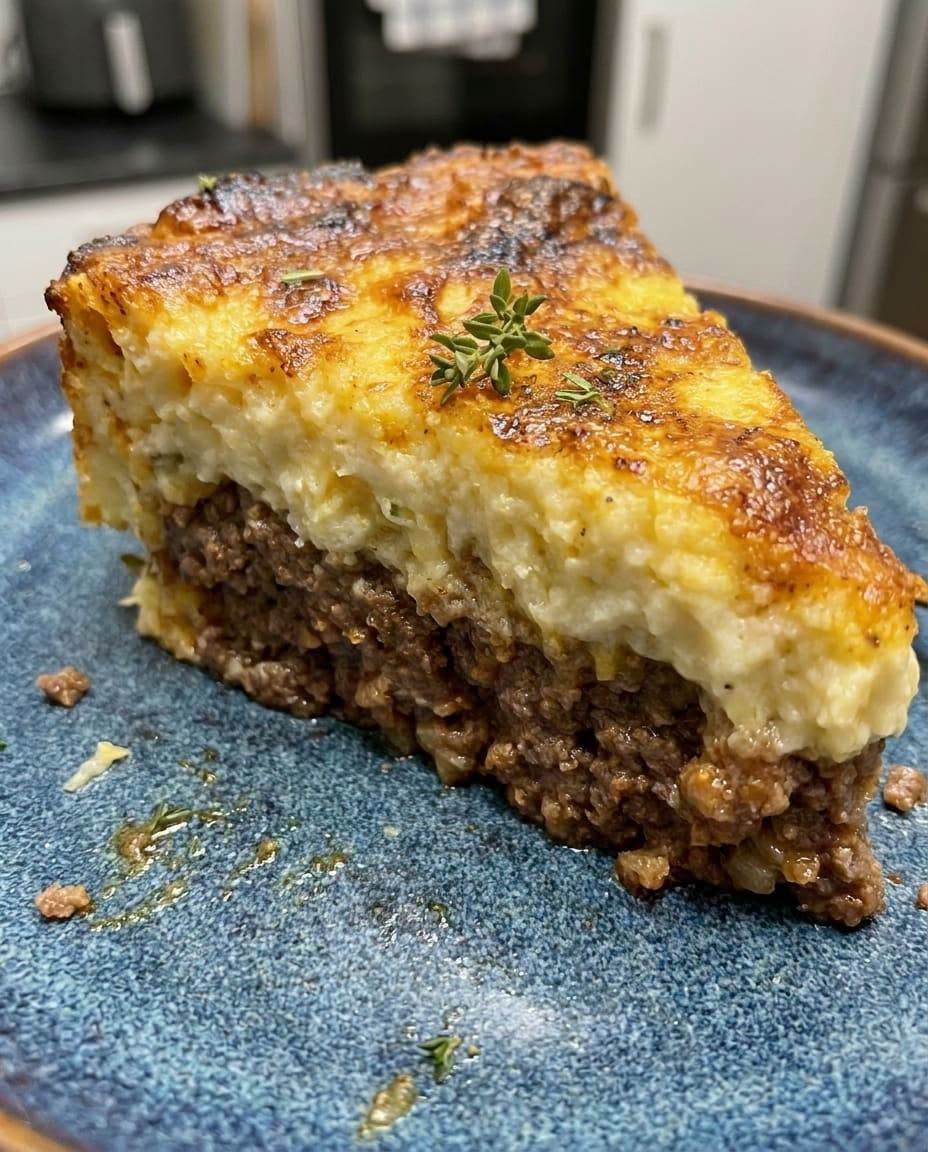
    This Chiles Rellenos Cornbread combines the flavors of a classic Mexican chile relleno with a soft, buttery cornbread. Made with roasted poblano peppers, melted cheese, and sweet corn, this dish is the perfect side for chili, soups, BBQ, tacos, or a comforting family dinner.


    Ingredients

    For the Cornbread:

    • 2 cups cornmeal
    • 1 cup all-purpose flour
    • 1 tablespoon baking powder
    • 1 teaspoon salt
    • 2 tablespoons sugar (optional)
    • 2 large eggs
    • 1ยฝ cups buttermilk
    • ยฝ cup melted butter
    • ยฝ cup sour cream
    • 1 cup corn kernels (fresh, frozen, or canned)

    Chile Rellenos Filling:

    • 4โ€“5 roasted poblano peppers, peeled and seeded
    • 2 cups shredded Monterey Jack cheese
    • 1 cup shredded cheddar cheese
    • ยฝ cup queso fresco (optional)
    • 1โ€“2 jalapeรฑos, finely chopped (optional)
    • ยฝ cup roasted Hatch green chiles

    Optional Toppings:

    • Extra shredded cheese
    • Fresh cilantro
    • Sliced jalapeรฑos
    • Sour cream
    • Salsa verde
    • Green onions

    Instructions

    Step 1: Roast the Peppers

    • Roast poblano peppers over an open flame, grill, or under the broiler until the skin is blistered.
    • Place peppers in a covered bowl for 10โ€“15 minutes to steam.
    • Peel the skin and remove seeds.
    • Slice into strips.

    Step 2: Prepare the Cornbread Batter

    In a large bowl combine:

    • Cornmeal
    • Flour
    • Baking powder
    • Salt
    • Sugar

    In another bowl mix:

    • Eggs
    • Buttermilk
    • Melted butter
    • Sour cream

    Combine wet and dry ingredients.

    Fold in:

    • Corn kernels
    • Hatch green chiles

    Step 3: Assemble the Cornbread

    • Preheat oven to 375ยฐF (190ยฐC).
    • Grease a 9×13 baking dish or cast iron skillet.
    • Pour half of the cornbread batter into the pan.
    • Add roasted poblano strips.
    • Sprinkle cheese evenly over peppers.
    • Add remaining batter on top.
    • Sprinkle extra cheese if desired.

    Step 4: Bake

    • Bake for 35โ€“45 minutes until golden brown.
    • A toothpick inserted in the center should come out clean.
    • Let cool for 10 minutes before slicing.

    Step 5: Serve

    Serve warm with:

    • Salsa verde
    • Sour cream
    • Chili
    • Green chile stew
    • Pinto beans
    • BBQ meats

    Extra Recipe Tips & Secrets ๐ŸŒถ๏ธโœจ

    For the Best Chiles Rellenos Cornbread:

    โœ… Roast the peppers first
    This creates the smoky flavor that makes the dish special.

    โœ… Use a cast iron skillet
    It gives the edges a delicious golden crust.

    โœ… Donโ€™t overmix the batter
    Mix just until combined for a soft texture.

    โœ… Use good melting cheese
    Oaxaca, Monterey Jack, and Pepper Jack work beautifully.


    Delicious Variations

    ๐Ÿฅ“ Bacon Green Chile Cornbread:

    Add:

    • Crispy bacon pieces
    • Extra cheddar cheese

    ๐ŸŒฝ Mexican Street Corn Style:

    Add:

    • Cotija cheese
    • Lime zest
    • Tajรญn seasoning
    • Cilantro

    ๐Ÿ— Chicken Chiles Rellenos Cornbread:

    Add:

    • Shredded chicken
    • Extra green chile sauce

    ๐Ÿ”ฅ Spicy Version:

    Add:

    • Serrano peppers
    • Hot Hatch chiles
    • Chipotle peppers

    Serving Ideas ๐ŸŒฎ

    Perfect with:

    ๐Ÿฒ Green Chile Pork Posole
    ๐Ÿซ˜ Pinto Beans
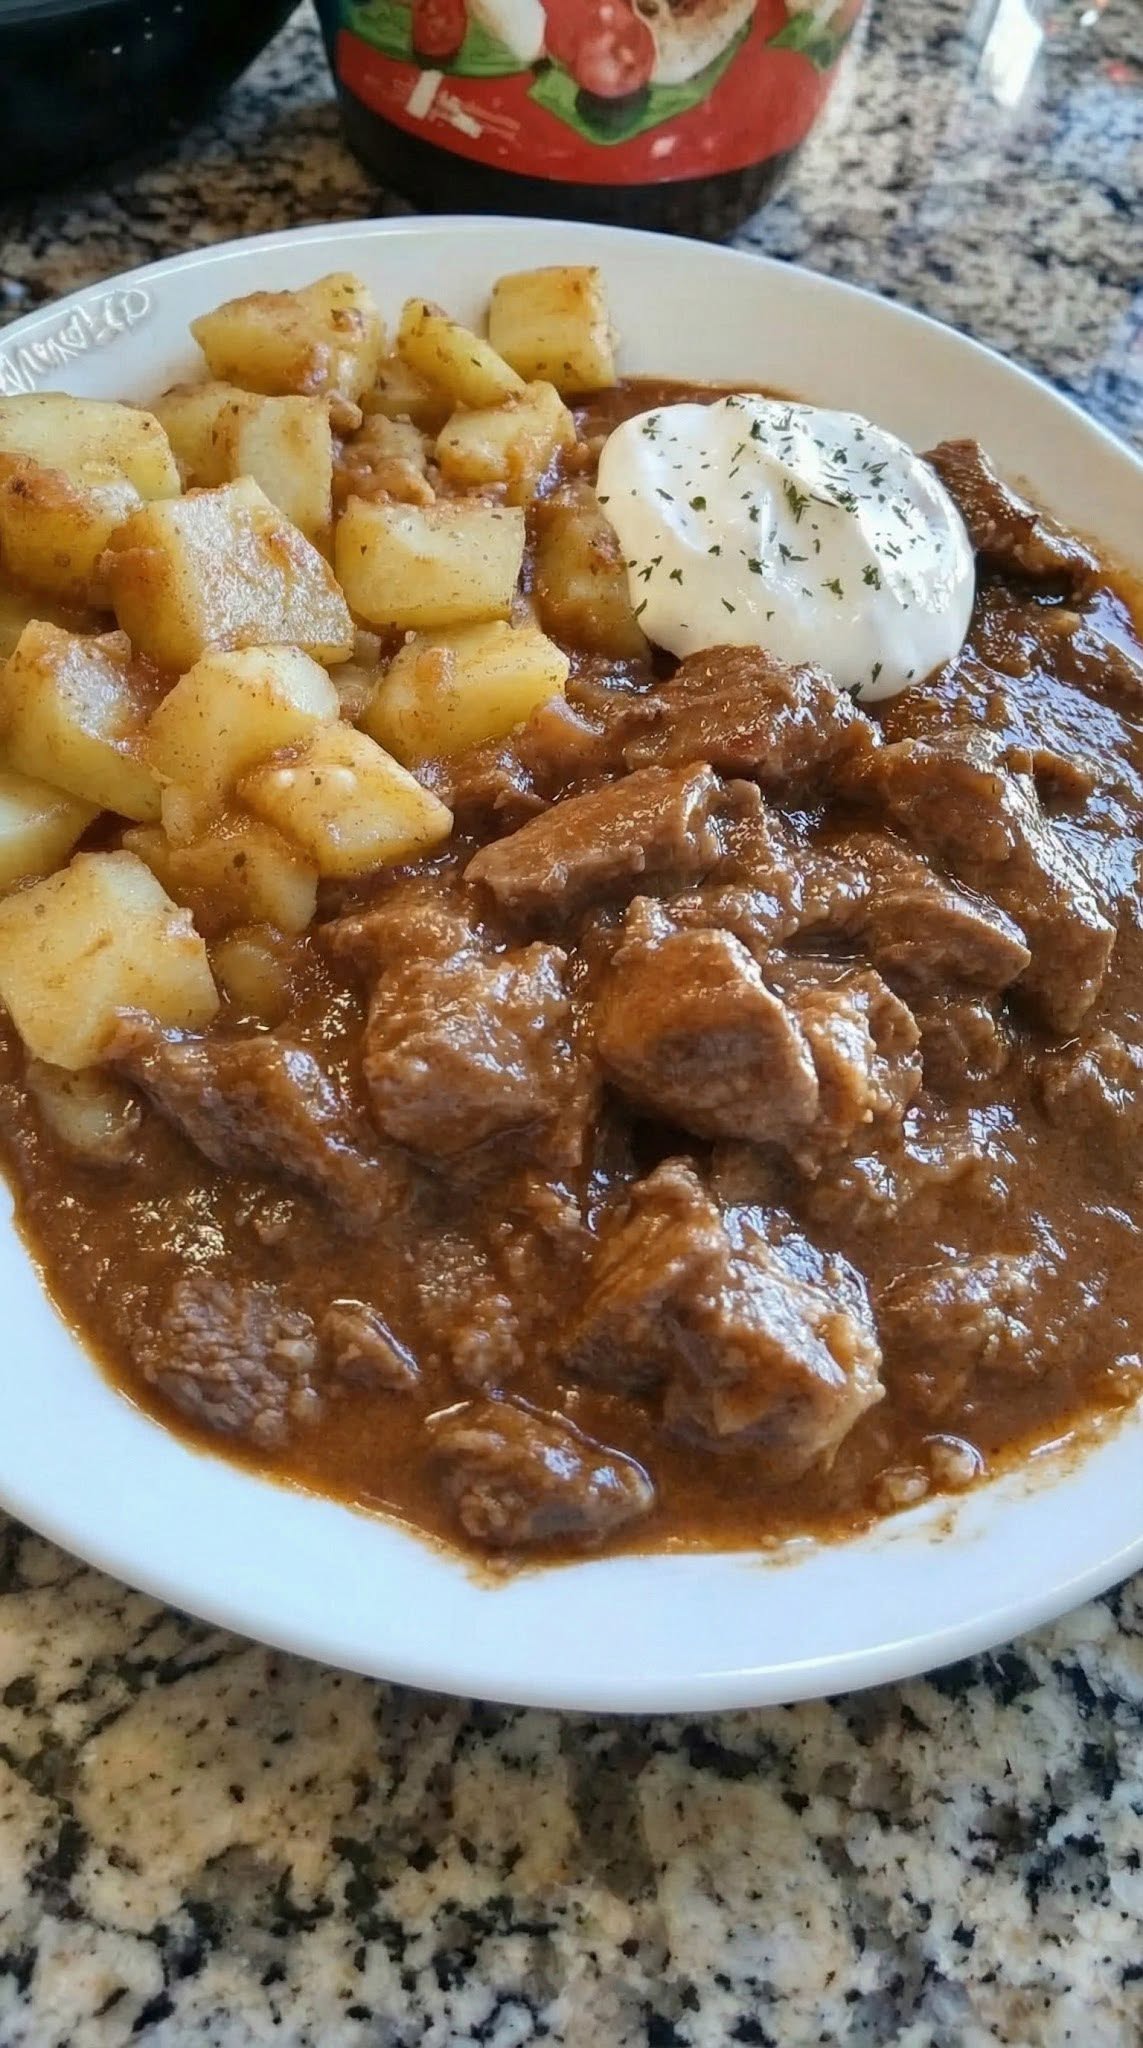
    ๐Ÿฅฉ Carne Guisada
    ๐Ÿ— Green Chile Chicken Stew
    ๐ŸŒถ๏ธ Salsa Verde
    ๐Ÿ– Smoked brisket
    ๐Ÿฅ— Fresh salad


    Storage & Meal Prep

    Refrigerator:
    Store covered for up to 4 days.

    Freezer:
    Freeze individual slices for up to 3 months.

    Reheating:
    Warm in the oven or air fryer to bring back the crispy edges.


    Social Media Caption Ideas โค๏ธ

    Option 1:

    “Made this Chiles Rellenos Cornbread and it was incredible! ๐ŸŒถ๏ธ๐ŸŒฝ๐Ÿง€ A fluffy homemade cornbread loaded with roasted poblano peppers, Hatch green chiles, and melted cheese. The perfect combination of Mexican flavors and classic comfort food!
    Full recipe is in the comments below!”


    Option 2:

    “If you love chile rellenos, you need to try this cornbread! ๐Ÿ˜๐ŸŒถ๏ธ Cheesy, buttery, slightly spicy, and packed with roasted pepper flavor. This is the side dish everyone will ask for again and again.
    Save this recipe โค๏ธ
    Recipe below!”


    Option 3:

    “This Chiles Rellenos Cornbread disappeared fast! ๐ŸŒฝ๐Ÿ”ฅ The smoky roasted peppers, creamy melted cheese, and sweet cornbread come together perfectly. A must-have for taco nights, BBQs, and family dinners.
    Who would try a slice? ๐Ÿ‘‡
    Full recipe in the comments!”


    Option 4:

    “Comfort food with a Southwest twist! ๐ŸŒถ๏ธ๐Ÿง€ This Chiles Rellenos Cornbread is warm, cheesy, and full of bold flavor. Perfect with soups, chili, or enjoyed all on its own.
    Check the comments for the full recipe!”


    Nutrition Facts (Approximate)

    Per slice (if cut into 12 pieces):

    • Calories: 280โ€“380 kcal
    • Protein: 10โ€“15 g
    • Carbohydrates: 30โ€“40 g
    • Fat: 15โ€“22 g
    • Fiber: 2โ€“4 g

    Entire Recipe:

    • Calories: approximately 3,500โ€“4,500 kcal
    • Protein: approximately 130โ€“180 g

    Frequently Asked Questions (Q&A)

    Q: What peppers are best for this cornbread?
    A: Poblano peppers are traditional because they have a mild flavor and roast beautifully.

    Q: Can I use canned green chiles?
    A: Yes! They are a great shortcut and still add delicious flavor.

    Q: Can I make this less spicy?
    A: Yes. Remove seeds from peppers and use mild Hatch chiles.

    Q: Can I make this ahead of time?
    A: Absolutely! Bake it ahead and reheat before serving.

    Q: What cheese works best?
    A: Monterey Jack, Oaxaca, Pepper Jack, and cheddar all melt well.

    Q: Can I add meat?
    A: Yes! Shredded chicken, bacon, or ground beef make great additions.

    Q: What makes this recipe special?
    A: It combines the smoky, cheesy flavors of chile rellenos with the comforting texture of homemade cornbread.


    ๐ŸŒถ๏ธ๐ŸŒฝ๐Ÿง€ Chiles Rellenos Cornbread is the perfect fusion of Mexican flavors and Southern comfort food โ€” cheesy, buttery, slightly spicy, and packed with roasted chile goodness in every bite! โค๏ธ

  • Slow Cooker Pinto Beans, Green Chile & Beef

    (Slow-Cooked Southwestern Beef and Bean Stew)

    This Slow Cooker Pinto Beans, Green Chile & Beef recipe is the perfect comfort meal! Tender beef, creamy pinto beans, and smoky Hatch green chiles slowly cook together with bold spices to create a hearty Southwestern dish. Itโ€™s delicious served as a stew, taco filling, burrito filling, or with warm tortillas.


    Ingredients

    For the Slow Cooker:

    • 2 pounds beef chuck roast or stew meat, cut into chunks
    • 2 cups dried pinto beans (or 4 cans cooked pinto beans, drained and rinsed)
    • 3 cups roasted Hatch green chiles, chopped
    • 1 large onion, diced
    • 6 cloves garlic, minced
    • 2 jalapeรฑos, sliced (optional)
    • 1 can (14.5 oz) diced tomatoes
    • 6 cups beef broth
    • 2 tablespoons tomato paste

    Seasonings:

    • 2 tablespoons chili powder
    • 2 teaspoons ground cumin
    • 2 teaspoons Mexican oregano
    • 1 teaspoon smoked paprika
    • 1 teaspoon garlic powder
    • 1 teaspoon onion powder
    • 1 teaspoon salt (adjust to taste)
    • 1 teaspoon black pepper
    • ยฝ teaspoon cayenne pepper (optional)

    Optional Additions:

    • 6 slices cooked bacon, chopped
    • 1 smoked ham hock
    • 1 cup corn kernels
    • 1 bell pepper, diced
    • 1 cup shredded Monterey Jack cheese
    • Fresh cilantro
    • Lime juice

    Instructions

    Step 1: Prepare the Beef

    • Season beef chunks with salt and pepper.
    • Heat a skillet with a little oil.
    • Sear beef on all sides until browned.

    โœ… Browning adds a deeper, richer flavor, but you can skip this step if needed.


    Step 2: Add Ingredients to Slow Cooker

    Place into the slow cooker:

    • Beef
    • Pinto beans
    • Green chiles
    • Onion
    • Garlic
    • Tomatoes
    • Tomato paste
    • Jalapeรฑos
    • Beef broth
    • All seasonings

    Stir everything together.


    Step 3: Slow Cook

    For dried beans:

    • Cook on LOW for 8โ€“10 hours
      or
    • HIGH for 5โ€“6 hours

    until beans are tender and beef falls apart.

    For canned beans:

    • Cook on LOW for 6โ€“7 hours
    • Add beans during the last 1โ€“2 hours for the best texture.

    Step 4: Finish the Dish

    • Shred the beef slightly with a fork.
    • Stir everything together.
    • Add lime juice and fresh cilantro.
    • Adjust salt and spice.

    Serve hot!


    Serving Ideas ๐ŸŒฎ

    Enjoy with:

    ๐ŸŒฝ Warm cornbread
    ๐ŸŒฎ Flour tortillas
    ๐Ÿš Mexican rice
    ๐Ÿฅ‘ Avocado slices
    ๐Ÿง€ Shredded cheese
    ๐ŸŒถ๏ธ Salsa verde
    ๐Ÿณ Fried eggs on top
    ๐Ÿฅ— Fresh salad


    Extra Recipe Tips & Secrets ๐ŸŒถ๏ธโœจ

    For the Best Flavor:

    โœ… Use chuck roast
    It becomes incredibly tender after slow cooking.

    โœ… Roast your green chiles
    Roasted Hatch chiles add a smoky Southwest flavor.

    โœ… Mash some beans
    Mash 1 cup of beans into the broth for a thicker, creamier texture.

    โœ… Make it the next day
    The flavors become even richer after resting overnight.


    Delicious Variations

    ๐Ÿฅ“ Bacon Green Chile Beef Beans:

    Add:

    • Crispy bacon
    • Smoked paprika
    • Extra onions

    ๐ŸŒถ๏ธ Spicy Version:

    Add:

    • Serrano peppers
    • Hot Hatch chiles
    • Chipotle peppers

    ๐Ÿง€ Creamy Green Chile Beef:

    Add at the end:

    • Cream cheese
    • Monterey Jack cheese
    • Sour cream

    ๐ŸŒฎ Taco Bowl Version:

    Serve over:

    • Rice
    • Lettuce
    • Cheese
    • Salsa
    • Avocado

    Storage & Meal Prep

    Refrigerator:
    Store in an airtight container for up to 5 days.

    Freezer:
    Freeze for up to 3 months.

    Reheating:
    Warm slowly and add a little broth if it becomes too thick.


    Social Media Caption Ideas โค๏ธ

    Option 1:

    “Made this Slow Cooker Pinto Beans, Green Chile & Beef and it was pure comfort food! ๐ŸŒถ๏ธ๐Ÿฅฉ๐Ÿซ˜ Tender beef, creamy beans, and smoky green chiles slow cooked together for the perfect hearty meal.
    This recipe is packed with flavor and perfect for family dinners!
    Full recipe is in the comments below!”


    Option 2:

    “Dinner was a success with this Slow Cooker Green Chile Beef & Pinto Beans! ๐Ÿ˜๐ŸŒถ๏ธ The beef is fall-apart tender, the beans are creamy, and the Hatch green chile adds the perfect kick. A warm bowl of homemade goodness!
    Save this recipe โค๏ธ
    Recipe below!”


    Option 3:

    “Nothing beats a slow cooker meal! ๐Ÿฅฉ๐Ÿซ˜ This Pinto Bean, Green Chile & Beef recipe is loaded with bold Southwest flavors and makes the house smell amazing all day long. Perfect with tortillas, rice, or your favorite toppings.
    Who would love a bowl of this? ๐Ÿ‘‡
    Full recipe in the comments!”


    Option 4:

    “Comfort food at its best! ๐ŸŒถ๏ธ๐Ÿฒ Slow cooked beef, hearty pinto beans, and roasted green chiles come together in this delicious homemade recipe. Easy, flavorful, and perfect for sharing.
    Check the comments for the full recipe!”


    Nutrition Facts (Approximate)

    Per serving (if divided into 8 servings):

    • Calories: 450โ€“600 kcal
    • Protein: 35โ€“45 g
    • Carbohydrates: 45โ€“60 g
    • Fat: 15โ€“25 g
    • Fiber: 12โ€“16 g

    Entire Recipe:

    • Calories: approximately 3,600โ€“4,800 kcal
    • Protein: approximately 280โ€“350 g

    Frequently Asked Questions (Q&A)

    Q: Can I use canned pinto beans?
    A: Yes! Add them near the end of cooking so they donโ€™t become too soft.

    Q: What beef is best for this recipe?
    A: Chuck roast is ideal because it becomes tender and flavorful after slow cooking.

    Q: Can I make this recipe spicy?
    A: Yes! Add extra Hatch chiles, serranos, or hot sauce.

    Q: Can I make this without beef?
    A: Absolutely. Use extra beans, mushrooms, or shredded chicken instead.

    Q: Can I cook this on the stovetop?
    A: Yes! Simmer covered for 2โ€“3 hours until the beef and beans are tender.

    Q: What are Hatch green chiles?
    A: Hatch chiles are New Mexico peppers known for their smoky flavor and delicious roasted taste.

    Q: What can I do with leftovers?
    A: Use them for tacos, burritos, nachos, enchiladas, or chili bowls.


    ๐ŸŒถ๏ธ๐Ÿฅฉ๐Ÿซ˜ Slow Cooker Pinto Beans, Green Chile & Beef is the ultimate Southwest comfort meal โ€” tender beef, creamy beans, and smoky green chile flavors cooked low and slow for a bowl full of homemade goodness! โค๏ธ

  • Jalapeรฑo Cream Cheese Dip

    (Creamy, Cheesy, Spicy Jalapeรฑo Dip)

    This Jalapeรฑo Cream Cheese Dip is the perfect appetizer for parties, game days, holidays, and family gatherings. Made with creamy cheese, spicy jalapeรฑos, garlic, and melted cheese, this warm dip is rich, flavorful, and impossible to stop eating!


    Ingredients

    For the Dip:

    • 16 oz cream cheese, softened
    • 1 cup sour cream
    • 1 cup mayonnaise
    • 2 cups shredded Monterey Jack cheese
    • 1 cup shredded cheddar cheese
    • 4โ€“6 fresh jalapeรฑos, finely chopped
    • 1 small can (4 oz) diced green chiles
    • 3 cloves garlic, minced
    • ยฝ cup green onions, chopped
    • ยฝ teaspoon smoked paprika
    • 1 teaspoon garlic powder
    • 1 teaspoon onion powder
    • ยฝ teaspoon black pepper
    • Salt to taste
    • ยฝ cup fresh cilantro, chopped (optional)

    Optional Topping:

    • Extra shredded cheese
    • Crispy bacon pieces
    • Sliced jalapeรฑos
    • Green onions
    • Crushed tortilla chips
    • Fresh cilantro

    Instructions

    Step 1: Prepare the Jalapeรฑos

    • Wash and finely chop jalapeรฑos.
    • Remove seeds and membranes for a milder dip.
    • Leave some seeds if you like extra heat.

    Step 2: Mix the Creamy Base

    In a large bowl combine:

    • Softened cream cheese
    • Sour cream
    • Mayonnaise

    Mix until smooth and creamy.


    Step 3: Add the Flavor

    Stir in:

    • Jalapeรฑos
    • Green chiles
    • Garlic
    • Green onions
    • Monterey Jack cheese
    • Cheddar cheese
    • Smoked paprika
    • Garlic powder
    • Onion powder
    • Pepper
    • Salt

    Mix until everything is well combined.


    Step 4: Bake the Dip

    • Spread mixture into a baking dish.
    • Top with extra cheese if desired.
    • Bake at 375ยฐF (190ยฐC) for 20โ€“25 minutes until hot and bubbly.

    Step 5: Serve

    Serve warm with:

    • Tortilla chips
    • Crackers
    • Toasted bread
    • Pretzels
    • Vegetable sticks

    Extra Recipe Tips & Secrets ๐ŸŒถ๏ธโœจ

    For the Best Jalapeรฑo Dip:

    โœ… Roast the jalapeรฑos first
    Adds a smoky flavor and reduces sharp heat.

    โœ… Use freshly shredded cheese
    It melts smoother than pre-shredded cheese.

    โœ… Let cream cheese soften
    This creates a smoother dip without lumps.

    โœ… Add bacon for a restaurant-style flavor
    Crispy bacon takes this dip to another level.


    Delicious Variations

    ๐Ÿฅ“ Bacon Jalapeรฑo Popper Dip:

    Add:

    • 1 pound crispy bacon
    • Extra cheddar cheese
    • Breadcrumb topping

    ๐Ÿ”ฅ Extra Spicy Version:

    Add:

    • Serrano peppers
    • Hot sauce
    • Cayenne pepper
    • Pickled jalapeรฑos

    ๐ŸŒฝ Mexican Street Corn Style:

    Add:

    • Corn kernels
    • Cotija cheese
    • Lime juice
    • Tajรญn seasoning

    ๐Ÿ— Chicken Jalapeรฑo Dip:

    Add:

    • 2 cups shredded chicken
    • Buffalo sauce
    • Extra cheese

    ๐Ÿฅ‘ Creamy Avocado Jalapeรฑo Dip:

    Add:

    • 1 mashed avocado
    • Extra lime juice
    • Cilantro

    Serving Ideas ๐ŸŒฎ

    Perfect with:

    ๐ŸŒฝ Tortilla chips
    ๐Ÿ” Burgers
    ๐ŸŒฏ Burritos
    ๐ŸŒฎ Tacos
    ๐Ÿ— Grilled chicken
    ๐Ÿฅฉ Carne asada
    ๐Ÿฅ– Warm bread
    ๐Ÿฅ• Fresh vegetables


    Storage & Meal Prep

    Refrigerator:
    Store in an airtight container for up to 4 days.

    Reheating:
    Warm in the oven or microwave until creamy again.

    Make Ahead:
    Prepare up to 24 hours ahead, refrigerate, and bake when ready.


    Social Media Caption Ideas โค๏ธ

    Option 1:

    “Made this Jalapeรฑo Cream Cheese Dip and it was a hit! ๐ŸŒถ๏ธ๐Ÿง€ Creamy, cheesy, slightly spicy, and packed with flavor. The perfect appetizer for parties, game nights, or anytime youโ€™re craving something delicious.
    Full recipe is in the comments below!”


    Option 2:

    “Jalapeรฑo lovers, this one is for you! ๐Ÿ˜๐ŸŒถ๏ธ This warm Cream Cheese Jalapeรฑo Dip is loaded with melted cheese, fresh peppers, and creamy goodness. Grab your chips because this disappears fast!
    Save this recipe โค๏ธ
    Recipe below!”


    Option 3:

    “This dip is pure comfort food! ๐Ÿง€๐Ÿ”ฅ Creamy cheese, spicy jalapeรฑos, and a golden cheesy top make this the ultimate party appetizer. Easy to make and everyone asks for the recipe!
    Who would try this? ๐Ÿ‘‡
    Full recipe in the comments!”


    Option 4:

    “Need a crowd-pleasing appetizer? Look no further! ๐ŸŒถ๏ธ๐Ÿง€ This Jalapeรฑo Cream Cheese Dip is warm, cheesy, and full of bold flavor. Perfect for holidays, BBQs, and family gatherings.
    Check the comments for the full recipe!”


    Nutrition Facts (Approximate)

    Per serving (if divided into 12 servings):

    • Calories: 250โ€“350 kcal
    • Protein: 8โ€“12 g
    • Carbohydrates: 4โ€“8 g
    • Fat: 25โ€“32 g
    • Fiber: 1 g

    Entire Recipe:

    • Calories: approximately 3,000โ€“4,000 kcal
    • Protein: approximately 100โ€“150 g

    Frequently Asked Questions (Q&A)

    Q: Is Jalapeรฑo Cream Cheese Dip spicy?
    A: The heat depends on the jalapeรฑos. Remove seeds for mild heat or keep them for extra spice.

    Q: Can I make this dip ahead of time?
    A: Yes! Prepare it a day ahead and bake before serving.

    Q: Can I make it in a slow cooker?
    A: Yes! Cook on LOW for 2โ€“3 hours, stirring occasionally.

    Q: Can I use canned jalapeรฑos?
    A: Absolutely! Pickled jalapeรฑos add a delicious tangy flavor.

    Q: How can I make it lighter?
    A: Use Greek yogurt instead of some sour cream and reduce mayonnaise.

    Q: Can I freeze this dip?
    A: Freezing is not recommended because dairy-based dips can change texture.

    Q: What makes this dip so popular?
    A: The combination of creamy cheese, spicy peppers, and melted goodness makes it a perfect crowd favorite.


    ๐ŸŒถ๏ธ๐Ÿง€ Jalapeรฑo Cream Cheese Dip is the ultimate cheesy appetizer โ€” creamy, spicy, and packed with flavor. Whether itโ€™s game day, a party, or a cozy night at home, this dip is guaranteed to be a favorite! โค๏ธ

  • Crispy Chicken Tacos

    (Golden Crunchy Chicken Tacos with Fresh Toppings)

    These Crispy Chicken Tacos are the perfect combination of crunchy shells, juicy seasoned chicken, melted cheese, and fresh toppings. Easy enough for a weeknight dinner but delicious enough for taco night with family and friends!


    Ingredients

    For the Crispy Chicken Filling:

    • 2 pounds boneless skinless chicken thighs or breasts
    • 2 tablespoons olive oil
    • 1 medium onion, diced
    • 4 cloves garlic, minced
    • 1 teaspoon cumin
    • 2 teaspoons chili powder
    • 1 teaspoon smoked paprika
    • 1 teaspoon Mexican oregano
    • 1 teaspoon garlic powder
    • 1 teaspoon onion powder
    • 1 teaspoon salt
    • ยฝ teaspoon black pepper
    • Juice of 1 lime
    • ยผ cup chicken broth

    For the Crispy Taco Shells:

    • 12 corn tortillas
    • 2 cups shredded Monterey Jack cheese
    • 1 cup shredded cheddar cheese
    • Oil or cooking spray for crisping

    Toppings:

    • Shredded lettuce
    • Diced tomatoes
    • Fresh cilantro
    • Diced onions
    • Avocado slices
    • Salsa verde
    • Sour cream
    • Pickled jalapeรฑos
    • Cotija cheese
    • Lime wedges

    Instructions

    1. Cook the Chicken

    • Heat olive oil in a large skillet.
    • Add onion and cook until softened.
    • Add garlic and cook for 30 seconds.
    • Add chicken and season with cumin, chili powder, paprika, oregano, garlic powder, onion powder, salt, and pepper.
    • Add chicken broth and lime juice.
    • Cover and simmer for 20โ€“25 minutes until chicken is tender.

    2. Shred the Chicken

    • Remove chicken from the pan.
    • Shred with two forks.
    • Return shredded chicken to the skillet and cook for another 5 minutes so it absorbs the flavors.

    3. Make Crispy Tacos

    Oven Method:

    • Preheat oven to 425ยฐF (220ยฐC).
    • Place tortillas on a baking sheet.
    • Add cheese and chicken.
    • Fold tortillas and lightly brush with oil.
    • Bake for 12โ€“15 minutes until golden and crispy.

    Skillet Method:

    • Heat a lightly oiled skillet.
    • Fill tortillas with cheese and chicken.
    • Cook until crispy on both sides.

    4. Add Toppings

    Fill tacos with:

    • Lettuce
    • Tomatoes
    • Cilantro
    • Salsa
    • Avocado
    • Sour cream

    Serve warm with lime wedges.


    Extra Recipe Tips & Secrets ๐ŸŒฎ๐Ÿ”ฅ

    For the Crispiest Chicken Tacos:

    โœ… Warm tortillas first
    Soft tortillas fold better and wonโ€™t crack.

    โœ… Use cheese as a โ€œglueโ€
    Melted cheese helps hold the taco together.

    โœ… Chicken thighs give more flavor
    They stay juicy and tender.

    โœ… Crisp after filling
    This creates that perfect crunchy shell with a cheesy center.


    Delicious Variations

    ๐ŸŒถ๏ธ Spicy Chicken Tacos:

    Add:

    • Jalapeรฑos
    • Chipotle peppers
    • Hot salsa
    • Extra chili powder

    ๐Ÿง€ Birria-Style Crispy Chicken Tacos:

    Add:

    • Consomรฉ dipping sauce
    • Oaxaca cheese
    • Fresh onions and cilantro

    ๐Ÿฅ‘ California Style:

    Add:

    • Guacamole
    • Pico de gallo
    • Cabbage slaw

    ๐Ÿฅ“ Loaded Chicken Tacos:

    Add:

    • Crispy bacon
    • Queso
    • Corn salsa

    Serving Ideas

    Perfect with:

    ๐ŸŒฝ Mexican Street Corn Salad
    ๐Ÿš Mexican rice
    ๐Ÿซ˜ Refried beans
    ๐Ÿฅ‘ Guacamole
    ๐ŸŒถ๏ธ Salsa verde
    ๐Ÿน Fresh lime drinks


    Storage & Meal Prep

    Chicken Filling:
    Store in the refrigerator for up to 4 days.

    Freezer:
    Freeze shredded chicken for up to 3 months.

    Reheating:
    Crisp tacos in an oven or air fryer for the best texture.


    Social Media Caption Ideas โค๏ธ

    Option 1:

    “Made these Crispy Chicken Tacos and they were amazing! ๐ŸŒฎ๐Ÿ”ฅ Golden crunchy shells filled with juicy seasoned chicken, melted cheese, and fresh toppings. The perfect taco night recipe that everyone will love!
    Full recipe is in the comments below!”


    Option 2:

    “Crunchy taco perfection! ๐Ÿ˜๐ŸŒฎ These Crispy Chicken Tacos are loaded with flavorful shredded chicken, gooey cheese, and fresh toppings. Easy to make, full of flavor, and impossible to stop eating!
    Save this recipe for your next taco night โค๏ธ
    Recipe below!”


    Option 3:

    “Tonightโ€™s dinner was a taco dream! ๐ŸŒฎโœจ Crispy shells, tender chicken, melted cheese, and all the toppings you love. These homemade chicken tacos taste better than takeout!
    Who would you share these with? ๐Ÿ‘‡
    Full recipe in the comments!”


    Option 4:

    “Nothing beats homemade tacos! โค๏ธ๐ŸŒฎ These Crispy Chicken Tacos are crunchy, cheesy, and packed with bold Mexican-inspired flavors. Perfect for family dinners, parties, or a fun weekend meal.
    Check the comments for the full recipe!”


    Nutrition Facts (Approximate)

    Per taco (if recipe makes 12 tacos):

    • Calories: 280โ€“380 kcal
    • Protein: 20โ€“28 g
    • Carbohydrates: 25โ€“35 g
    • Fat: 12โ€“20 g
    • Fiber: 3โ€“5 g

    Entire Recipe:

    • Calories: approximately 3,400โ€“4,500 kcal
    • Protein: approximately 250โ€“330 g

    Frequently Asked Questions (Q&A)

    Q: Can I use rotisserie chicken?
    A: Yes! Shred the chicken and season it before crisping the tacos.

    Q: What tortillas work best?
    A: Corn tortillas give the crispiest texture, but flour tortillas can also be used.

    Q: Can I make these in an air fryer?
    A: Yes! Air fry at 375ยฐF (190ยฐC) for 6โ€“8 minutes until crispy.

    Q: How do I prevent tacos from getting soggy?
    A: Avoid adding wet toppings before serving. Add salsa and sour cream right before eating.

    Q: Can I use leftover chicken?
    A: Absolutely! Leftover grilled or roasted chicken works great.

    Q: What cheese melts best?
    A: Monterey Jack, Oaxaca, mozzarella, and cheddar are excellent choices.

    Q: What makes crispy tacos special?
    A: The contrast between the crunchy shell, juicy chicken, and fresh toppings creates the perfect taco experience.


    ๐ŸŒฎ๐Ÿ— Crispy Chicken Tacos are the ultimate comfort food โ€” crunchy, cheesy, flavorful, and packed with delicious homemade goodness. Perfect for taco nights, parties, or anytime youโ€™re craving something crispy and satisfying! โค๏ธ

  • Cheesy Bacon Cheeseburger Queso Dip

    (Loaded Cheeseburger-Style Queso Dip)

    A creamy, cheesy, and irresistible appetizer combining everything you love about a bacon cheeseburger โ€” seasoned ground beef, crispy bacon, melted cheese, and bold flavors all blended into a warm queso dip. Perfect for game days, parties, family gatherings, or taco nights!


    Ingredients

    For the Cheeseburger Queso:

    • 1 pound ground beef
    • 8 slices bacon, cooked crispy and crumbled
    • 1 tablespoon butter or olive oil
    • ยฝ medium onion, finely diced
    • 3 cloves garlic, minced
    • 1 jalapeรฑo, finely chopped (optional)
    • 1 tablespoon Worcestershire sauce
    • 1 teaspoon yellow mustard
    • 1 teaspoon smoked paprika
    • 1 teaspoon garlic powder
    • 1 teaspoon onion powder
    • ยฝ teaspoon black pepper
    • Salt to taste

    For the Cheese Sauce:

    • 16 oz Velveeta cheese, cubed
    • 1 cup shredded cheddar cheese
    • 1 cup Monterey Jack cheese
    • 1 cup milk or evaporated milk
    • 4 oz cream cheese, softened
    • 1 can (10 oz) diced tomatoes with green chiles, drained or undrained
    • 2 tablespoons sour cream (optional)

    Toppings (Optional):

    • Extra crispy bacon
    • Shredded cheddar cheese
    • Pickles, diced
    • Green onions
    • Jalapeรฑo slices
    • Fresh cilantro
    • Diced tomatoes
    • Burger sauce drizzle

    Instructions

    1. Cook the Bacon & Beef

    • Cook bacon until crispy.
    • Drain and crumble into pieces.
    • In a large skillet, brown ground beef over medium heat.
    • Add onion and cook until softened.
    • Add garlic and cook for 30 seconds.

    2. Season the Meat

    Stir in:

    • Worcestershire sauce
    • Mustard
    • Smoked paprika
    • Garlic powder
    • Onion powder
    • Black pepper

    Cook for another 2โ€“3 minutes.


    3. Make the Queso

    • In a saucepan or slow cooker, combine:
      • Velveeta
      • Cheddar
      • Monterey Jack
      • Cream cheese
      • Milk
      • Tomatoes with green chiles

    Heat slowly until melted and smooth.


    4. Combine Everything

    • Stir cooked beef mixture and bacon into the cheese sauce.
    • Mix until creamy and fully combined.
    • Keep warm and serve with your favorite dippers.

    Extra Recipe Tips & Secrets ๐Ÿง€โœจ

    For the Best Cheeseburger Queso:

    โœ… Cook the beef separately
    This keeps the queso creamy instead of greasy.

    โœ… Use evaporated milk
    It creates a smoother, richer cheese sauce.

    โœ… Add pickles for a real cheeseburger flavor
    Diced dill pickles take this dip to the next level!

    โœ… Keep it warm
    Use a slow cooker or queso warmer for parties.


    Delicious Variations

    ๐ŸŒถ๏ธ Spicy Bacon Cheeseburger Queso:

    Add:

    • Extra jalapeรฑos
    • Serrano peppers
    • Hot sauce
    • Pepper Jack cheese

    ๐Ÿ” Classic Burger Queso:

    Add:

    • Diced pickles
    • Ketchup drizzle
    • Mustard swirl

    ๐Ÿฅ“ Loaded BBQ Bacon Queso:

    Add:

    • BBQ sauce
    • Smoked brisket
    • Extra cheddar

    ๐ŸŒฎ Taco Cheeseburger Queso:

    Add:

    • Taco seasoning
    • Black beans
    • Corn
    • Salsa

    Serving Ideas

    Perfect with:

    ๐ŸŒฝ Tortilla chips
    ๐Ÿฅจ Pretzels
    ๐ŸŸ French fries
    ๐Ÿฅ– Bread cubes
    ๐Ÿฅ• Vegetables
    ๐ŸŒฎ Tacos
    ๐Ÿ” Burger sliders


    Storage & Meal Prep

    Refrigerator:
    Store in an airtight container for up to 4 days.

    Reheating:

    • Warm slowly on the stove or microwave.
    • Add a splash of milk to bring back the creamy texture.

    Slow Cooker Tip:
    Keep on LOW or WARM during parties and stir occasionally.


    Social Media Caption Ideas โค๏ธ

    Option 1:

    “Made this Cheesy Bacon Cheeseburger Queso Dip and it disappeared so fast! ๐Ÿง€๐Ÿฅ“๐Ÿ” All the flavors of a juicy cheeseburger packed into a warm, creamy dip with crispy bacon, seasoned beef, and loads of melted cheese.
    Perfect for game day, parties, or any snack craving!
    Full recipe is in the comments below!”


    Option 2:

    “What happens when a cheeseburger meets queso? MAGIC! ๐Ÿ˜๐Ÿ”๐Ÿง€ This Bacon Cheeseburger Queso Dip is creamy, cheesy, loaded with beef, and packed with crispy bacon flavor. Grab some chips because this one wonโ€™t last long!
    Save this recipe โค๏ธ
    Recipe below!”


    Option 3:

    “I made this loaded Bacon Cheeseburger Queso and WOWโ€ฆ itโ€™s everything you love about a burger in dip form! ๐Ÿฅ“๐Ÿง€ Perfectly cheesy, savory, and full of flavor. This is the appetizer everyone will ask you to make again.
    Who would you share this with? ๐Ÿ‘‡
    Full recipe in the comments!”


    Option 4:

    “Party food perfection! ๐ŸŽ‰๐Ÿง€ This Cheesy Bacon Cheeseburger Queso Dip is rich, creamy, and packed with bold flavors. Whether itโ€™s game night or a family gathering, this dip always steals the show!
    Check the comments for the full recipe!”


    Nutrition Facts (Approximate)

    Per serving (if divided into 12 servings):

    • Calories: 350โ€“450 kcal
    • Protein: 18โ€“25 g
    • Carbohydrates: 5โ€“10 g
    • Fat: 28โ€“38 g
    • Fiber: 0โ€“1 g

    Entire Recipe:

    • Calories: approximately 4,200โ€“5,400 kcal
    • Protein: approximately 220โ€“300 g

    Frequently Asked Questions (Q&A)

    Q: Can I make this queso dip ahead of time?
    A: Yes! Prepare it ahead and gently reheat before serving.

    Q: Can I make it in a slow cooker?
    A: Absolutely! Brown the beef and bacon first, then combine everything in the slow cooker on LOW.

    Q: What cheese works best for queso?
    A: A combination of processed melting cheese, cheddar, and Monterey Jack gives the smoothest texture.

    Q: Can I use ground turkey instead of beef?
    A: Yes! Ground turkey works well for a lighter version.

    Q: How do I make it extra creamy?
    A: Add more cream cheese, evaporated milk, or sour cream.

    Q: Can I freeze queso dip?
    A: Itโ€™s possible, but the texture may change slightly. Fresh is best.

    Q: What makes this dip taste like a cheeseburger?
    A: The combination of beef, bacon, mustard, Worcestershire sauce, and pickles creates that classic burger flavor.


    ๐Ÿ”๐Ÿง€๐Ÿฅ“ Cheesy Bacon Cheeseburger Queso Dip is the ultimate party appetizer โ€” creamy, loaded with beef, crispy bacon, and cheesy goodness. Itโ€™s everything you love about a cheeseburger transformed into the perfect dip! โค๏ธ

  • Frito Corn Salad

    (Crunchy Mexican-Inspired Corn Salad with Fritos)

    A fun, creamy, and crunchy side dish made with sweet corn, colorful vegetables, cheese, and crispy Fritos chips. This Frito Corn Salad is perfect for BBQs, potlucks, parties, taco nights, and family gatherings. Itโ€™s easy to make and always disappears fast!


    Ingredients

    For the Salad:

    • 5 cups sweet corn (fresh, frozen, or canned and drained)
    • 1 large red bell pepper, diced
    • 1 large green bell pepper, diced
    • ยฝ red onion, finely chopped
    • 1 cup shredded cheddar cheese
    • 1 cup Monterey Jack cheese, shredded
    • 1 jalapeรฑo, finely diced (optional)
    • ยฝ cup fresh cilantro, chopped
    • 1 bag (9โ€“10 oz) Fritos corn chips

    For the Creamy Dressing:

    • 1 cup mayonnaise
    • ยฝ cup sour cream
    • 2 tablespoons lime juice
    • 1 teaspoon chili powder
    • 1 teaspoon smoked paprika
    • ยฝ teaspoon cumin
    • ยฝ teaspoon garlic powder
    • Salt and black pepper to taste
    • ยผ teaspoon cayenne pepper (optional)

    Instructions

    1. Prepare the Vegetables

    • If using frozen corn, thaw and drain well.
    • If using fresh corn, grill or boil for extra flavor.
    • Dice peppers, onion, and jalapeรฑo.

    2. Make the Dressing

    In a small bowl, mix:

    • Mayonnaise
    • Sour cream
    • Lime juice
    • Chili powder
    • Smoked paprika
    • Cumin
    • Garlic powder
    • Salt and pepper

    Stir until smooth and creamy.


    3. Combine the Salad

    • In a large bowl, combine corn, peppers, onion, cheese, jalapeรฑo, and cilantro.
    • Pour dressing over the mixture.
    • Stir gently until everything is coated.

    4. Add the Fritos

    • Add Fritos right before serving to keep them crunchy.
    • Mix lightly and serve immediately.

    Extra Recipe Tips & Secrets ๐ŸŒฝโœจ

    For the Best Frito Corn Salad:

    โœ… Add chips last
    This keeps the Fritos crispy instead of soggy.

    โœ… Grill the corn
    Grilled corn adds a smoky, street-corn flavor.

    โœ… Chill before serving
    Let the salad rest in the fridge for 30 minutes so flavors blend.

    โœ… Use fresh lime juice
    It brightens all the flavors.


    Delicious Variations

    ๐ŸŒถ๏ธ Mexican Street Corn Frito Salad:

    Add:

    • Cotija cheese
    • Tajรญn seasoning
    • Extra lime juice
    • Roasted corn

    ๐Ÿฅ“ Bacon Frito Corn Salad:

    Add:

    • Crispy bacon pieces
    • Green onions
    • Extra cheddar

    ๐Ÿง€ Extra Cheesy Version:

    Add:

    • Queso fresco
    • Pepper Jack cheese
    • Cheese cubes

    ๐Ÿ”ฅ Spicy Version:

    Add:

    • Serrano peppers
    • Hot sauce
    • Chipotle powder
    • Chili-lime Fritos

    ๐Ÿ— Protein Version:

    Add:

    • Shredded chicken
    • Grilled steak pieces
    • Black beans

    Serving Ideas ๐ŸŒฎ

    Perfect with:

    ๐ŸŒฎ Tacos
    ๐Ÿ– BBQ ribs
    ๐Ÿ” Burgers
    ๐Ÿ— Grilled chicken
    ๐Ÿฅฉ Carne asada
    ๐ŸŒฏ Burritos
    ๐ŸŒถ๏ธ Green chile dishes


    Storage & Meal Prep

    Refrigerator:
    Store without Fritos for up to 3 days.

    Best Tip:
    Keep chips separate and add fresh before serving.


    Social Media Caption Ideas โค๏ธ

    Option 1:

    “Made this Frito Corn Salad and it was a huge hit! ๐ŸŒฝโœจ Sweet corn, creamy dressing, cheese, fresh veggies, and crunchy Fritos come together for the perfect party side dish. Easy, delicious, and impossible to stop eating!
    Full recipe is in the comments below!”


    Option 2:

    “This Frito Corn Salad is the side dish everyone asks for! ๐Ÿ˜๐ŸŒฝ The creamy, cheesy corn mixture paired with crunchy Fritos is such a fun combination. Perfect for BBQs, parties, and summer gatherings.
    Save this recipe โ€” youโ€™ll want it again! โค๏ธ
    Recipe below!”


    Option 3:

    “I tried making this Frito Corn Salad and WOWโ€ฆ it disappeared fast! ๐Ÿคค๐ŸŒฝ The sweet corn, bold spices, creamy dressing, and crunchy chips make every bite delicious.
    Who would you share a bowl with? ๐Ÿ‘‡
    Full recipe in the comments!”


    Option 4:

    “Need an easy party dish? This Frito Corn Salad is it! ๐ŸŒฝ๐Ÿฅ— Loaded with flavor, color, and crunch, this recipe takes only minutes to make and everyone loves it.
    Check the comments for the full recipe!”


    Nutrition Facts (Approximate)

    Per serving (if divided into 10 servings):

    • Calories: 350โ€“450 kcal
    • Protein: 8โ€“12 g
    • Carbohydrates: 35โ€“45 g
    • Fat: 22โ€“30 g
    • Fiber: 3โ€“5 g

    Entire Recipe:

    • Calories: approximately 3,500โ€“4,500 kcal
    • Protein: approximately 80โ€“120 g

    Frequently Asked Questions (Q&A)

    Q: Can I make Frito Corn Salad ahead of time?
    A: Yes! Prepare the salad mixture ahead, but add Fritos right before serving.

    Q: Can I use canned corn?
    A: Absolutely! Just drain it well before mixing.

    Q: Can I make this healthier?
    A: Use Greek yogurt instead of some mayonnaise and add more vegetables.

    Q: What Fritos work best?
    A: Original Fritos, Chili Cheese Fritos, or Flaminโ€™ Hot Fritos all work great.

    Q: Can I add meat?
    A: Yes! Chicken, bacon, or grilled steak make it a complete meal.

    Q: Why is this recipe popular?
    A: Itโ€™s creamy, crunchy, colorful, and combines familiar flavors everyone loves.

    Q: How do I keep it crunchy for a party?
    A: Keep the Fritos in a separate bowl and mix them in just before eating.


    ๐ŸŒฝ๐Ÿฅ— Frito Corn Salad is the perfect combination of creamy, cheesy, fresh, and crunchy! Whether youโ€™re serving it at a backyard BBQ, family gathering, or taco night, this easy recipe is guaranteed to be a crowd favorite. โค๏ธ

  • Navajo Fry Bread with Smoked Brisket & Hatch Green Chile

    Navajo Fry Bread with Smoked Brisket & Hatch Green Chile

    A delicious Southwest-inspired dish featuring crispy, golden Navajo Fry Bread topped with tender smoked brisket, roasted Hatch green chiles, cheese, and fresh toppings. This recipe combines traditional fry bread with bold Southwestern flavors for an unforgettable meal.


    Ingredients

    For the Navajo Fry Bread:

    • 4 cups all-purpose flour
    • 1 tablespoon baking powder
    • 1 teaspoon salt
    • 1ยฝ cups warm water
    • 2 tablespoons powdered milk (optional)
    • 2 tablespoons vegetable oil or shortening
    • Oil for frying

    For the Smoked Brisket Topping:

    • 2 pounds smoked brisket, chopped or shredded
    • 1 tablespoon olive oil
    • 1 small onion, diced
    • 3 cloves garlic, minced
    • 2 cups roasted Hatch green chiles, chopped
    • 1 cup beef broth
    • 1 teaspoon cumin
    • 1 teaspoon smoked paprika
    • 1 teaspoon chili powder
    • Salt and black pepper to taste

    For Toppings:

    • 2 cups shredded cheddar or Monterey Jack cheese
    • Fresh cilantro
    • Diced tomatoes
    • Lettuce
    • Sour cream
    • Avocado slices
    • Pickled onions
    • Salsa verde
    • Jalapeรฑo slices
    • Lime wedges

    Instructions

    1. Make the Fry Bread Dough

    • In a large bowl, combine flour, baking powder, salt, and powdered milk.
    • Slowly add warm water and mix until a soft dough forms.
    • Knead gently for about 3โ€“5 minutes until smooth.
    • Cover and let rest for 30โ€“45 minutes.

    2. Shape & Fry the Bread

    • Divide dough into 8 equal portions.
    • Roll each piece into a ball, then flatten into a thin circle about 6 inches wide.
    • Heat oil to 350ยฐF (175ยฐC).
    • Fry each piece for 1โ€“2 minutes per side until golden and puffed.
    • Drain on paper towels.

    3. Prepare the Green Chile Brisket

    • Heat oil in a skillet over medium heat.
    • Add onion and cook until softened.
    • Add garlic and cook for 30 seconds.
    • Add smoked brisket, Hatch green chiles, beef broth, cumin, smoked paprika, chili powder, salt, and pepper.
    • Simmer for 10โ€“15 minutes until the brisket is juicy and flavorful.

    4. Assemble

    • Place warm fry bread on a plate.
    • Add a generous layer of smoked brisket and Hatch green chile mixture.
    • Top with cheese, cilantro, avocado, tomatoes, sour cream, and salsa.
    • Serve immediately while the fry bread is crispy.

    Extra Recipe Tips & Secrets ๐ŸŒถ๏ธโœจ

    For Perfect Fry Bread:

    โœ… Let the dough rest
    Resting helps create a softer, more elastic texture.

    โœ… Donโ€™t make it too thick
    A thinner center creates the perfect crispy outside and fluffy inside.

    โœ… Keep oil temperature steady
    Too hot = burnt outside. Too cool = greasy bread.


    Flavor Variations

    ๐ŸŒถ๏ธ Green Chile Brisket Fry Bread:

    Add:

    • Extra Hatch green chiles
    • Pepper Jack cheese
    • Roasted poblanos

    ๐Ÿง€ Loaded Fry Bread:

    Top with:

    • Pinto beans
    • Ground beef
    • Lettuce
    • Tomatoes
    • Cheese
    • Salsa

    ๐Ÿณ Breakfast Fry Bread:

    Add:

    • Scrambled eggs
    • Bacon
    • Sausage
    • Cheese
    • Green chile sauce

    ๐Ÿฏ Sweet Fry Bread:

    Serve with:

    • Honey
    • Cinnamon sugar
    • Powdered sugar

    Serving Ideas

    Perfect with:

    ๐ŸŒฝ Mexican street corn
    ๐Ÿš Spanish rice
    ๐Ÿซ˜ Pinto beans
    ๐Ÿฅ— Fresh salad
    ๐ŸŒถ๏ธ Salsa verde
    ๐Ÿฅ‘ Guacamole
    ๐Ÿฒ Green chile stew


    Storage & Meal Prep

    Fry Bread:
    Best eaten fresh, but can be stored covered for 1โ€“2 days and reheated in the oven.

    Brisket Mixture:
    Store refrigerated for up to 4 days.

    Freezer:
    Freeze cooked brisket topping for up to 3 months.


    Social Media Caption Ideas โค๏ธ

    Option 1:

    “Made this Navajo Fry Bread with Smoked Brisket & Hatch Green Chile and WOWโ€ฆ this was incredible! ๐ŸŒถ๏ธ๐Ÿ– Crispy golden fry bread topped with tender smoky brisket, roasted green chiles, melted cheese, and fresh toppings. Every bite is packed with Southwest flavor.
    Full recipe is in the comments below!”


    Option 2:

    “Dinner was something special tonight! ๐Ÿ˜๐Ÿž This Navajo Fry Bread loaded with smoked brisket and Hatch green chile is the perfect combination of crispy, savory, smoky, and spicy. A true comfort meal that everyone will love.
    Save this recipe โ€” you need to try it! โค๏ธ
    Recipe below!”


    Option 3:

    “Crispy homemade fry bread + smoky brisket + Hatch green chiles = the ultimate Southwest comfort food! ๐ŸŒถ๏ธ๐Ÿ”ฅ This recipe is full of bold flavors and perfect for family dinners, gatherings, or anytime you want something unforgettable.
    Who would try this? ๐Ÿ‘‡
    Full recipe in the comments!”


    Option 4:

    “I made this Navajo Fry Bread and the kitchen smelled amazing! ๐Ÿžโค๏ธ The crispy bread, tender brisket, and spicy green chile topping come together perfectly. This is the kind of recipe that turns an ordinary dinner into something memorable.
    Check the comments for the full recipe!”


    Nutrition Facts (Approximate)

    Per serving (1 loaded fry bread):

    • Calories: 750โ€“950 kcal
    • Protein: 45โ€“60 g
    • Carbohydrates: 70โ€“90 g
    • Fat: 35โ€“50 g
    • Fiber: 5โ€“8 g

    Entire Recipe:

    • Calories: approximately 6,000โ€“7,500 kcal
    • Protein: approximately 350โ€“450 g

    Frequently Asked Questions (Q&A)

    Q: What is Navajo Fry Bread?
    A: Navajo Fry Bread is a traditional Native American fried dough that is crispy on the outside and soft inside. It is often served with savory toppings or sweet toppings.

    Q: Can I make fry bread ahead of time?
    A: It is best fresh, but you can reheat it in the oven or air fryer to bring back some crispiness.

    Q: Can I use leftover brisket?
    A: Absolutely! This recipe is a perfect way to use leftover smoked brisket.

    Q: What are Hatch green chiles?
    A: Hatch green chiles are New Mexico-grown peppers known for their smoky flavor and delicious mild-to-medium heat.

    Q: Can I bake the fry bread instead of frying?
    A: Frying gives the traditional texture, but baking works if you prefer a lighter version.

    Q: Can I use another meat?
    A: Yes! Try pulled pork, shredded chicken, carne asada, or ground beef.

    Q: What makes this recipe special?
    A: The combination of crispy fry bread, smoky brisket, and roasted green chile creates a perfect balance of texture and bold Southwest flavor.


    ๐Ÿž๐ŸŒถ๏ธ Navajo Fry Bread with Smoked Brisket & Hatch Green Chile is a true Southwest-inspired masterpiece โ€” crispy, smoky, cheesy, and packed with unforgettable flavors. Perfect for sharing with family and friends! โค๏ธ

  • Arroz Con Pollo Recipe

    (Classic Mexican-Style Chicken and Rice)

    A comforting one-pot meal made with juicy chicken, flavorful seasoned rice, tomatoes, vegetables, and warm spices. Arroz Con Pollo is a family favorite because itโ€™s simple, filling, and packed with homemade flavor.


    Ingredients

    For the Chicken:

    • 3 pounds bone-in chicken thighs or drumsticks
    • 2 tablespoons olive oil
    • 1 teaspoon salt
    • 1 teaspoon black pepper
    • 1 teaspoon garlic powder
    • 1 teaspoon paprika

    For the Rice:

    • 2 cups long-grain white rice, rinsed and drained
    • 2 tablespoons olive oil
    • 1 medium onion, diced
    • 1 green bell pepper, diced
    • 4 cloves garlic, minced
    • 1 cup tomato sauce
    • 3 cups chicken broth
    • 1 cup frozen peas and carrots
    • 1 cup corn kernels (optional)

    Seasonings:

    • 2 teaspoons cumin
    • 1 teaspoon chili powder
    • 1 teaspoon smoked paprika
    • 1 teaspoon Mexican oregano
    • 1 teaspoon turmeric or achiote seasoning (for color)
    • Salt and pepper to taste

    For Garnishing:

    • Fresh cilantro
    • Lime wedges
    • Sliced avocado
    • Jalapeรฑos
    • Salsa
    • Sour cream

    Instructions

    1. Season and Brown the Chicken

    • Pat chicken dry and season with salt, pepper, garlic powder, and paprika.
    • Heat oil in a large skillet or Dutch oven.
    • Brown chicken pieces for 4โ€“5 minutes per side until golden.
    • Remove chicken and set aside.

    2. Prepare the Rice Base

    • In the same pan, add onion and bell pepper.
    • Cook for 3โ€“4 minutes until softened.
    • Add garlic and cook for 30 seconds.
    • Add rice and toast for 3โ€“5 minutes until lightly golden.

    3. Add Flavor

    • Stir in tomato sauce, cumin, chili powder, smoked paprika, oregano, and turmeric.
    • Cook for 1โ€“2 minutes.

    4. Cook Everything Together

    • Add chicken broth and stir.
    • Place browned chicken pieces on top of the rice.
    • Bring to a boil, then reduce heat to low.
    • Cover and cook for 25โ€“30 minutes until rice is tender and chicken is cooked through.

    5. Finish & Serve

    • Stir in peas and carrots during the last 5 minutes.
    • Let rest covered for 10 minutes.
    • Fluff rice with a fork.
    • Garnish with cilantro and lime.

    Serve warm with tortillas, salsa, or a fresh salad.


    Extra Recipe Tips & Secrets ๐Ÿ—โœจ

    For the Best Arroz Con Pollo:

    โœ… Toast the rice first
    This gives the rice a deeper flavor and prevents it from becoming mushy.

    โœ… Brown the chicken
    The caramelized flavor from the chicken makes the whole dish taste richer.

    โœ… Use bone-in chicken
    The bones add extra flavor to the rice while cooking.

    โœ… Let it rest before serving
    Resting allows the rice to absorb all the delicious flavors.


    Delicious Variations

    ๐ŸŒถ๏ธ Spicy Arroz Con Pollo:

    Add:

    • Jalapeรฑos
    • Serrano peppers
    • Chipotle peppers
    • Hot salsa

    ๐Ÿง€ Creamy Arroz Con Pollo:

    Add:

    • ยฝ cup cream cheese
    • ยฝ cup sour cream
    • Monterey Jack cheese

    ๐Ÿฅ‘ Southwest Style:

    Add:

    • Black beans
    • Corn
    • Green chiles
    • Avocado topping

    ๐Ÿ Tropical Version:

    Add:

    • Pineapple chunks
    • Bell peppers
    • Extra cilantro

    Serving Ideas ๐ŸŒฎ

    Perfect with:

    ๐ŸŒถ๏ธ Salsa verde
    ๐Ÿฅ‘ Guacamole
    ๐ŸŒฝ Mexican street corn
    ๐Ÿž Green Chile Cheese Bread
    ๐Ÿฅ— Fresh salad
    ๐Ÿซ˜ Refried beans
    ๐Ÿ‹ Lime wedges


    Storage & Meal Prep

    Refrigerator:
    Store leftovers in an airtight container for up to 4 days.

    Freezer:
    Freeze portions for up to 3 months.

    Reheating Tip:
    Add a splash of chicken broth before reheating to keep the rice moist.


    Social Media Caption Ideas โค๏ธ

    Option 1:

    “Made this Arroz Con Pollo and it was the perfect comfort meal! ๐Ÿ—๐Ÿš Tender chicken, flavorful rice, colorful vegetables, and delicious spices all cooked together in one pot. This is the kind of homemade dinner that brings everyone to the table.
    Full recipe is in the comments below!”


    Option 2:

    “Nothing beats a warm plate of homemade Arroz Con Pollo! ๐Ÿ˜๐Ÿ— The chicken is juicy, the rice is packed with flavor, and every bite tastes like a family recipe made with love. Simple ingredients, incredible results!
    Save this recipe for your next dinner night โค๏ธ
    Recipe below!”


    Option 3:

    “Tonightโ€™s dinner was a winner! ๐Ÿšโœจ This Arroz Con Pollo is colorful, comforting, and full of traditional flavors. One pot, easy cleanup, and a meal the whole family will love.
    Who would you share this with? ๐Ÿ‘‡
    Full recipe in the comments!”


    Option 4:

    “A classic that never gets old! โค๏ธ๐Ÿ— Arroz Con Pollo is the perfect combination of tender chicken, seasoned rice, and homemade flavors. Itโ€™s cozy, satisfying, and makes the kitchen smell amazing.
    Check the comments for the complete recipe!”


    Nutrition Facts (Approximate)

    Per serving (if divided into 8 servings):

    • Calories: 480โ€“600 kcal
    • Protein: 35โ€“45 g
    • Carbohydrates: 50โ€“60 g
    • Fat: 18โ€“28 g
    • Fiber: 4โ€“6 g

    Entire Recipe:

    • Calories: approximately 3,800โ€“4,800 kcal
    • Protein: approximately 280โ€“350 g

    Frequently Asked Questions (Q&A)

    Q: What does Arroz Con Pollo mean?
    A: Arroz Con Pollo means โ€œrice with chickenโ€ in Spanish. It is a traditional dish enjoyed throughout Latin America and Spain.

    Q: Can I use chicken breast instead of thighs?
    A: Yes, but thighs stay juicier and add more flavor.

    Q: Why is my rice mushy?
    A: Too much liquid, over-stirring, or cooking at too high a temperature can make rice mushy.

    Q: Can I make Arroz Con Pollo ahead of time?
    A: Yes! It reheats beautifully and often tastes even better the next day.

    Q: Can I add more vegetables?
    A: Absolutely! Try peas, carrots, corn, bell peppers, or green beans.

    Q: Can I make this in a slow cooker?
    A: Yes, but cook the rice separately and combine before serving for the best texture.

    Q: What makes Arroz Con Pollo special?
    A: The combination of seasoned chicken, aromatic rice, and traditional spices creates a comforting meal full of flavor and memories.


    ๐Ÿ—๐Ÿš Arroz Con Pollo is the ultimate comfort food โ€” tender chicken, flavorful rice, and warm spices cooked together into one delicious homemade meal. A classic recipe that brings family and friends together around the table! โค๏ธ

  • Green Chile Cheese Bread

    A soft, cheesy, and flavorful homemade bread packed with roasted green chiles and melted cheese. This Green Chile Cheese Bread is perfect as a side for soups, stews, chili, BBQ, or simply enjoyed warm with butter.


    Ingredients

    For the Bread:

    • 3 cups all-purpose flour
    • 1 tablespoon sugar
    • 1 tablespoon baking powder
    • 1 teaspoon salt
    • ยฝ teaspoon garlic powder
    • ยฝ teaspoon smoked paprika
    • 2 cups shredded Monterey Jack cheese
    • 1 cup shredded cheddar cheese
    • 1 cup roasted green chiles, diced (Hatch green chiles recommended)
    • 3 large eggs
    • 1 cup milk
    • โ…“ cup melted butter
    • ยผ cup chopped fresh cilantro (optional)
    • 2 green onions, finely sliced (optional)

    Instructions

    1. Prepare the batter

    • Preheat oven to 350ยฐF (175ยฐC).
    • Grease a 9×5-inch loaf pan or line with parchment paper.
    • In a large bowl, whisk together flour, sugar, baking powder, salt, garlic powder, and smoked paprika.

    2. Add the flavors

    • Stir in shredded Monterey Jack cheese, cheddar cheese, green chiles, cilantro, and green onions.
    • Toss gently to coat everything with flour.

    3. Mix the wet ingredients

    • In another bowl, whisk eggs, milk, and melted butter.
    • Pour the wet mixture into the dry ingredients.
    • Stir gently until just combined. Do not overmix.

    4. Bake the bread

    • Pour batter into the prepared loaf pan.
    • Sprinkle extra cheese on top if desired.
    • Bake for 45โ€“55 minutes, until golden brown and a toothpick inserted in the center comes out clean.

    5. Cool and serve

    • Let the bread cool for 10โ€“15 minutes before slicing.
    • Serve warm with butter, soup, chili, or your favorite Mexican dishes.

    Extra Tips & Variations ๐ŸŒถ๏ธโœจ

    Make It Extra Cheesy:

    Add:

    • Extra Monterey Jack on top
    • Pepper Jack cheese for more spice
    • A little cream cheese for a richer texture

    Make It Spicier:

    Add:

    • Fresh jalapeรฑos
    • Serrano peppers
    • Hot Hatch green chiles
    • A dash of cayenne pepper

    Add More Flavor:

    Try mixing in:

    • Crispy bacon pieces
    • Corn kernels
    • Roasted poblano peppers
    • Chopped cilantro
    • Caramelized onions

    Serving Ideas:

    Perfect with:

    • Green Chile Stew ๐ŸŒถ๏ธ
    • Caldo de Res ๐Ÿฒ
    • Chili
    • Taco soup
    • BBQ meats
    • Breakfast eggs

    Social Media Caption Ideas

    Option 1:
    “Last night I baked this Green Chile Cheese Bread and my kitchen smelled incredible! ๐ŸŒถ๏ธ๐Ÿง€๐Ÿž The combination of roasted green chiles and melted cheese creates the perfect balance of smoky, spicy, and savory flavors. This bread is soft, cheesy, and absolutely irresistible!
    You can find the full recipe in the comments below!”


    Option 2:
    “Fresh homemade bread just hits different! ๐Ÿ˜๐Ÿž This Green Chile Cheese Bread is loaded with cheesy goodness and roasted chile flavor in every bite. Perfect alongside soups, stews, or enjoyed warm straight from the oven.
    Save this recipe โ€” youโ€™re going to love it! โค๏ธ
    Full recipe in the comments!”


    Option 3:
    “I tried making this Green Chile Cheese Bread and WOWโ€ฆ it was amazing! ๐ŸŒถ๏ธโœจ The melted cheese, buttery texture, and smoky green chile flavor make this the perfect homemade treat. Easy to make and packed with flavor!
    Check out the full recipe in the comments below!”


    Nutrition Facts (Approximate)

    Per slice (if divided into 10 slices):

    • Calories: about 280โ€“350 kcal
    • Protein: about 10โ€“14 g
    • Carbohydrates: about 30โ€“38 g
    • Fat: about 14โ€“20 g
    • Fiber: about 1โ€“2 g

    Entire loaf:

    • Total Calories: approximately 2,800โ€“3,500 kcal
    • Total Protein: approximately 100โ€“140 g

    Frequently Asked Questions (Q&A)

    Q: Can I use canned green chiles?
    A: Yes! Canned diced green chiles work perfectly. Just drain them well before adding.

    Q: What cheese melts best in this bread?
    A: Monterey Jack, Pepper Jack, cheddar, and Oaxaca cheese all work beautifully.

    Q: Can I make this bread ahead of time?
    A: Yes! Store it wrapped at room temperature for 2 days or refrigerate for up to 5 days.

    Q: Can I freeze Green Chile Cheese Bread?
    A: Absolutely. Wrap slices individually and freeze for up to 3 months.

    Q: How do I reheat it?
    A: Warm slices in the oven, toaster oven, or microwave with a little butter.

    Q: Can I make it gluten-free?
    A: Yes! Use a gluten-free all-purpose flour blend.

    Q: Is this bread spicy?
    A: The spice level depends on the green chiles. Mild Hatch chiles give great flavor without too much heat.


    ๐ŸŒถ๏ธ๐Ÿง€ This Green Chile Cheese Bread is the perfect combination of homemade comfort and bold Southwestern flavor. Soft, buttery, cheesy, and loaded with roasted green chile goodness โ€” one slice is never enough! ๐Ÿžโค๏ธ
    More Recipe Tips & Tricks ๐ŸŒถ๏ธ๐Ÿง€๐Ÿž

    How to Make the Best Green Chile Cheese Bread:

    โœ… Drain the green chiles well
    Too much liquid from the chiles can make the bread heavy. Pat them dry before mixing.

    โœ… Use freshly shredded cheese
    Freshly shredded cheese melts better and gives the bread a smoother, cheesier texture.

    โœ… Donโ€™t overmix the batter
    Mix just until combined โ€” overmixing can make the bread dense instead of soft and tender.

    โœ… Let it rest before slicing
    Allow the bread to cool slightly so the cheese sets and each slice holds together perfectly.


    More Flavor Variations

    ๐ŸŒถ๏ธ Bacon Green Chile Cheese Bread

    Add:

    • 1 cup cooked crispy bacon, crumbled
    • Extra cheddar cheese on top

    ๐ŸŒฝ Green Chile Corn Cheese Bread

    Add:

    • 1 cup sweet corn kernels
    • ยฝ teaspoon chili powder
    • Extra cilantro

    ๐Ÿง€ Extra Creamy Version

    Add:

    • 4 oz softened cream cheese
    • ยฝ cup sour cream

    This creates a richer, softer bread.

    ๐Ÿ”ฅ Spicy Southwest Version

    Add:

    • Jalapeรฑos
    • Pepper Jack cheese
    • Chipotle powder
    • Hot green chiles

    ๐Ÿฅ“ Breakfast Version

    Add:

    • Cooked sausage
    • Scrambled eggs
    • More cheese

    Perfect for brunch!


    Storage & Meal Prep

    Room Temperature:
    Store in an airtight container for up to 2 days.

    Refrigerator:
    Keep wrapped for up to 5 days.

    Freezer:
    Freeze whole loaf or individual slices for up to 3 months.

    Reheating Tip:
    Warm slices in the oven at 300ยฐF (150ยฐC) for 5โ€“10 minutes for that fresh-baked texture.


    More Serving Ideas ๐Ÿฒ

    This bread goes perfectly with:

    ๐ŸŒถ๏ธ Green Chile Ground Beef Stew
    ๐Ÿฒ Caldo de Res
    ๐Ÿฅฃ Chicken Tortilla Soup
    ๐Ÿ› Chili
    ๐Ÿฅฉ Steak and grilled meats
    ๐Ÿณ Eggs and breakfast dishes
    ๐ŸŒฎ Tacos and enchiladas
    ๐Ÿฅ— Fresh salads


    Extra Social Media Captions

    Option 4:
    “I baked this Green Chile Cheese Bread and it disappeared so fast! ๐Ÿ˜๐Ÿž The cheesy center, buttery texture, and roasted green chile flavor make this one of those recipes everyone asks for again. Perfect with soup, chili, or just warm with a little butter.
    Full recipe is in the comments below!”


    Option 5:
    “Homemade bread with a Southwest twist! ๐ŸŒถ๏ธ๐Ÿง€ This Green Chile Cheese Bread is loaded with melted cheese and flavorful roasted chiles in every bite. Itโ€™s easy to make, incredibly comforting, and the perfect addition to any meal.
    Who would love a slice of this? โค๏ธ
    Recipe below!”


    Option 6:
    “The smell of freshly baked bread is amazingโ€ฆ but add cheese and green chiles? Absolutely irresistible! ๐Ÿคค๐ŸŒถ๏ธ This Green Chile Cheese Bread is soft, savory, and packed with bold flavors. A must-try recipe for bread lovers!
    Donโ€™t forget to check the comments for the full recipe!”


    Extra Q&A

    Q: Can I make this in muffin form?
    A: Yes! Pour the batter into a greased muffin tin and bake for about 18โ€“22 minutes.

    Q: Can I use fresh roasted Hatch chiles?
    A: Absolutely! Fresh roasted chiles give the best smoky flavor.

    Q: Why did my bread turn out dry?
    A: Overbaking or using too much flour can dry it out. Measure flour carefully and remove it when the center is just cooked.

    Q: Can I make this without eggs?
    A: You can try egg substitutes, but eggs help give the bread structure and a soft texture.

    Q: Can I add meat to this bread?
    A: Yes! Bacon, sausage, shredded chicken, or cooked ground beef are delicious additions.

    Q: Is this bread good for parties?
    A: Yes! Slice it into small pieces and serve as an appetizer โ€” itโ€™s always a crowd favorite.


    ๐ŸŒถ๏ธ๐Ÿž Green Chile Cheese Bread is the perfect blend of homemade comfort and bold Southwest flavor. Whether served with soup, shared at a gathering, or enjoyed warm from the oven, this cheesy chile-filled bread is guaranteed to become a favorite! โค๏ธ

  • Easy Peasy Mexican Rice (Restaurant-Style)

    Easy Peasy Mexican Rice (Restaurant-Style)

    Ingredients

    • 2 cups long-grain white rice, rinsed and drained
    • 2 tablespoons vegetable oil
    • 1 small onion, finely diced
    • 3 cloves garlic, minced
    • 1 cup tomato sauce
    • 3 cups chicken broth (or vegetable broth)
    • 1 teaspoon cumin
    • 1 teaspoon chili powder
    • 1 teaspoon paprika
    • 1 teaspoon salt (adjust to taste)
    • ยฝ teaspoon black pepper
    • 1 cup frozen peas and carrots (optional)
    • ยฝ cup corn kernels (optional)
    • ยผ cup fresh cilantro, chopped
    • Juice of 1 lime (optional)

    Instructions

    1. Toast the rice
      • Heat oil in a large skillet or pot over medium heat.
      • Add rinsed rice and cook for 5โ€“7 minutes, stirring often, until the rice becomes lightly golden and smells nutty.
      • This step gives the rice a delicious restaurant-style flavor.
    2. Cook the aromatics
      • Add diced onion and cook for 2โ€“3 minutes until softened.
      • Stir in garlic and cook for another 30 seconds.
    3. Add the flavors
      • Pour in tomato sauce and stir well.
      • Add cumin, chili powder, paprika, salt, and pepper.
      • Cook for 1โ€“2 minutes to blend the flavors.
    4. Simmer the rice
      • Add chicken broth and stir everything together.
      • Bring to a boil, then reduce heat to low.
      • Cover and simmer for 18โ€“20 minutes until the liquid is absorbed and rice is tender.
    5. Finish and serve
      • Remove from heat and let sit covered for 5โ€“10 minutes.
      • Fluff with a fork.
      • Stir in peas, carrots, corn, cilantro, and lime juice if desired.

    Extra Tips & Variations ๐ŸŒฎโœจ

    Make It More Authentic:

    • Use chicken bouillon with the broth for deeper flavor.
    • Blend fresh tomatoes with garlic and onion instead of using tomato sauce.
    • Add a pinch of saffron or achiote for extra color and flavor.

    Make It Spicy:

    Add:

    • Diced jalapeรฑos
    • Serrano peppers
    • Chipotle peppers in adobo sauce
    • A dash of hot sauce

    Add More Protein:

    Turn it into a full meal by adding:

    • Shredded chicken
    • Ground beef
    • Black beans
    • Grilled shrimp

    Perfect Pairings:

    This Mexican Rice goes perfectly with:

    • Tacos ๐ŸŒฎ
    • Enchiladas
    • Carne asada
    • Fajitas
    • Burritos
    • Grilled chicken
    • Refried beans

      Restaurant-Style Secret Tips:
      Always rinse the rice before cooking to remove extra starch and keep it fluffy.
      Toasting the rice until lightly golden creates that authentic roasted flavor.
      Let the rice rest covered after cooking โ€” this helps every grain become perfectly tender.
      Use warm broth instead of cold liquid for a richer flavor.
      Flavor Boost Additions:
      Try adding:
      1 roasted poblano pepper, diced
      ยฝ cup diced bell peppers
      A handful of chopped tomatoes
      1 teaspoon taco seasoning
      A splash of salsa instead of tomato sauce
      A little butter at the end for extra richness
      Different Versions:
      Cheesy Mexican Rice:
      Add shredded cheddar or Monterey Jack cheese before serving.
      Cilantro Lime Rice:
      Add extra lime juice and fresh cilantro for a bright, fresh flavor.
      Spicy Mexican Rice:
      Add diced jalapeรฑos, serrano peppers, or chipotle peppers for smoky heat.
      One-Pot Mexican Rice:
      Cook seasoned chicken, sausage, or shrimp right in the same pot for a complete meal.

      More Social Media Captions
      Option 4:
      “I made this Easy Peasy Mexican Rice and it turned out so flavorful! ๐Ÿšโœจ Perfectly fluffy rice, rich tomato flavor, and just the right amount of seasoning. This is the side dish that makes every taco night, enchilada dinner, or family meal even better.
      Save this recipe โ€” youโ€™ll want to make it again! โค๏ธ
      Full recipe in the comments below!”


      Option 5:
      “The secret to a great Mexican meal starts with the perfect rice! ๐ŸŒถ๏ธ๐Ÿš This homemade Mexican Rice is simple, delicious, and full of authentic flavors. Itโ€™s the perfect companion for tacos, burritos, grilled meats, and so much more.
      Who else loves restaurant-style rice at home? ๐Ÿ˜
      Recipe is waiting in the comments!”


      Option 6:
      “Forget boring plain rice! ๐Ÿ˜‹ This Easy Peasy Mexican Rice is colorful, flavorful, and incredibly easy to make. The combination of toasted rice, tomato, garlic, and spices creates the perfect side dish everyone will love.
      Try it once and it will become a regular at your dinner table!
      Full recipe below!”


      Option 7:
      “Made this Mexican Rice from scratch today and the whole kitchen smelled amazing! ๐Ÿก๐Ÿš The flavors are warm, comforting, and perfect with all your favorite Mexican dishes. Simple ingredients, easy steps, and amazing results.
      Donโ€™t forget to check the comments for the full recipe!”


      Serving Ideas ๐ŸŒฎ
      This Mexican Rice is amazing with:
      โœ… Chicken enchiladas
      โœ… Beef tacos
      โœ… Carne asada
      โœ… Burrito bowls
      โœ… Quesadillas
      โœ… Fajitas
      โœ… Chili
      โœ… Grilled shrimp
      โœ… Black beans and salsa

      Extra Q&A
      Q: Can I make Mexican Rice without tomato sauce?
      A: Yes! You can use blended fresh tomatoes, salsa, or tomato paste mixed with water instead.
      Q: How do I keep my rice from sticking?
      A: Use enough oil when toasting, avoid stirring while simmering, and allow the rice to rest before fluffing.
      Q: Can I add beans to Mexican Rice?
      A: Yes! Black beans or pinto beans make it heartier and turn it into a complete meal.
      Q: Why does my rice taste bland?
      A: Rice needs enough seasoning. Use flavorful broth, garlic, onion, cumin, and salt for the best results.
      Q: Can I cook this in a rice cooker?
      A: Yes! Toast the rice and sautรฉ the aromatics first, then transfer everything to the rice cooker.
      Q: What is the difference between Spanish Rice and Mexican Rice?
      A: They are very similar. Mexican rice usually uses tomato, garlic, onion, and spices, while Spanish rice often includes saffron or different seasonings.

      Final Description:
      “This Easy Peasy Mexican Rice is proof that simple ingredients can create incredible flavor! ๐Ÿš๐ŸŒถ๏ธ Whether youโ€™re making a big family dinner, hosting friends, or just adding a delicious side to taco night, this recipe is easy, affordable, and guaranteed to become a favorite. One pot, simple steps, and a whole lot of flavor!” โค๏ธ


    Social Media Caption Ideas

    Option 1:
    “Last night I made this Easy Peasy Mexican Rice and it was the perfect side dish! ๐Ÿš๐ŸŒถ๏ธ Fluffy, flavorful, and packed with delicious tomato and spice flavors. It tastes just like the rice you get at your favorite Mexican restaurant and comes together so easily.
    You can find the full recipe in the comments below!”

    Option 2:
    “Sometimes the simplest recipes are the best! โค๏ธ This Mexican Rice is easy, delicious, and pairs perfectly with almost any Mexican dish. The perfect combination of savory flavors, fluffy rice, and a little spice in every bite.
    Full recipe is waiting for you in the comments!”

    Option 3:
    “Made this homemade Mexican Rice today and everyone loved it! ๐Ÿ˜ Itโ€™s fluffy, flavorful, and so much better than store-bought. A must-have side dish for taco night, enchiladas, or any family dinner.
    Check out the full recipe in the comments below!”


    Nutrition Facts (Approximate)

    Per serving (if divided into 6 servings):

    • Calories: about 260โ€“320 kcal
    • Protein: about 5โ€“7 g
    • Carbohydrates: about 50โ€“60 g
    • Fat: about 6โ€“8 g
    • Fiber: about 2โ€“4 g

    Entire recipe:

    • Total Calories: approximately 1,600โ€“1,900 kcal
    • Total Protein: approximately 30โ€“40 g

    Frequently Asked Questions (Q&A)

    Q: Why do I need to toast the rice first?
    A: Toasting the rice adds a nutty flavor and helps create that classic restaurant-style Mexican rice texture.

    Q: Can I use brown rice?
    A: Yes, but you will need more liquid and a longer cooking time.

    Q: Can I make this rice ahead of time?
    A: Absolutely! Store it in the refrigerator for up to 4 days and reheat with a splash of broth or water.

    Q: Why is my Mexican rice mushy?
    A: Too much liquid or stirring while cooking can make rice mushy. Keep the lid closed and let it steam.

    Q: Can I freeze Mexican rice?
    A: Yes! Freeze in an airtight container for up to 3 months.

    Q: Can I make this vegetarian?
    A: Definitely. Use vegetable broth instead of chicken broth.

    Q: What makes Mexican rice taste better?
    A: Toasting the rice, using flavorful broth, and adding tomato, garlic, onion, and spices create the best flavor.

    ๐Ÿš๐ŸŒถ๏ธ Easy, flavorful, and comforting โ€” this Easy Peasy Mexican Rice is the perfect homemade side dish to complete any Mexican-inspired meal!