Category: CAKES

  • Strawberry Butter Swim Biscuits

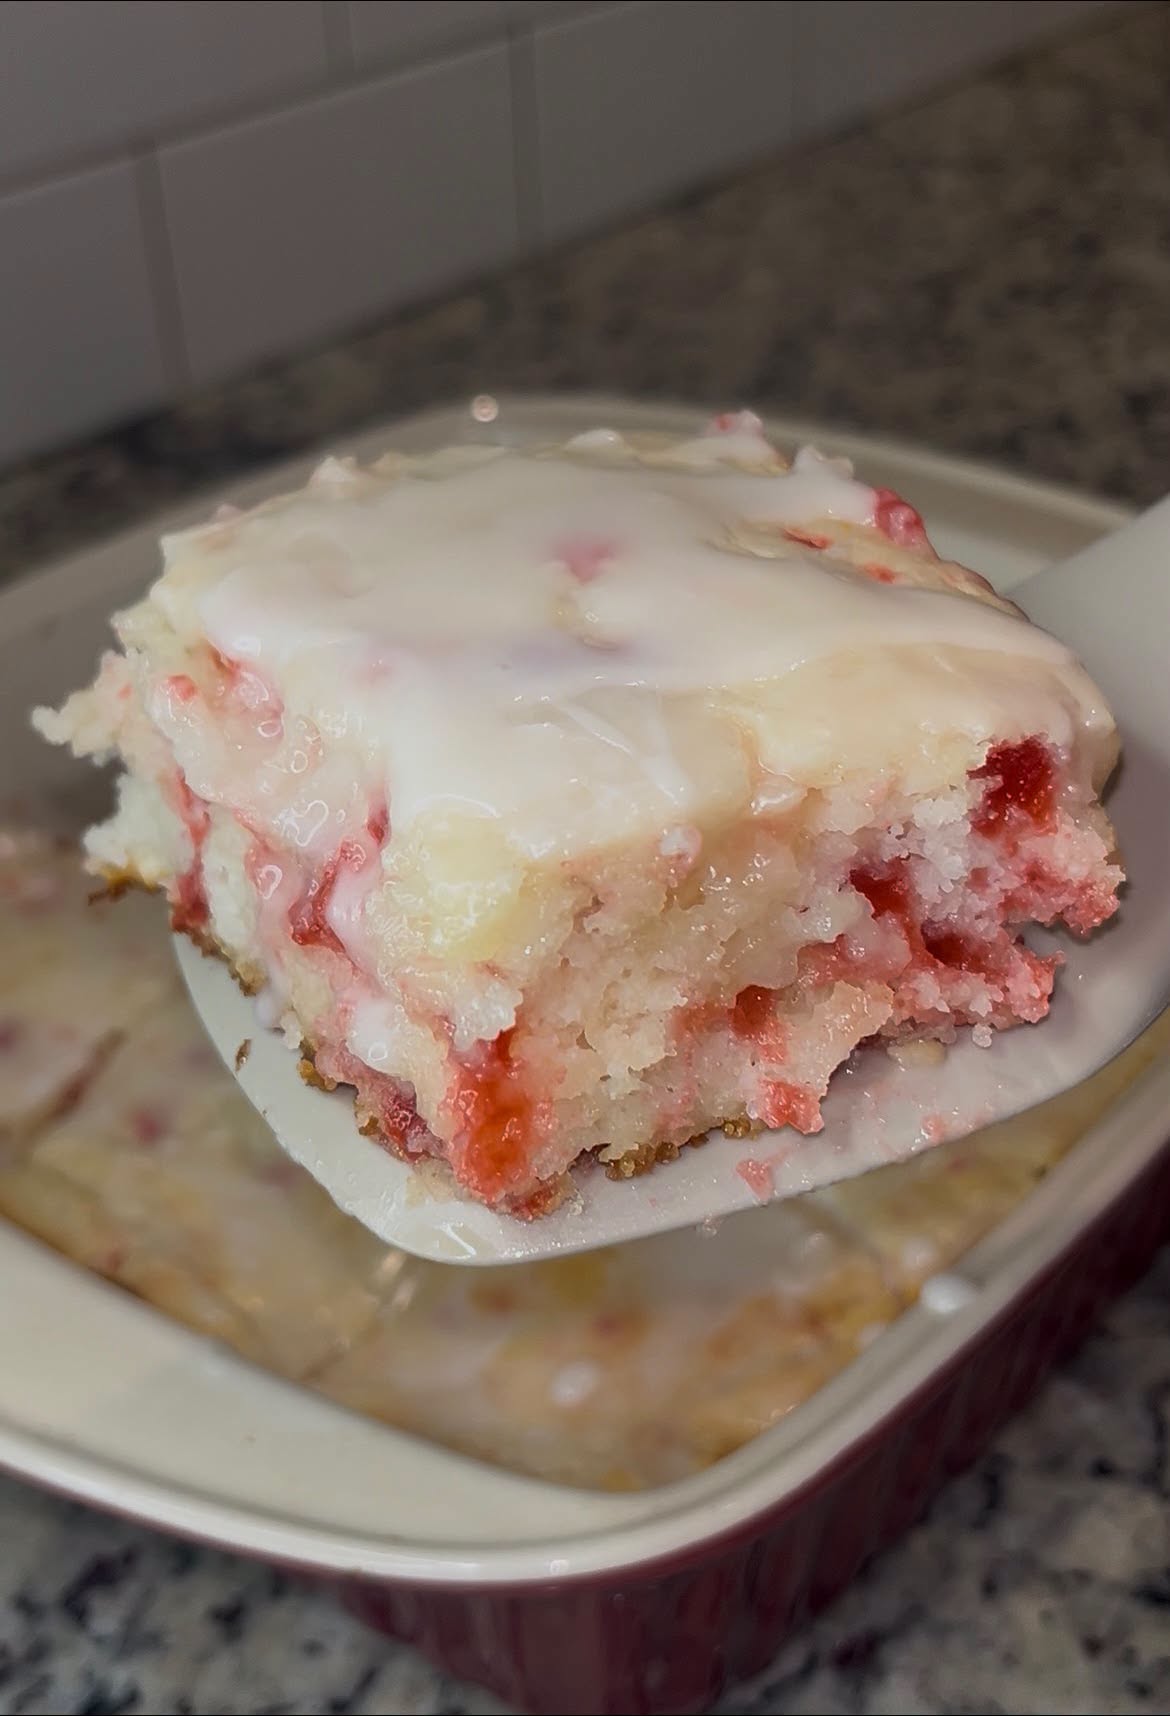
    Strawberry Butter Swim Biscuits

    (Soft, Buttery Biscuits Baked in Melted Butter with Sweet Strawberry Flavor)

    These Strawberry Butter Swim Biscuits are soft, fluffy, and incredibly buttery with bursts of sweet strawberries in every bite. Baked directly in melted butter, they develop golden edges, a tender center, and a rich flavor that’s perfect for breakfast, brunch, or dessert.

    They’re easy to makeโ€”no rolling, no cutting, and no biscuit expertise required!


    Full Recipe (Ingredients + Instructions)

    Ingredients

    For the Biscuits:

    • 2ยฝ cups all-purpose flour
    • 1 tablespoon baking powder
    • 1 tablespoon granulated sugar
    • 1 teaspoon salt
    • 2 cups buttermilk
    • 1 teaspoon vanilla extract
    • 1 cup fresh strawberries, diced
    • ยฝ cup strawberry preserves or jam

    For the Butter:

    • 1 stick (ยฝ cup) unsalted butter, melted

    Optional Glaze:

    • 1 cup powdered sugar
    • 2 tablespoons milk
    • ยฝ teaspoon vanilla extract

    Instructions

    Step 1: Prepare the Baking Dish

    Preheat oven to:

    450ยฐF (230ยฐC).

    Pour the melted butter into an 8×8-inch baking dish, making sure it evenly coats the bottom.


    Step 2: Make the Batter

    In a large bowl whisk together:

    • Flour
    • Baking powder
    • Sugar
    • Salt

    Add:

    • Buttermilk
    • Vanilla extract

    Mix until just combined.

    Do not overmix.

    Fold in the diced strawberries.


    Step 3: Assemble

    Spread the biscuit batter directly over the melted butter.

    Drop spoonfuls of strawberry preserves over the batter and gently swirl with a knife.

    Use a knife to lightly score the batter into 9 squares before baking.


    Step 4: Bake

    Bake for:

    25โ€“30 minutes

    until the top is golden brown and the center is cooked through.


    Step 5: Glaze (Optional)

    Mix powdered sugar, milk, and vanilla until smooth.

    Drizzle over warm biscuits.

    Serve warm.


    Extra Recipe Tips & Variations โœจ

    ๐Ÿ‹ Strawberry Lemon Biscuits

    Add 1 tablespoon lemon zest to the batter.


    ๐Ÿซ Berry Mix Version

    Use a combination of strawberries, blueberries, and raspberries.


    ๐Ÿ“ Cheesecake Style

    Add small cubes of cream cheese throughout the batter.


    ๐Ÿฏ Honey Butter Version

    Brush warm biscuits with honey butter after baking.


    ๐Ÿซ Chocolate Strawberry Biscuits

    Sprinkle mini chocolate chips into the batter.


    Flavor Upgrades / Secret Tips ๐Ÿ”ฅ

    โœ… Use cold buttermilk for extra tender biscuits.

    โœ… Pat fresh strawberries dry to prevent excess moisture.

    โœ… Don’t overmix the batter.

    โœ… Bake immediately after mixing for the fluffiest texture.

    โœ… Serve warm for the ultimate buttery experience.


    Serving Ideas ๐Ÿฝ๏ธ

    Serve with:

    โ˜• Coffee
    ๐Ÿฅ› Cold milk
    ๐Ÿ“ Fresh strawberries
    ๐Ÿฆ Vanilla ice cream
    ๐Ÿฏ Honey butter
    ๐Ÿฅ„ Whipped cream

    Perfect for:

    • Breakfast
    • Brunch
    • Mother’s Day
    • Potlucks
    • Dessert

    Storage & Meal Prep Tips ๐Ÿฅก

    Room Temperature:

    Store covered for 1โ€“2 days.

    Refrigerator:

    Store for 4โ€“5 days.

    Reheating:

    Warm in the microwave for 10โ€“15 seconds before serving.

    Freezer:

    Freeze individual portions for up to 2 months.


    Nutrition Facts (Approximate)

    Per biscuit:

    • Calories: 290โ€“360 kcal
    • Protein: 4โ€“5 g
    • Carbohydrates: 35โ€“40 g
    • Fat: 15โ€“18 g

    Frequently Asked Questions (Q&A)

    Q: Why are they called “swim biscuits”?
    A: Because the dough “swims” in melted butter while baking, creating incredibly buttery edges and a tender interior.

    Q: Can I use frozen strawberries?
    A: Yes, but thaw and drain them well first.

    Q: Can I use milk instead of buttermilk?
    A: Yes, but buttermilk gives the biscuits their signature tenderness and flavor.

    Q: Can I make these sweeter?
    A: Absolutely! Add extra sugar or more strawberry preserves.

    Q: Do I need to cut the biscuits before baking?
    A: Scoring the dough makes them easier to separate after baking.


    Social Media Captions โค๏ธ

    Option 1 (Facebook Style)

    “Made these Strawberry Butter Swim Biscuits today and they were absolutely incredible! ๐Ÿ“๐Ÿงˆ Soft, buttery, fluffy, and bursting with sweet strawberry flavor. They disappeared fast!”

    Option 2 (Instagram Style)

    “Buttery, fluffy, and loaded with strawberries ๐Ÿ“โœจ Breakfast perfection!”

    Option 3 (Short Viral Caption)

    “These biscuits didn’t stand a chance ๐Ÿ“๐Ÿงˆ๐Ÿ”ฅ”

    Option 4 (Homestyle Caption)

    “Some recipes instantly feel like comfort โค๏ธ Warm Strawberry Butter Swim Biscuits fresh from the oven make every morning a little sweeter.”


    Final Food Description for Posting ๐Ÿด

    Strawberry Butter Swim Biscuits are soft, fluffy biscuits baked in melted butter and filled with sweet strawberries and strawberry preserves. With golden buttery edges and a tender center, they’re the perfect combination of breakfast comfort and dessert indulgence. ๐Ÿ“๐Ÿงˆโœจ

  • Coconut Cheesecake Pancakes Recipe

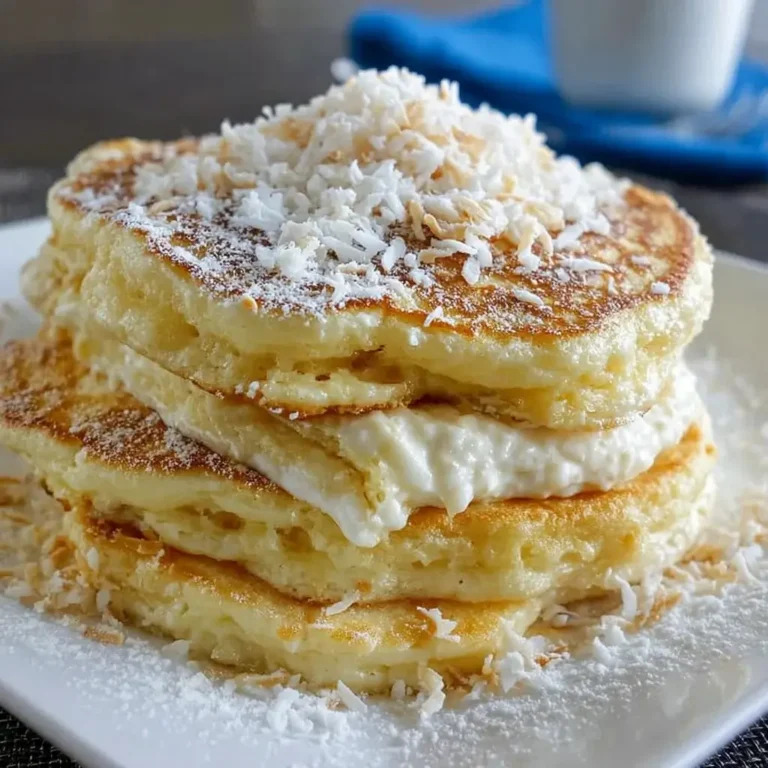
    Coconut Cheesecake Pancakes Recipe

    Fluffy pancakes meet creamy cheesecake and tropical coconut flavors in this decadent breakfast treat. These pancakes are soft, rich, and topped with a sweet coconut cheesecake drizzle that makes them taste like dessert for breakfast.

    Ingredients

    For the Pancakes:

    • 1 ยฝ cups all-purpose flour
    • 2 tablespoons granulated sugar
    • 2 teaspoons baking powder
    • ยฝ teaspoon baking soda
    • ยผ teaspoon salt
    • 1 cup coconut milk (or regular milk)
    • ยฝ cup shredded sweetened coconut
    • 2 large eggs
    • 4 oz cream cheese, softened
    • 2 tablespoons melted butter
    • 1 teaspoon vanilla extract

    For the Coconut Cheesecake Topping:

    • 4 oz cream cheese, softened
    • ยฝ cup powdered sugar
    • ยผ cup coconut milk
    • ยฝ teaspoon vanilla extract
    • ยผ cup shredded coconut

    Optional Toppings:

    • Toasted coconut flakes
    • Fresh berries
    • Sliced bananas
    • Maple syrup
    • Whipped cream
    • White chocolate drizzle

    Instructions

    Make the Cheesecake Pancake Batter:

    1. In a large bowl, whisk together flour, sugar, baking powder, baking soda, and salt.
    2. In another bowl, beat cream cheese until smooth.
    3. Add eggs, coconut milk, melted butter, and vanilla extract. Mix until creamy.
    4. Slowly combine the wet ingredients with the dry ingredients. Stir gently until just combined.
    5. Fold in shredded coconut. Do not overmix โ€” a few lumps are okay.

    Cook the Pancakes:

    1. Heat a nonstick skillet or griddle over medium heat and lightly grease.
    2. Pour about ยผ cup batter for each pancake.
    3. Cook until bubbles form on the surface and the edges look set, about 2โ€“3 minutes.
    4. Flip and cook another 1โ€“2 minutes until golden brown.
    5. Repeat with remaining batter.

    Make the Coconut Cheesecake Topping:

    1. Beat cream cheese and powdered sugar until smooth.
    2. Add coconut milk and vanilla. Mix until creamy and drizzle-friendly.
    3. Stir in shredded coconut.

    Serve:

    Stack pancakes, drizzle generously with coconut cheesecake topping, and finish with toasted coconut flakes and your favorite toppings.


    ๐ŸŒด Extra Tips & Variations

    โœจ More coconut flavor: Toast the shredded coconut before adding it to the batter.
    โœจ Cheesecake swirl pancakes: Drop small spoonfuls of the cheesecake mixture onto each pancake while cooking and swirl gently.
    โœจ Tropical version: Add diced pineapple or mango on top.
    โœจ Crunchy topping: Add crushed graham crackers for a true cheesecake crust flavor.
    โœจ Chocolate coconut: Add mini chocolate chips to the batter.


    Storage & Meal Prep

    • Store leftover pancakes in an airtight container in the refrigerator for up to 4 days.
    • Freeze pancakes between sheets of parchment paper for up to 2 months.
    • Reheat in a toaster, oven, or skillet for the best texture.

    Nutrition (Approx. per serving โ€“ 3 pancakes with topping)

    • Calories: 520
    • Protein: 12g
    • Carbohydrates: 58g
    • Fat: 27g

    Social Media Caption Ideas

    Option 1:
    ๐Ÿฅฅโœจ Breakfast just got a tropical cheesecake makeover! These Coconut Cheesecake Pancakes are fluffy, creamy, and packed with sweet coconut flavor. A little taste of paradise right on your plate! ๐ŸŒด๐Ÿ’•

    Full recipe in the comments ๐Ÿ‘‡

    Option 2:
    This morning I made something special โ€” fluffy pancakes with all the flavors of coconut cheesecake! ๐Ÿฅฅ๐Ÿค The perfect cozy breakfast when you want something sweet and unforgettable.

    Recipe below ๐Ÿ‘‡


    Final Food Description

    These Coconut Cheesecake Pancakes are the perfect combination of fluffy homemade pancakes, creamy cheesecake richness, and sweet coconut goodness. Every bite is soft, indulgent, and filled with tropical flavor โ€” a breakfast that feels like a dessert! ๐Ÿฅฅ๐Ÿฅžโœจ

    Zasad ste iskoristili svu Instant inteligenciju. Odgovori mogu biti slabije kvalitete do 21:17.Besplatno isprobajte Plus

  • Peach Coffee Cake

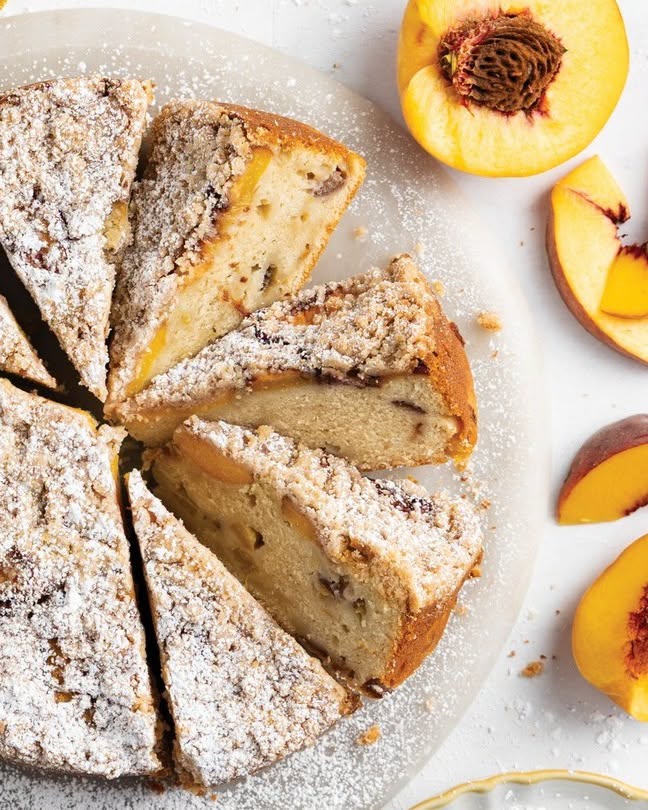
    Peach Coffee Cake

    (A Moist, Buttery Cake Loaded with Juicy Peaches & Cinnamon Streusel)

    This Peach Coffee Cake is the perfect sweet treat for breakfast, brunch, or an afternoon cup of coffee. Made with fresh peaches, a tender buttery cake, and a crunchy cinnamon streusel topping, every bite is full of warm homemade flavor.

    A classic comfort recipe that tastes like summer in every slice!


    Full Recipe (Ingredients + Instructions)

    Ingredients

    For the Cinnamon Streusel Topping:

    • ยพ cup all-purpose flour
    • ยฝ cup brown sugar, packed
    • 1 teaspoon cinnamon
    • ยผ teaspoon salt
    • 6 tablespoons cold butter, cubed

    For the Peach Coffee Cake:

    • 2 cups all-purpose flour
    • 2 teaspoons baking powder
    • ยฝ teaspoon baking soda
    • ยฝ teaspoon salt
    • ยฝ cup unsalted butter, softened
    • ยพ cup granulated sugar
    • 2 large eggs
    • 2 teaspoons vanilla extract
    • 1 cup sour cream or Greek yogurt
    • 2 cups fresh peaches, peeled and diced
    • 1 tablespoon flour (for coating peaches)

    Optional Glaze:

    • 1 cup powdered sugar
    • 2โ€“3 tablespoons milk
    • ยฝ teaspoon vanilla extract

    Instructions

    Step 1: Prepare the Streusel

    In a bowl combine:

    • Flour
    • Brown sugar
    • Cinnamon
    • Salt

    Cut in cold butter until the mixture becomes crumbly.

    Set aside.


    Step 2: Prepare the Cake Batter

    Preheat oven to:

    350ยฐF (175ยฐC)

    Grease a 9-inch square baking pan or springform pan.

    In a bowl whisk together:

    • Flour
    • Baking powder
    • Baking soda
    • Salt

    Set aside.


    Step 3: Cream Butter & Sugar

    Beat together:

    • Softened butter
    • Sugar

    until light and fluffy.

    Add:

    • Eggs
    • Vanilla

    Mix until combined.


    Step 4: Add Sour Cream & Flour

    Alternate adding:

    • Flour mixture
    • Sour cream

    Mix gently until just combined.

    Do not overmix.


    Step 5: Add Peaches

    Toss diced peaches with 1 tablespoon flour.

    Fold gently into the batter.


    Step 6: Assemble & Bake

    Spread batter into prepared pan.

    Top with cinnamon streusel.

    Bake for:

    40โ€“50 minutes

    until a toothpick inserted in the center comes out clean.


    Step 7: Add Glaze (Optional)

    Mix powdered sugar, milk, and vanilla.

    Drizzle over cooled cake.

    Slice and serve.


    Extra Recipe Tips & Variations โœจ

    ๐Ÿ‘ Fresh Peach Version

    Use ripe summer peaches for the best flavor.


    ๐Ÿซ Peach Blueberry Coffee Cake

    Add 1 cup fresh blueberries with the peaches.


    ๐ŸŒฐ Peach Almond Coffee Cake

    Add sliced almonds to the streusel topping.


    ๐Ÿฏ Brown Sugar Peach Cake

    Replace some white sugar with brown sugar for a deeper caramel flavor.


    ๐Ÿง Muffin Version

    Bake in muffin tins for 20โ€“25 minutes.


    Flavor Upgrades / Secret Tips ๐Ÿ”ฅ

    โœ… Coat peaches lightly with flour to prevent them from sinking.

    โœ… Use full-fat sour cream for the moistest cake.

    โœ… Add a pinch of nutmeg for a bakery-style flavor.

    โœ… Don’t overmix the batterโ€”gentle mixing keeps it tender.

    โœ… Let the cake cool slightly before slicing so it holds together.


    Serving Ideas ๐Ÿฝ๏ธ

    Serve with:

    โ˜• Hot coffee
    ๐Ÿต Tea
    ๐Ÿฆ Vanilla ice cream
    ๐Ÿ‘ Fresh peach slices
    ๐Ÿฅ› Cold milk
    ๐Ÿฏ Honey drizzle

    Perfect for:

    • Breakfast
    • Brunch
    • Afternoon snacks
    • Church gatherings
    • Family get-togethers

    Storage & Meal Prep Tips ๐Ÿฅก

    Room Temperature:

    Store covered for 2 days.

    Refrigerator:

    Keeps fresh for 5 days.

    Freezer:

    Freeze slices individually for up to 3 months.

    Reheating:

    Warm slices for 10โ€“15 seconds in the microwave for a fresh-baked taste.


    Nutrition Facts (Approximate)

    Per serving:

    • Calories: 350โ€“420 kcal
    • Protein: 5โ€“7 g
    • Carbohydrates: 45โ€“55 g
    • Fat: 16โ€“20 g

    Frequently Asked Questions (Q&A)

    Q: Can I use canned peaches?
    A: Yes! Drain them very well before adding.

    Q: Can I use frozen peaches?
    A: Yes. Use them frozen and add a few extra minutes to the baking time.

    Q: Why is my coffee cake dry?
    A: Overmixing or overbaking can dry it out. Mix gently and check early.

    Q: Can I make this ahead?
    A: Yes! It tastes even better the next day.

    Q: Why is it called coffee cake if there is no coffee?
    A: Coffee cake is traditionally a cake served alongside coffee or tea, not necessarily made with coffee.


    Social Media Captions โค๏ธ

    Option 1 (Facebook Style)

    “Made this Peach Coffee Cake today and my kitchen smelled amazing! ๐Ÿ‘โ˜•โœจ A soft buttery cake filled with juicy peaches and topped with a sweet cinnamon streusel. The perfect homemade treat with a cup of coffee!”

    Option 2 (Instagram Style)

    “Fresh peaches + buttery cake + cinnamon crumble = pure comfort ๐Ÿ‘โœจ”

    Option 3 (Short Viral Caption)

    “A slice of summer with every bite ๐Ÿ‘โ˜•”

    Option 4 (Homestyle Caption)

    “Some recipes feel like home โค๏ธ This Peach Coffee Cake is warm, sweet, and made for sharing around the table with family and friends.”


    Final Food Description for Posting ๐Ÿด

    Peach Coffee Cake is a tender, buttery homemade cake filled with juicy peaches and topped with a sweet cinnamon streusel. Perfectly moist with a bakery-style crumb, this classic dessert is ideal for breakfast, brunch, or enjoying with a warm cup of coffee. ๐Ÿ‘โ˜•โœจ

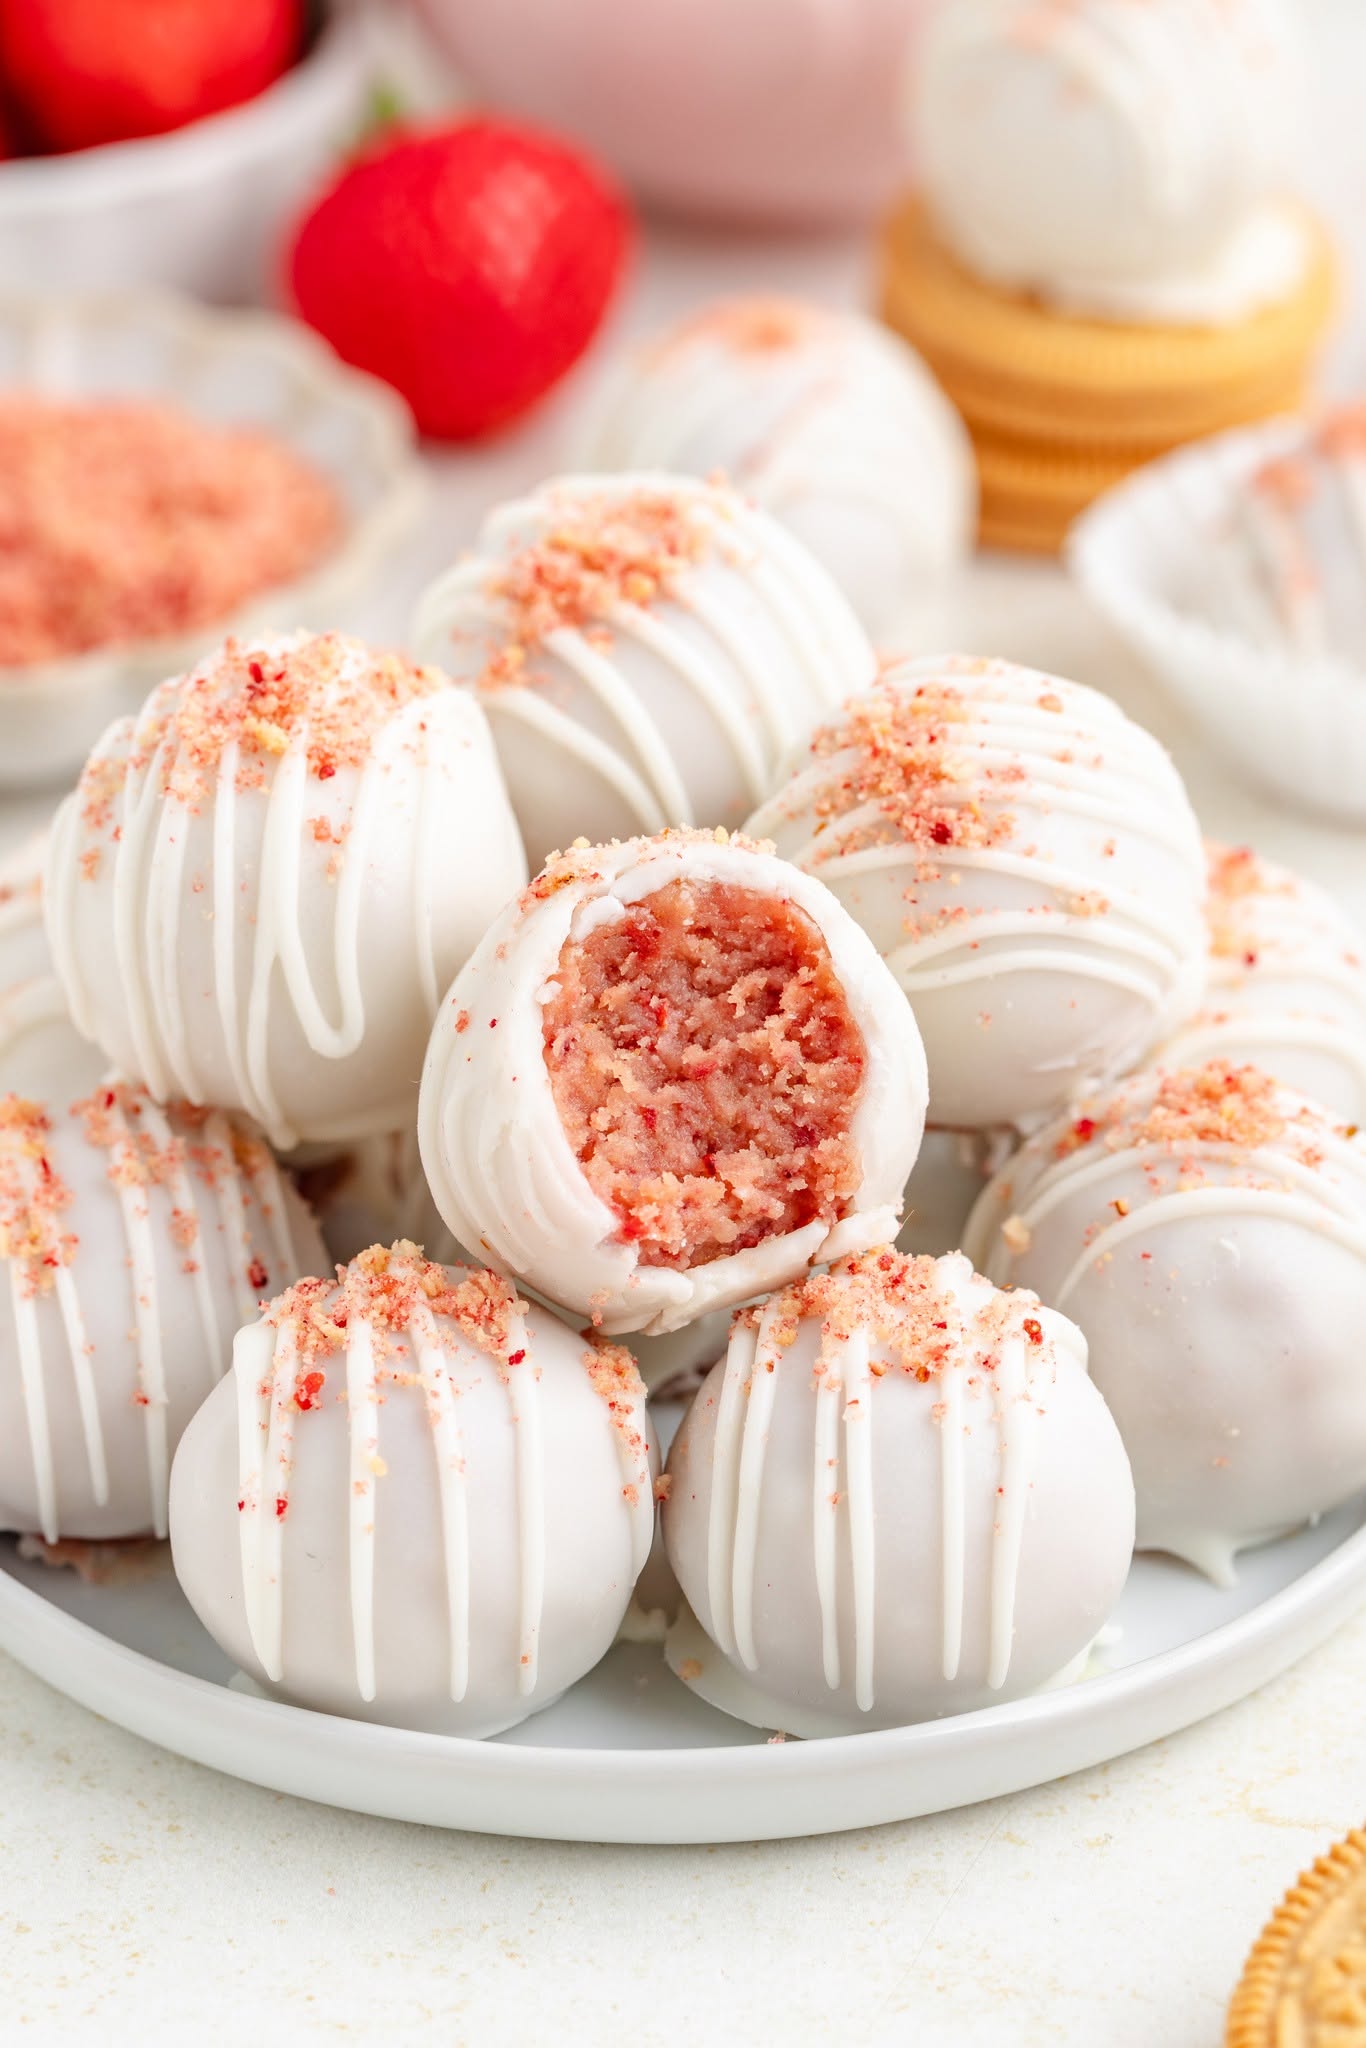
  • strawberry truffles

    strawberry truffles

    (Creamy, Sweet & Decadent Homemade Strawberry Treats)

    These Strawberry Truffles are the perfect bite-sized dessert made with rich white chocolate, sweet strawberry flavor, and a smooth creamy center. Theyโ€™re elegant enough for special occasions but simple enough to make anytime youโ€™re craving a homemade treat.

    Perfect for Valentineโ€™s Day, parties, gifts, dessert tables, or a sweet afternoon snack!


    Full Recipe (Ingredients + Instructions)

    Ingredients

    For the Strawberry Truffle Filling:

    • 2 cups white chocolate chips or chopped white chocolate
    • ยฝ cup heavy cream
    • 3 tablespoons strawberry jam or strawberry puree
    • 1 teaspoon vanilla extract
    • 1 tablespoon butter
    • Pinch of salt

    For the Coating:

    • 1ยฝ cups white chocolate, melted
    • Freeze-dried strawberry pieces (optional)
    • Powdered sugar (optional)
    • Sprinkles (optional)
    • Crushed cookies (optional)

    Instructions

    Step 1: Make the Strawberry Filling

    Place white chocolate in a heat-safe bowl.

    Warm heavy cream until just simmering.

    Pour cream over chocolate and let sit for:

    1โ€“2 minutes

    Stir until smooth.

    Add:

    • Strawberry jam or puree
    • Vanilla extract
    • Butter
    • Salt

    Mix until creamy.


    Step 2: Chill the Mixture

    Cover and refrigerate for:

    2โ€“3 hours

    until firm enough to scoop.


    Step 3: Shape the Truffles

    Scoop small portions using a spoon or cookie scoop.

    Roll into smooth balls with your hands.

    Place on parchment paper.


    Step 4: Coat the Truffles

    Dip each truffle into melted white chocolate.

    Decorate with:

    • Freeze-dried strawberries
    • Sprinkles
    • Powdered sugar

    Allow coating to set.


    Step 5: Serve

    Enjoy chilled or slightly softened at room temperature.


    Extra Recipe Tips & Variations โœจ

    ๐Ÿ“ Chocolate Strawberry Truffles

    Use dark or milk chocolate instead of white chocolate.


    ๐Ÿฐ Strawberry Cheesecake Truffles

    Add:

    • 4 oz softened cream cheese
    • Crushed graham crackers

    for cheesecake flavor.


    ๐Ÿช Strawberry Cookie Truffles

    Mix in crushed vanilla cookies or shortbread cookies.


    ๐Ÿฅฅ Strawberry Coconut Truffles

    Roll finished truffles in shredded coconut.


    ๐Ÿ‹ Strawberry Lemon Truffles

    Add lemon zest for a fresh citrus twist.


    Flavor Upgrades / Secret Tips ๐Ÿ”ฅ

    โœ… Use real strawberry puree for the freshest flavor.

    โœ… Freeze-dried strawberries add intense strawberry taste without extra moisture.

    โœ… Chill the filling completely before rolling.

    โœ… Use good-quality white chocolate for the smoothest texture.

    โœ… Keep hands slightly cool when shaping to prevent melting.


    Serving Ideas ๐Ÿฝ๏ธ

    Serve with:

    ๐Ÿ“ Fresh strawberries
    โ˜• Coffee or tea
    ๐Ÿพ Dessert boards
    ๐Ÿซ Chocolate-covered fruit
    ๐ŸŽ Gift boxes

    Perfect for:

    • Valentineโ€™s Day
    • Bridal showers
    • Baby showers
    • Holidays
    • Birthday parties

    Storage & Meal Prep Tips ๐Ÿฅก

    Refrigerator:

    Store in an airtight container for up to 1 week.

    Freezer:

    Freeze for up to 2 months.

    Serving:

    Let sit at room temperature for 10 minutes before serving for the creamiest texture.


    Nutrition Facts (Approximate)

    Per truffle:

    • Calories: 120โ€“150 kcal
    • Protein: 1โ€“2 g
    • Carbohydrates: 15โ€“18 g
    • Fat: 7โ€“10 g

    (Nutrition varies depending on coating and size.)


    Frequently Asked Questions (Q&A)

    Q: Can I use fresh strawberries instead of jam?
    A: Yes, but reduce the moisture by cooking the puree slightly before adding.

    Q: Why are my truffles too soft?
    A: They may need more chilling time or a little more chocolate added to the filling.

    Q: Can I use milk chocolate?
    A: Absolutely! Strawberry pairs beautifully with milk and dark chocolate.

    Q: How long do homemade truffles last?
    A: About one week refrigerated in an airtight container.

    Q: Can I make these ahead?
    A: Yes! They are perfect for making ahead for parties and gifts.


    Social Media Captions โค๏ธ

    Option 1 (Facebook Style)

    “Made these Strawberry Truffles today and they are absolutely irresistible! ๐Ÿ“๐Ÿซ Creamy, sweet, and packed with strawberry flavorโ€”the perfect little homemade dessert.”

    Option 2 (Instagram Style)

    “Tiny bites of strawberry heaven ๐Ÿ“โœจ Smooth, creamy, and covered in chocolate perfection!”

    Option 3 (Short Viral Caption)

    “Strawberry + chocolate = pure happiness ๐Ÿ“๐Ÿซโค๏ธ”

    Option 4 (Homestyle Caption)

    “Sweet little treats made with love โค๏ธ These homemade strawberry truffles are the perfect dessert for sharing with family and friends.”


    Final Food Description for Posting ๐Ÿด

    Strawberry Truffles are creamy, bite-sized desserts made with smooth white chocolate and sweet strawberry flavor, then coated in a delicate chocolate shell. These elegant homemade treats are rich, fruity, and perfect for celebrations, gifts, or satisfying your sweet tooth anytime. ๐Ÿ“๐Ÿซโœจ

  • No-Bake Chocolate Marshmallow Pie

    No-Bake Chocolate Marshmallow Pie

    (Rich, Creamy Chocolate Pie with Fluffy Marshmallow Filling & Oreo Crust)

    This No-Bake Chocolate Marshmallow Pie is an incredibly easy, rich, and creamy dessert featuring a buttery chocolate cookie crust, a silky chocolate-marshmallow filling, and a fluffy whipped topping. Every bite is smooth, light, chocolaty, and melts in your mouthโ€”no oven required!

    Perfect for holidays, birthdays, potlucks, summer parties, or anytime you’re craving a simple yet impressive dessert.


    Full Recipe (Ingredients + Instructions)

    Ingredients

    For the Chocolate Cookie Crust:

    • 24 Oreo cookies (or chocolate wafer cookies), finely crushed
    • 6 tablespoons unsalted butter, melted

    For the Chocolate Marshmallow Filling:

    • 8 oz cream cheese, softened
    • 1 (7 oz) jar marshmallow fluff
    • 1 cup powdered sugar
    • 1 teaspoon vanilla extract
    • 1ยฝ cups semi-sweet chocolate chips
    • ยฝ cup heavy cream
    • 1ยฝ cups whipped topping (or homemade whipped cream)

    For the Topping:

    • 1ยฝ cups whipped cream
    • Mini marshmallows
    • Chocolate curls
    • Chocolate shavings
    • Chocolate chips
    • Crushed Oreos
    • Chocolate drizzle

    Instructions

    Step 1: Make the Crust

    Combine:

    • Crushed Oreo cookies
    • Melted butter

    Mix until evenly coated.

    Press firmly into a 9-inch pie dish, covering the bottom and sides.

    Refrigerate for 30 minutes.


    Step 2: Melt the Chocolate

    Heat the heavy cream until hot but not boiling.

    Pour over the chocolate chips.

    Let sit for 2 minutes, then stir until smooth.

    Cool for 10 minutes.


    Step 3: Prepare the Filling

    Beat together:

    • Cream cheese
    • Marshmallow fluff
    • Powdered sugar
    • Vanilla

    until smooth and fluffy.

    Slowly mix in the cooled melted chocolate.

    Fold in the whipped topping until fully combined.


    Step 4: Fill the Pie

    Spread the chocolate marshmallow filling evenly into the chilled crust.

    Smooth the top with a spatula.


    Step 5: Chill

    Refrigerate for at least 6 hours, or overnight, until fully set.


    Step 6: Decorate

    Top with:

    • Whipped cream
    • Mini marshmallows
    • Chocolate curls
    • Chocolate drizzle
    • Crushed Oreos

    Slice and serve chilled.


    Extra Recipe Tips & Variations โœจ

    ๐Ÿซ Triple Chocolate Pie

    Use:

    • Milk chocolate
    • Semi-sweet chocolate
    • Dark chocolate

    for an extra-rich dessert.


    ๐Ÿฅœ Rocky Road Pie

    Add:

    • Chopped almonds
    • Mini marshmallows
    • Chocolate chunks

    to the filling.


    ๐Ÿ“ Chocolate Strawberry Pie

    Top with fresh strawberries and chocolate drizzle.


    โ˜• Mocha Chocolate Pie

    Mix 1 teaspoon instant espresso powder into the melted chocolate.


    ๐Ÿช Cookies & Cream Pie

    Fold crushed Oreos into the filling before chilling.


    Flavor Upgrades / Secret Tips ๐Ÿ”ฅ

    โœ… Use full-fat cream cheese for the creamiest texture.

    โœ… Let the melted chocolate cool slightly before mixing to prevent lumps.

    โœ… Chill overnight for the cleanest slices.

    โœ… Homemade whipped cream gives the freshest flavor.

    โœ… Add a pinch of sea salt to enhance the chocolate.

    โœ… Freeze for 20 minutes before serving for an ice cream pie texture.


    Serving Ideas ๐Ÿฝ๏ธ

    Serve with:

    โ˜• Hot coffee
    ๐Ÿฅ› Cold milk
    ๐Ÿ“ Fresh berries
    ๐Ÿฆ Vanilla ice cream
    ๐Ÿซ Extra chocolate sauce

    Perfect for:

    • Holidays
    • Birthday parties
    • Potlucks
    • Summer desserts
    • Family gatherings

    Storage & Meal Prep Tips ๐Ÿฅก

    Refrigerator:

    Store covered for 4โ€“5 days.

    Freezer:

    Freeze for up to 2 months.

    Wrap tightly with plastic wrap and foil.

    Thawing:

    Transfer to the refrigerator for 2โ€“3 hours before serving.

    Make Ahead:

    This pie is ideal to prepare 1 day in advance, as it sets beautifully overnight.


    Nutrition Facts (Approximate)

    Per slice (1/8 pie):

    • Calories: 480โ€“580 kcal
    • Protein: 5โ€“7 g
    • Carbohydrates: 42โ€“50 g
    • Fat: 32โ€“38 g

    (Nutrition varies depending on the toppings and brand of ingredients used.)


    Frequently Asked Questions (Q&A)

    Q: Can I use Cool Whip instead of homemade whipped cream?
    A: Yes! Either works perfectly in this recipe.

    Q: Does the pie need to be baked?
    A: No. This is a completely no-bake dessert.

    Q: Can I use a graham cracker crust instead of Oreo?
    A: Absolutely! Graham cracker crust makes a delicious alternative.

    Q: Can I make this ahead of time?
    A: Yes. It’s even better after chilling overnight.

    Q: How do I get clean slices?
    A: Dip a sharp knife in hot water and wipe it clean between each slice.


    Social Media Captions โค๏ธ

    Option 1 (Facebook Style)

    “Made this No-Bake Chocolate Marshmallow Pie today, and it’s every chocolate lover’s dream! ๐Ÿซ๐Ÿฅงโ˜๏ธ Rich, creamy, fluffy, and incredibly easy to make. The perfect dessert for any occasion!”

    Option 2 (Instagram Style)

    “No oven, no stress… just creamy chocolate marshmallow perfection! ๐Ÿซโœจ๐Ÿฅง”

    Option 3 (Short Viral Caption)

    “Chocolate lovers, this one’s for you! ๐Ÿซ๐ŸคŽโœจ”

    Option 4 (Homestyle Caption)

    “Simple ingredients, no baking, and a whole lot of chocolate โค๏ธ This homemade marshmallow pie is always a crowd favorite!”


    Final Food Description for Posting ๐Ÿด

    No-Bake Chocolate Marshmallow Pie is a rich and creamy dessert made with a buttery Oreo cookie crust, a fluffy chocolate-marshmallow filling, and a generous topping of whipped cream, mini marshmallows, and chocolate shavings. Smooth, decadent, and incredibly easy to make, this chilled pie is the perfect sweet treat for holidays, parties, or any time you’re craving a delicious no-bake dessert. ๐Ÿซ๐Ÿฅงโ˜๏ธโœจ

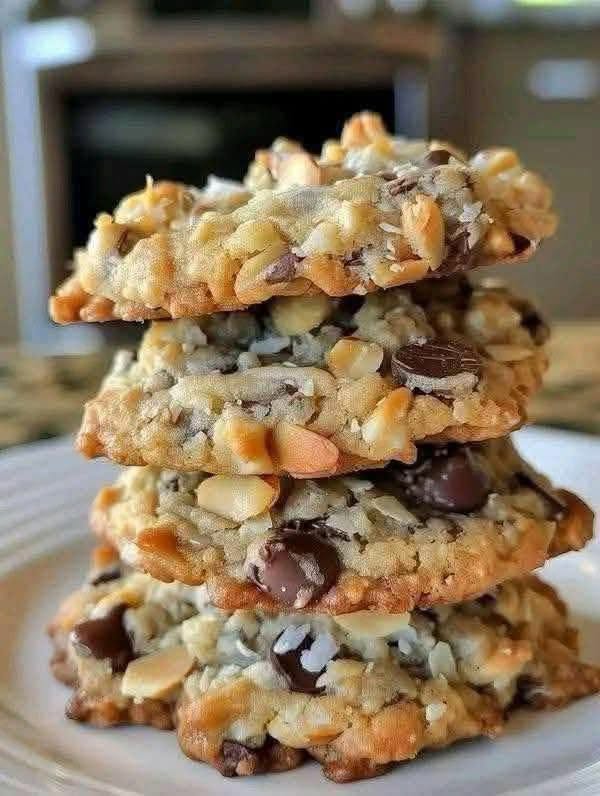
  • White Chocolate Macadamia Nut Cookies

    White Chocolate Macadamia Nut Cookies

    (Soft, Chewy Cookies Loaded with White Chocolate Chips & Buttery Macadamia Nuts)

    These White Chocolate Macadamia Nut Cookies are a bakery-style favorite with golden crispy edges, a soft chewy center, creamy white chocolate chips, and rich buttery macadamia nuts in every bite.

    Sweet, nutty, and perfectly balanced, these cookies are easy to make and taste just like the ones from your favorite bakery. Perfect for holidays, cookie exchanges, afternoon coffee, or a homemade dessert everyone loves.


    Full Recipe (Ingredients + Instructions)

    Ingredients

    Cookie Dough:

    • 2ยฝ cups all-purpose flour
    • 1 teaspoon baking soda
    • ยฝ teaspoon salt
    • 1 cup unsalted butter, softened
    • ยพ cup brown sugar, packed
    • ยฝ cup granulated sugar
    • 2 large eggs
    • 2 teaspoons vanilla extract
    • 1 tablespoon cornstarch (for extra softness)

    Mix-Ins:

    • 1ยฝ cups white chocolate chips
    • 1 cup macadamia nuts, roughly chopped

    Instructions

    Step 1: Prepare the Dough

    Preheat oven to:

    350ยฐF (175ยฐC)

    Line baking sheets with parchment paper.

    In a bowl combine:

    • Flour
    • Baking soda
    • Salt
    • Cornstarch

    Set aside.


    Step 2: Cream Butter & Sugar

    Beat together:

    • Softened butter
    • Brown sugar
    • Granulated sugar

    for:

    2โ€“3 minutes

    until light and fluffy.


    Step 3: Add Wet Ingredients

    Add:

    • Eggs one at a time
    • Vanilla extract

    Mix until combined.


    Step 4: Combine Dough

    Slowly add dry ingredients.

    Mix just until combined.

    Do not overmix.

    Fold in:

    • White chocolate chips
    • Macadamia nuts

    Step 5: Bake Cookies

    Scoop dough into:

    2 tablespoon-sized balls

    Place on baking sheet.

    Bake:

    10โ€“12 minutes

    until edges are lightly golden.

    Centers should still look slightly soft.


    Step 6: Cool

    Let cookies cool on the baking sheet:

    5 minutes

    before transferring to a cooling rack.


    Extra Recipe Tips & Variations โœจ

    ๐Ÿซ Chocolate White Macadamia Cookies

    Add:

    • Dark chocolate chips

    for a richer flavor.


    ๐Ÿฅฅ Tropical Version

    Add:

    • Shredded coconut

    for a coconut macadamia twist.


    ๐Ÿฏ Brown Butter Version

    Brown the butter first for a deeper caramel-like flavor.


    ๐Ÿช Extra Thick Bakery Cookies

    Chill dough for:

    1โ€“2 hours

    before baking.


    ๐ŸŒŠ Sea Salt White Chocolate Cookies

    Sprinkle with flaky sea salt before baking for a sweet-salty combination.


    Flavor Upgrades / Secret Tips ๐Ÿ”ฅ

    โœ… Use real vanilla extract for the best flavor.

    โœ… Toast macadamia nuts lightly before adding for a richer nutty taste.

    โœ… Do not overbakeโ€”soft centers make the best cookies.

    โœ… Chill the dough if you want thicker bakery-style cookies.

    โœ… Use good-quality white chocolate chips because they make a big difference.

    โœ… Add a pinch of espresso powder to enhance the sweetness.


    Serving Ideas ๐Ÿฝ๏ธ

    Serve with:

    โ˜• Coffee
    ๐Ÿฅ› Cold milk
    ๐Ÿต Tea
    ๐Ÿฆ Vanilla ice cream
    ๐Ÿ“ Fresh berries

    Perfect for:

    • Holiday cookie trays
    • Bake sales
    • Parties
    • Gift boxes
    • Family desserts

    Storage & Meal Prep Tips ๐Ÿฅก

    Room Temperature:

    Store in an airtight container for:

    5โ€“7 days

    Refrigerator:

    Keep dough refrigerated for:

    up to 3 days

    before baking.

    Freezer:

    Freeze cookie dough balls for:

    up to 3 months

    Bake straight from frozen, adding 1โ€“2 extra minutes.

    Reheating:

    Warm cookies for:

    10 seconds

    in the microwave for a fresh-baked texture.


    Nutrition Facts (Approximate)

    Per cookie:

    • Calories: 220โ€“280 kcal
    • Protein: 3โ€“4 g
    • Carbohydrates: 25โ€“35 g
    • Fat: 12โ€“16 g

    (Nutrition varies depending on cookie size and ingredients.)


    Frequently Asked Questions (Q&A)

    Q: Why are my cookies flat?
    A: The butter may have been too warm, or the dough needed more chilling time.

    Q: Can I use salted butter?
    A: Yes. Reduce the added salt slightly.

    Q: How do I make cookies softer?
    A: Add cornstarch and avoid overbaking.

    Q: Can I use other nuts?
    A: Yes. Cashews, pecans, or almonds work well.

    Q: Can I make these ahead?
    A: Yes. Freeze cookie dough balls and bake whenever you want fresh cookies.


    Social Media Captions โค๏ธ

    Option 1 (Facebook Style)

    “Fresh homemade White Chocolate Macadamia Nut Cookies ๐Ÿช๐Ÿค Soft, chewy, buttery, and loaded with creamy white chocolate and crunchy macadamia nuts. These disappear fast!”

    Option 2 (Instagram Style)

    “The perfect cookie doesnโ€™t existโ€ฆ until now ๐Ÿค๐Ÿชโœจ White chocolate + macadamia = pure happiness!”

    Option 3 (Short Viral Caption)

    “Bakery-style cookies right from my kitchen ๐Ÿช๐ŸŒฐ”

    Option 4 (Homestyle Caption)

    “Nothing beats the smell of homemade cookies โค๏ธ These white chocolate macadamia cookies are sweet, buttery, and made for sharing with the people you love.”


    Final Food Description for Posting ๐Ÿด

    White Chocolate Macadamia Nut Cookies are soft, chewy bakery-style cookies filled with creamy white chocolate chips and buttery macadamia nuts. With golden edges, a tender center, and the perfect sweet-and-nutty flavor, these homemade cookies are an irresistible treat for any occasion. ๐Ÿช๐Ÿค๐ŸŒฐโœจ

  • Nutella Donut

    (Soft Homemade Donuts Filled with Creamy Hazelnut Chocolate Spread)

    These Nutella Donuts are fluffy, golden, and filled with rich, creamy Nutella in every bite. Made with soft homemade dough, lightly fried until perfectly golden, then coated with sugar and filled with everyoneโ€™s favorite chocolate hazelnut spread, these donuts are the ultimate sweet treat.

    Perfect for breakfast, dessert, brunch, holidays, or whenever youโ€™re craving something bakery-style at home.


    Full Recipe (Ingredients + Instructions)

    Ingredients

    For the Donut Dough:

    • 4 cups all-purpose flour
    • 2ยผ teaspoons active dry yeast
    • ยพ cup warm milk
    • ยผ cup granulated sugar
    • 2 large eggs
    • ยผ cup unsalted butter, softened
    • 1 teaspoon vanilla extract
    • 1 teaspoon salt

    For Filling & Coating:

    • 1 cup Nutella (or chocolate hazelnut spread)
    • ยฝ cup granulated sugar (for coating)
    • Powdered sugar (optional)
    • Chocolate drizzle (optional)

    For Frying:

    • Vegetable oil, enough for frying

    Instructions

    Step 1: Activate the Yeast

    In a small bowl combine:

    • Warm milk
    • 1 tablespoon sugar
    • Yeast

    Let sit for:

    5โ€“10 minutes

    until foamy.


    Step 2: Make the Dough

    In a large bowl combine:

    • Flour
    • Remaining sugar
    • Salt

    Add:

    • Yeast mixture
    • Eggs
    • Vanilla
    • Butter

    Mix until a soft dough forms.

    Knead for:

    8โ€“10 minutes

    until smooth and elastic.


    Step 3: Let the Dough Rise

    Place dough in a greased bowl.

    Cover and let rise in a warm place for:

    1โ€“2 hours

    until doubled in size.


    Step 4: Shape the Donuts

    Punch down dough.

    Roll out to about:

    ยฝ-inch thickness

    Cut into donut rounds.

    Place on a tray.

    Cover and let rise again:

    30โ€“45 minutes


    Step 5: Fry the Donuts

    Heat oil to:

    350ยฐF (175ยฐC)

    Fry donuts for:

    1โ€“2 minutes per side

    until:

    โœ… Golden brown
    โœ… Puffy
    โœ… Cooked through

    Transfer to paper towels.


    Step 6: Fill with Nutella

    Once donuts cool slightly:

    Fill a piping bag with Nutella.

    Using a small knife or piping tip, create a hole in the side.

    Pipe Nutella inside each donut.

    Roll in sugar or dust with powdered sugar.

    Serve warm.


    Extra Recipe Tips & Variations โœจ

    ๐Ÿ“ Nutella Strawberry Donuts

    Add fresh strawberries inside with Nutella for a delicious combination.


    ๐ŸŒ Banana Nutella Donuts

    Add sliced banana with the Nutella filling.


    ๐Ÿซ Chocolate Glazed Version

    Top donuts with:

    • Chocolate glaze
    • Hazelnuts
    • Chocolate chips

    ๐Ÿฉ Baked Nutella Donuts

    Bake at:

    375ยฐF (190ยฐC) for 12โ€“15 minutes

    for a lighter version.


    โ˜• Coffee Shop Style

    Serve with:

    • Espresso
    • Cappuccino
    • Hot chocolate

    for a bakery-style treat.


    Flavor Upgrades / Secret Tips ๐Ÿ”ฅ

    โœ… Make sure milk is warm, not hot, so it doesnโ€™t kill the yeast.

    โœ… Donโ€™t add too much flourโ€”the dough should stay soft for fluffy donuts.

    โœ… Let donuts rise fully for a lighter texture.

    โœ… Fry at the correct temperature so they cook evenly.

    โœ… Warm Nutella slightly before filling for easier piping.

    โœ… Add a pinch of cinnamon sugar for extra flavor.


    Serving Ideas ๐Ÿฝ๏ธ

    Serve with:

    โ˜• Coffee
    ๐Ÿฅ› Cold milk
    ๐Ÿ“ Fresh berries
    ๐Ÿฆ Vanilla ice cream
    ๐Ÿซ Extra Nutella drizzle

    Perfect for:

    • Breakfast treats
    • Birthday parties
    • Brunch
    • Dessert tables
    • Holiday mornings

    Storage & Meal Prep Tips ๐Ÿฅก

    Room Temperature:

    Store in an airtight container for:

    1โ€“2 days

    Refrigerator:

    Store for:

    3โ€“4 days

    but allow them to come to room temperature before serving.

    Freezer:

    Freeze unfilled donuts for:

    up to 2 months

    Fill after thawing.

    Reheating:

    Warm in microwave for:

    10โ€“15 seconds

    to soften.


    Nutrition Facts (Approximate)

    Per donut:

    • Calories: 280โ€“380 kcal
    • Protein: 5โ€“7 g
    • Carbohydrates: 35โ€“45 g
    • Fat: 14โ€“20 g

    (Nutrition varies depending on size and amount of Nutella filling.)


    Frequently Asked Questions (Q&A)

    Q: Can I bake these instead of frying?
    A: Yes. They will be softer and less crispy but still delicious.

    Q: Can I use store-bought dough?
    A: Yes, refrigerated biscuit or donut dough can work for a quicker version.

    Q: How do I get a fluffy donut texture?
    A: Give the dough enough time to rise and avoid adding too much flour.

    Q: Can I fill donuts before frying?
    A: Itโ€™s best to fry first and fill afterward so the filling stays creamy.

    Q: Can I use another filling?
    A: Absolutely! Try pastry cream, jam, peanut butter, or caramel.


    Social Media Captions โค๏ธ

    Option 1 (Facebook Style)

    “Homemade Nutella Donuts are here! ๐Ÿฉ๐Ÿซ Soft, fluffy donuts filled with creamy chocolate hazelnut goodnessโ€”these taste like they came straight from a bakery.”

    Option 2 (Instagram Style)

    “The ultimate sweet treat ๐Ÿ˜๐Ÿซ Fluffy donuts + Nutella filling = pure happiness!”

    Option 3 (Short Viral Caption)

    “A donut filled with Nutella? Yes please! ๐Ÿฉโœจ”

    Option 4 (Homestyle Caption)

    “Some desserts are made to bring smiles โค๏ธ These homemade Nutella donuts are sweet, fluffy, and perfect for sharing with family and friends.”


    Final Food Description for Posting ๐Ÿด

    Nutella Donuts are soft, fluffy homemade donuts filled with creamy chocolate hazelnut spread and finished with a sweet sugar coating. Golden on the outside, tender on the inside, and filled with irresistible Nutella flavor, these bakery-style treats are perfect for breakfast, dessert, or any sweet craving. ๐Ÿฉ๐Ÿซโœจ

  • APPLE CRISP RECIPE

    APPLE CRISP RECIPE

    (Classic Homemade Apple Crisp with Buttery Oat Topping)

    This Apple Crisp Recipe is the perfect cozy dessert made with tender cinnamon-spiced apples baked under a golden, buttery oat crumble topping. Itโ€™s easy to make, full of warm fall flavors, and absolutely delicious served with vanilla ice cream or whipped cream.

    Full Recipe (Ingredients + Instructions)
    Ingredients
    For the Apple Filling:
    6โ€“7 medium apples (about 3 pounds), peeled, cored, and sliced
    ยผ cup granulated sugar
    ยผ cup brown sugar
    2 tablespoons all-purpose flour
    2 tablespoons fresh lemon juice
    1ยฝ teaspoons ground cinnamon
    ยผ teaspoon nutmeg
    1 teaspoon vanilla extract
    ยผ teaspoon salt
    For the Crisp Topping:
    1 cup old-fashioned rolled oats
    ยพ cup all-purpose flour
    ยพ cup brown sugar
    ยฝ cup cold butter, cubed
    ยฝ teaspoon cinnamon
    ยผ teaspoon salt
    ยฝ cup chopped pecans or walnuts (optional)
    Instructions
    Step 1: Prepare the Apples

    Preheat oven to:

    350ยฐF (175ยฐC)

    Grease a 9×13-inch baking dish.

    In a large bowl combine:

    Sliced apples
    Granulated sugar
    Brown sugar
    Flour
    Lemon juice
    Cinnamon
    Nutmeg
    Vanilla
    Salt

    Mix until apples are evenly coated.

    Spread into the baking dish.

    Step 2: Make the Crisp Topping

    In a bowl combine:

    Oats
    Flour
    Brown sugar
    Cinnamon
    Salt

    Add cold butter.

    Use your fingers or a pastry cutter to mix until the topping becomes crumbly.

    Stir in nuts if using.

    Step 3: Assemble

    Sprinkle the crisp topping evenly over the apples.

    Make sure the apples are fully covered.

    Step 4: Bake

    Bake for:

    40โ€“50 minutes

    until:

    โœ… Apples are tender
    โœ… Filling is bubbling
    โœ… Topping is golden brown

    Let cool for:

    10โ€“15 minutes

    before serving.

    Extra Recipe Tips & Variations โœจ
    ๐Ÿ Best Apples for Apple Crisp

    Use firm apples like:

    Granny Smith (tart)
    Honeycrisp (sweet)
    Fuji
    Gala
    Pink Lady

    A mix of sweet and tart apples creates the best flavor.

    ๐Ÿฏ Caramel Apple Crisp

    Add:

    Caramel sauce over the apples
    Extra drizzle before serving
    ๐Ÿฅœ Nutty Apple Crisp

    Add:

    Pecans
    Walnuts
    Almonds

    to the topping.

    ๐Ÿ“ Apple Berry Crisp

    Add:

    Blueberries
    Raspberries
    Cranberries

    with the apples.

    ๐Ÿ‘ Peach Apple Crisp

    Replace some apples with:

    Fresh peaches

    for a summer version.

    ๐Ÿฅฃ Gluten-Free Version

    Use:

    Gluten-free oats
    Gluten-free flour blend
    Flavor Upgrades / Secret Tips ๐Ÿ”ฅ

    โœ… Mix different apple varieties for a deeper flavor.

    โœ… Add a pinch of salt to the topping โ€” it balances the sweetness.

    โœ… Use cold butter for a crispier topping.

    โœ… Add a splash of maple syrup to the filling for extra richness.

    โœ… Toast the oats lightly before mixing for a nuttier flavor.

    โœ… Add a little orange zest with the apples for a fresh twist.

    Serving Ideas ๐Ÿฝ๏ธ

    Serve warm with:

    ๐Ÿฆ Vanilla ice cream
    ๐Ÿฅ„ Whipped cream
    ๐Ÿฏ Caramel drizzle
    ๐Ÿฅœ Chopped pecans
    โ˜• Coffee or tea

    Perfect for:

    Thanksgiving
    Holiday dinners
    Family gatherings
    Weekend baking
    Storage & Meal Prep Tips ๐Ÿฅก
    Refrigerator:

    Store covered for:

    4โ€“5 days

    Freezer:

    Freeze baked apple crisp for:

    up to 3 months

    Make Ahead:

    Prepare the apple filling and topping separately, refrigerate, and bake when ready.

    Reheating:

    Warm individual servings in the microwave or reheat in the oven at:

    325ยฐF (160ยฐC)

    for a crisp topping.

    Nutrition Facts (Approximate)

    Per serving:

    Calories: 350โ€“450 kcal
    Protein: 4โ€“6 g
    Carbohydrates: 55โ€“65 g
    Fat: 15โ€“20 g

    (Nutrition varies depending on apples, topping amount, and serving size.)

    Frequently Asked Questions (Q&A)

    Q: Do I have to peel the apples?
    A: No, but peeling gives a softer, more classic texture.

    Q: Why is my apple crisp watery?
    A: Some apples release more liquid. Using flour or cornstarch in the filling helps thicken the juices.

    Q: Can I make apple crisp ahead of time?
    A: Yes! Bake it ahead and reheat before serving.

    Q: Can I use quick oats instead of rolled oats?
    A: Yes, but rolled oats give the best crunchy texture.

    Q: How do I make the topping extra crispy?
    A: Use cold butter and avoid covering the dish while baking.

    Social Media Captions โค๏ธ
    Option 1 (Facebook Style)

    “Made this homemade Apple Crisp and the whole house smelled amazing! ๐ŸŽโœจ Warm cinnamon apples topped with a buttery golden crumble โ€” the perfect cozy dessert.”

    Option 2 (Instagram Style)

    “The ultimate fall dessert is here! ๐Ÿ‚๐ŸŽ Sweet cinnamon apples, crispy oat topping, and a scoop of vanilla ice cream make every bite unforgettable.”

    Option 3 (Short Viral Caption)

    “Warm apple crisp + vanilla ice cream = pure happiness ๐ŸŽ๐Ÿฆโœจ”

    Option 4 (Homestyle Caption)

    “Nothing says homemade comfort like a fresh baked Apple Crisp. โค๏ธ Simple ingredients, classic flavors, and a dessert everyone loves.”

    Final Food Description for Posting ๐Ÿด

    This Classic Apple Crisp is the perfect homemade dessert with tender cinnamon-spiced apples baked under a buttery, golden oat crumble topping. Warm, comforting, and delicious with a scoop of vanilla ice cream, this easy recipe is a family favorite for any season. ๐ŸŽโœจ

  • Strawberry Cheesecake French Toast

    Strawberry Cheesecake French Toast

    (Creamy Cheesecake Filling with Sweet Strawberries)

    This Strawberry Cheesecake French Toast is the ultimate breakfast treat โ€” thick slices of golden brioche or bread stuffed with a rich cheesecake-style filling, fresh strawberries, and topped with a sweet strawberry sauce. Itโ€™s like dessert and breakfast combined into one irresistible dish!


    Ingredients

    For the French Toast:

    • 8 thick slices brioche, challah, or Texas toast
    • 4 large eggs
    • 1 cup whole milk
    • ยฝ cup heavy cream
    • 2 teaspoons vanilla extract
    • 1 teaspoon cinnamon
    • ยผ teaspoon nutmeg
    • Pinch of salt
    • 2 tablespoons butter (for cooking)

    For the Cheesecake Filling:

    • 8 ounces cream cheese, softened
    • ยผ cup powdered sugar
    • 1 teaspoon vanilla extract
    • ยฝ cup whipped cream or whipped topping
    • 1 cup fresh strawberries, diced

    Strawberry Topping:

    • 2 cups fresh strawberries, sliced
    • 2 tablespoons sugar
    • 1 tablespoon lemon juice
    • Powdered sugar for dusting

    Instructions

    Step 1: Make the Cheesecake Filling

    In a bowl beat together:

    • Cream cheese
    • Powdered sugar
    • Vanilla

    until smooth.

    Fold in:

    • Whipped cream
    • Diced strawberries

    Set aside.


    Step 2: Prepare the Strawberry Topping

    Combine:

    • Sliced strawberries
    • Sugar
    • Lemon juice

    Let sit:

    10โ€“15 minutes

    until juicy.


    Step 3: Assemble the French Toast

    Spread cheesecake filling between two slices of bread to create sandwiches.

    Press gently to seal.


    Step 4: Make the Custard

    Whisk together:

    • Eggs
    • Milk
    • Heavy cream
    • Vanilla
    • Cinnamon
    • Nutmeg
    • Salt

    Dip each stuffed sandwich into the mixture.

    Coat both sides well.


    Step 5: Cook the French Toast

    Heat butter in a skillet over medium heat.

    Cook stuffed French toast:

    3โ€“4 minutes per side

    until golden brown and cooked through.


    Step 6: Serve

    Top with:

    ๐Ÿ“ Strawberry topping
    ๐Ÿš Powdered sugar
    ๐Ÿฆ Whipped cream
    ๐Ÿฏ Maple syrup

    Serve warm!


    Extra Tips & Secrets โœจ

    โœ… Use thick bread so it holds the cheesecake filling.

    โœ… Day-old bread absorbs the custard better.

    โœ… Cook over medium heat so the outside doesnโ€™t burn before the inside warms.

    โœ… Fresh strawberries give the best flavor.


    Delicious Variations

    ๐Ÿซ Chocolate Strawberry Cheesecake French Toast

    Add:

    • Chocolate chips
    • Chocolate drizzle

    ๐ŸŒ Banana Cheesecake French Toast

    Add:

    • Sliced bananas
    • Caramel sauce

    ๐Ÿซ Berry Cheesecake French Toast

    Use:

    • Blueberries
    • Raspberries
    • Blackberries

    ๐Ÿ‹ Lemon Strawberry Cheesecake Toast

    Add:

    • Lemon zest
    • Lemon cream cheese filling

    ๐Ÿฅœ Nutella Strawberry French Toast

    Add:

    • Nutella layer
    • Strawberries

    Serving Ideas

    Perfect with:

    โ˜• Coffee
    ๐Ÿฅ“ Crispy bacon
    ๐Ÿ“ Fresh berries
    ๐Ÿฏ Maple syrup
    ๐Ÿฅ› Cold milk


    Storage

    Refrigerator:
    Store leftovers for up to 3 days.

    Reheating:
    Warm in a toaster oven, oven, or skillet for best texture.


    Nutrition Facts (Approximate)

    Per serving:

    • Calories: 450โ€“600 kcal
    • Protein: 12โ€“18 g
    • Carbohydrates: 50โ€“65 g
    • Fat: 25โ€“35 g

    Frequently Asked Questions (Q&A)

    Q: What bread is best for stuffed French toast?
    A: Brioche, challah, and thick Texas toast work best because they are soft but sturdy.

    Q: Can I prepare this ahead?
    A: Yes! Assemble the stuffed bread and refrigerate overnight, then cook in the morning.

    Q: Can I use frozen strawberries?
    A: Yes, but thaw and drain them first to avoid extra moisture.

    Q: How do I keep French toast from getting soggy?
    A: Donโ€™t soak the bread too long and cook it over medium heat.

    Q: Can I bake it instead of frying?
    A: Yes! Bake stuffed slices at 375ยฐF (190ยฐC) until golden and warmed through.


    Social Media Caption Ideas โค๏ธ

    Option 1:
    “Made this Strawberry Cheesecake French Toast and it was breakfast heaven! ๐Ÿ“โœจ Golden bread stuffed with creamy cheesecake filling and fresh strawberries โ€” the perfect sweet treat.”

    Option 2:
    “When breakfast tastes like dessert! ๐Ÿ˜ This strawberry cheesecake French toast is rich, creamy, fruity, and absolutely unforgettable.”

    Option 3:
    “A little indulgence for the morning! ๐Ÿ“๐Ÿž Creamy cheesecake filling, sweet strawberries, and golden French toast make the perfect combination.”


    ๐Ÿ“๐Ÿžโœจ Strawberry Cheesecake French Toast is the ultimate brunch recipe โ€” crispy outside, creamy inside, and bursting with fresh strawberry flavor! โค๏ธ

  • Vanilla Raspberry Sheet Cake

    Vanilla Raspberry Sheet Cake

    (Soft, Moist Vanilla Cake with Fresh Raspberry Flavor)

    This Vanilla Raspberry Sheet Cake is a beautiful, easy dessert with a tender vanilla cake base, sweet-tart raspberries, and a creamy frosting. Perfect for birthdays, potlucks, holidays, or any gathering where you need a simple cake that feeds a crowd!


    Ingredients

    For the Vanilla Sheet Cake:

    • 2ยฝ cups all-purpose flour
    • 2ยฝ teaspoons baking powder
    • ยฝ teaspoon salt
    • 1 cup unsalted butter, softened
    • 1ยพ cups granulated sugar
    • 4 large eggs, room temperature
    • 2 teaspoons vanilla extract
    • 1 cup whole milk
    • ยฝ cup sour cream or Greek yogurt

    For the Raspberry Filling:

    • 2 cups fresh raspberries
    • โ…“ cup granulated sugar
    • 1 tablespoon lemon juice
    • 2 tablespoons cornstarch
    • 2 tablespoons water

    For the Creamy Frosting:

    • 1 cup unsalted butter, softened
    • 4 cups powdered sugar
    • 2 teaspoons vanilla extract
    • 3โ€“4 tablespoons heavy cream or milk
    • Pinch of salt
    • ยฝ cup raspberry puree (optional)

    Optional Toppings:

    • Fresh raspberries ๐Ÿ“
    • White chocolate curls
    • Lemon zest
    • Powdered sugar
    • Whipped cream
    • Mint leaves

    Instructions

    Step 1: Prepare the Oven

    Preheat oven to:

    350ยฐF (175ยฐC)

    Grease a:

    9×13-inch sheet pan

    or line with parchment paper.


    Step 2: Make the Cake Batter

    In a bowl whisk together:

    • Flour
    • Baking powder
    • Salt

    In another bowl beat:

    • Butter
    • Sugar

    for 3โ€“5 minutes until light and fluffy.

    Add:

    • Eggs one at a time
    • Vanilla

    Mix in:

    • Milk
    • Sour cream

    Alternate with dry ingredients until smooth.


    Step 3: Bake the Cake

    Pour batter into prepared pan.

    Bake:

    30โ€“35 minutes

    until a toothpick inserted in the center comes out clean.

    Cool completely.


    Step 4: Make the Raspberry Filling

    In a saucepan combine:

    • Raspberries
    • Sugar
    • Lemon juice

    Cook over medium heat until berries break down.

    Mix cornstarch with water.

    Add to berries and cook until thickened.

    Cool completely.


    Step 5: Make the Frosting

    Beat butter until creamy.

    Add:

    • Powdered sugar
    • Vanilla
    • Salt
    • Cream

    Beat until fluffy.

    Mix in raspberry puree if desired.


    Step 6: Assemble

    Spread raspberry filling over cooled cake.

    Top with frosting.

    Decorate with fresh raspberries.

    Chill before slicing for cleaner pieces.


    Extra Tips & Secrets โœจ

    โœ… Use room-temperature ingredients for the smoothest batter.

    โœ… Do not overmix after adding flour to keep the cake soft.

    โœ… Fresh raspberries give the best flavor, but frozen works too.

    โœ… Chill before cutting for beautiful sheet cake slices.


    Delicious Variations

    ๐Ÿ‹ Lemon Raspberry Sheet Cake

    Add:

    • Lemon zest
    • Lemon glaze

    ๐Ÿซ Chocolate Raspberry Cake

    Use:

    • Chocolate cake base
    • Raspberry filling

    ๐Ÿฅฅ Raspberry Coconut Cake

    Add:

    • Coconut flakes
    • Coconut frosting

    ๐Ÿฐ Raspberry Cream Cheese Cake

    Use:

    • Cream cheese frosting
    • Extra berries

    ๐Ÿ“ Mixed Berry Sheet Cake

    Add:

    • Strawberries
    • Blueberries
    • Blackberries

    Serving Ideas

    Serve with:

    โ˜• Coffee
    ๐Ÿต Tea
    ๐Ÿฆ Vanilla ice cream
    ๐Ÿ“ Fresh berries
    ๐Ÿฅ› Cold milk


    Storage

    Refrigerator:
    Store covered for up to 5 days.

    Freezer:
    Freeze unfrosted cake for up to 3 months.


    Nutrition Facts (Approximate)

    Per slice (1 of 15 servings):

    • Calories: 350โ€“450 kcal
    • Protein: 4โ€“6 g
    • Carbohydrates: 50โ€“60 g
    • Fat: 15โ€“22 g

    Frequently Asked Questions (Q&A)

    Q: Can I use frozen raspberries?
    A: Yes! Cook them the same way, but drain excess liquid if needed.

    Q: Can I make this cake ahead?
    A: Yes. Bake the cake a day ahead and frost before serving.

    Q: How do I keep sheet cake moist?
    A: Store covered and avoid overbaking.

    Q: Can I use a different frosting?
    A: Cream cheese frosting, whipped cream frosting, or vanilla buttercream all work well.

    Q: Can I make cupcakes instead?
    A: Yes! Bake for about 18โ€“22 minutes.


    Social Media Caption Ideas โค๏ธ

    Option 1:
    “Made this Vanilla Raspberry Sheet Cake and it was a dream! ๐Ÿฐ๐Ÿ“ Soft vanilla cake, sweet raspberry filling, and creamy frosting make the perfect dessert.”

    Option 2:
    “Fresh raspberries and vanilla cake are a match made in heaven! ๐Ÿ˜ This easy sheet cake is beautiful, delicious, and perfect for sharing.”

    Option 3:
    “A little sweetness for any occasion! ๐Ÿ“โœจ This Vanilla Raspberry Sheet Cake is soft, creamy, fruity, and absolutely irresistible.”


    ๐Ÿฐ๐Ÿ“ Vanilla Raspberry Sheet Cake is the perfect crowd-pleasing dessert โ€” soft vanilla cake, bright raspberry flavor, and a creamy finish in every bite! โค๏ธ