Category: RECIPES

  • Chicken Salad Sandwich with Grapes

    Chicken Salad Sandwich with Grapes

    (Creamy Chicken Salad with Sweet Grapes, Crunchy Celery & Tender Chicken)

    This classic Chicken Salad Sandwich with Grapes combines juicy shredded chicken, sweet grapes, crunchy celery, and a creamy dressing for the perfect balance of savory, sweet, and refreshing flavors. Itโ€™s an easy lunch recipe thatโ€™s perfect for meal prep, picnics, brunch, or a quick family meal.


    Full Recipe (Ingredients + Instructions)

    Ingredients

    For the Chicken Salad:

    • 3 cups cooked chicken breast, shredded or diced
    • 1 cup seedless red grapes, halved
    • 2 celery stalks, finely chopped
    • ยผ cup red onion, finely diced
    • ยฝ cup mayonnaise
    • ยผ cup Greek yogurt or sour cream
    • 1 tablespoon Dijon mustard
    • 1 tablespoon fresh lemon juice
    • 1 teaspoon honey
    • ยฝ teaspoon garlic powder
    • ยฝ teaspoon onion powder
    • ยฝ teaspoon salt (adjust to taste)
    • ยฝ teaspoon black pepper
    • 2 tablespoons fresh parsley or dill, chopped
    • ยฝ cup chopped pecans or sliced almonds (optional)

    For the Sandwich:

    • 8 slices bread (croissant, brioche, sourdough, or sandwich bread)
    • Lettuce leaves
    • Tomato slices (optional)
    • Extra grapes or fruit for serving

    Instructions

    Step 1: Prepare the Dressing

    In a medium bowl, combine:

    • Mayonnaise
    • Greek yogurt
    • Dijon mustard
    • Lemon juice
    • Honey
    • Garlic powder
    • Onion powder
    • Salt
    • Black pepper

    Mix until smooth and creamy.


    Step 2: Make the Chicken Salad

    Add:

    • Cooked chicken
    • Grapes
    • Celery
    • Red onion
    • Pecans or almonds
    • Fresh herbs

    Gently mix until everything is evenly coated with the dressing.


    Step 3: Chill the Salad

    Cover and refrigerate for:

    30 minutes to 1 hour

    This allows the flavors to blend together.


    Step 4: Assemble the Sandwiches

    Toast bread if desired.

    Layer with:

    • Lettuce
    • Chicken salad
    • Tomato slices (optional)

    Add the second slice of bread and serve.


    Extra Recipe Tips & Variations โœจ

    ๐Ÿ— Use Rotisserie Chicken

    For a faster version, use shredded rotisserie chicken.

    ๐Ÿ‡ Best Grapes

    Red seedless grapes are sweeter, but green grapes add a fresh tart flavor.

    ๐Ÿฅœ Add Crunch

    Try:

    • Pecans
    • Walnuts
    • Almonds
    • Sunflower seeds

    ๐Ÿฅ Make It Fancy

    Serve on:

    • Croissants
    • Mini brioche buns
    • Lettuce cups

    ๐Ÿฅ‘ Healthier Version

    Replace half or all of the mayonnaise with Greek yogurt.

    ๐Ÿฅ“ Bacon Chicken Salad

    Add:

    • Crispy bacon pieces
    • Extra black pepper

    ๐ŸŽ Apple Chicken Salad

    Replace grapes with:

    • Diced apples

    Flavor Upgrades / Secret Tips ๐Ÿ”ฅ

    โœ… Add a splash of pickle juice for a tangy restaurant-style flavor.

    โœ… Toast the nuts before adding them for deeper flavor.

    โœ… Use a mix of white and dark chicken meat for more moisture.

    โœ… Let the chicken salad rest overnight โ€” the flavor becomes even better.

    โœ… Add a little fresh lemon zest for a brighter taste.

    โœ… A small pinch of celery salt gives it a classic deli flavor.


    Serving Ideas ๐Ÿฝ๏ธ

    Serve your chicken salad sandwich with:

    • Potato chips
    • Pickles
    • Fresh fruit
    • Coleslaw
    • Pasta salad
    • Green salad
    • Tomato soup

    For a party or brunch:

    • Make mini sandwiches
    • Serve on croissants
    • Add grapes and berries on the side

    Storage & Meal Prep Tips ๐Ÿฅก

    Refrigerator:

    Store chicken salad in an airtight container for:

    3โ€“4 days

    Meal Prep:

    Prepare the chicken salad ahead and assemble sandwiches when ready to eat.

    Freezing:

    Not recommended because mayonnaise-based salads can separate after thawing.

    Best Texture Tip:

    Keep bread separate until serving to prevent it from becoming soggy.


    Nutrition Facts (Approximate)

    Per sandwich:

    • Calories: 450โ€“550 kcal
    • Protein: 30โ€“35 g
    • Carbohydrates: 35โ€“45 g
    • Fat: 22โ€“30 g

    (Nutrition varies depending on bread, mayonnaise, and portion size.)


    Frequently Asked Questions (Q&A)

    Q: Can I use leftover chicken?
    A: Yes! This recipe is perfect for leftover roasted chicken or rotisserie chicken.

    Q: What grapes work best?
    A: Seedless red grapes are the most popular because they add sweetness and color.

    Q: Can I make this without mayonnaise?
    A: Yes. Use Greek yogurt, mashed avocado, or a combination of yogurt and mayo.

    Q: How long does chicken salad last?
    A: It stays fresh in the refrigerator for about 3โ€“4 days.

    Q: Can I serve this without bread?
    A: Absolutely! Serve it as a salad bowl, lettuce wrap, or with crackers.

    Q: Why add grapes to chicken salad?
    A: The grapes add a sweet, juicy contrast to the creamy and savory chicken mixture.


    Social Media Captions โค๏ธ

    Option 1 (Facebook Style)

    “Made this Chicken Salad Sandwich with Grapes and it was absolutely delicious! ๐Ÿฅช๐Ÿ‡ Creamy chicken salad combined with sweet grapes, crunchy celery, and fresh flavors makes the perfect easy lunch recipe.”

    Option 2 (Instagram Style)

    “Sweet, creamy, crunchy, and SO satisfying! ๐Ÿ‡๐Ÿฅช This chicken salad sandwich is the perfect balance of flavors in every bite. Simple ingredients, amazing taste!”

    Option 3 (Short Viral Caption)

    “The perfect chicken salad sandwich doesnโ€™t get easier than this! ๐Ÿฅชโœจ Creamy chicken, juicy grapes, and a little crunch โ€” a must-try lunch idea!”

    Option 4 (Homestyle Caption)

    “Nothing beats a classic homemade lunch! โค๏ธ This Chicken Salad Sandwich with Grapes is fresh, creamy, and packed with comforting flavors the whole family will love.”


    Final Food Description for Posting ๐Ÿด

    This Chicken Salad Sandwich with Grapes is the perfect combination of creamy, sweet, and crunchy! Tender chicken is mixed with juicy grapes, crisp celery, and a flavorful dressing, then piled onto soft bread for an easy and delicious homemade lunch. A timeless recipe thatโ€™s simple, refreshing, and always a crowd favorite. ๐Ÿฅช๐Ÿ‡โค๏ธ

  • Carne Guisada with Homemade Flour Tortillas

    Carne Guisada with Homemade Flour Tortillas

    (Traditional Mexican Beef Stew with Soft Homemade Tortillas)

    Tender chunks of beef are slow-simmered in a rich, savory gravy with onions, garlic, tomatoes, and warm spices, then served with soft, homemade flour tortillas. This comforting Mexican classic is perfect for wrapping, dipping, and soaking up every last bit of the flavorful sauce.


    Ingredients

    For the Carne Guisada:

    • 2ยฝ pounds beef chuck roast, cut into 1-inch cubes
    • 2 tablespoons vegetable oil
    • 1 medium onion, diced
    • 4 cloves garlic, minced
    • 2 tablespoons all-purpose flour
    • 2 tablespoons tomato paste
    • 2 medium tomatoes, diced
    • 2 cups beef broth
    • 1 teaspoon ground cumin
    • 1 teaspoon chili powder
    • 1 teaspoon smoked paprika
    • 1 teaspoon dried oregano
    • ยฝ teaspoon black pepper
    • 1 teaspoon salt (or to taste)
    • 2 bay leaves
    • 1 tablespoon lime juice
    • Fresh cilantro, chopped (for garnish)

    For the Homemade Flour Tortillas:

    • 3 cups all-purpose flour
    • 1 teaspoon salt
    • 1 teaspoon baking powder
    • โ…“ cup lard, shortening, or butter
    • 1 cup warm water (plus more if needed)

    Instructions

    Step 1: Make the Tortilla Dough

    In a large bowl combine:

    • Flour
    • Salt
    • Baking powder

    Cut in the lard or shortening until the mixture resembles coarse crumbs.

    Gradually add warm water and knead until a soft, smooth dough forms.

    Cover and let rest for:

    30 minutes


    Step 2: Brown the Beef

    Heat oil in a large Dutch oven or heavy pot over medium-high heat.

    Brown the beef in batches until well seared.

    Remove and set aside.


    Step 3: Build the Sauce

    In the same pot, cook:

    • Onion

    for about 5 minutes.

    Add:

    • Garlic

    Cook for 30 seconds.

    Stir in:

    • Flour
    • Tomato paste

    Cook for 1 minute.

    Add:

    • Tomatoes
    • Beef broth
    • Cumin
    • Chili powder
    • Smoked paprika
    • Oregano
    • Salt
    • Pepper
    • Bay leaves

    Return the beef to the pot.


    Step 4: Simmer

    Bring to a gentle boil.

    Reduce heat to low.

    Cover and simmer for:

    1ยฝโ€“2 hours

    until the beef is fork-tender and the gravy has thickened.

    Stir in lime juice before serving.


    Step 5: Cook the Tortillas

    Divide dough into:

    10โ€“12 balls

    Roll each into a thin circle about 8 inches wide.

    Cook on a hot dry skillet or comal for:

    30โ€“60 seconds per side

    until lightly browned with golden spots.

    Keep warm in a clean kitchen towel.


    Step 6: Serve

    Serve the carne guisada with warm flour tortillas.

    Top with:

    • Fresh cilantro
    • Diced onion
    • Lime wedges

    Extra Tips & Secrets โœจ

    โœ… Chuck roast is the best cut because it becomes tender after slow cooking.

    โœ… Brown the beef well for a deeper, richer flavor.

    โœ… Let the tortillas rest after kneading for softer, easier-to-roll dough.

    โœ… The stew tastes even better the next day after the flavors have developed.


    Delicious Variations

    ๐ŸŒถ๏ธ Green Chile Carne Guisada

    Add:

    • Roasted Hatch green chiles
    • Jalapeรฑos

    ๐Ÿฅ” Carne Guisada with Potatoes

    Add:

    • 2 cups diced potatoes during the last 30 minutes of cooking

    ๐Ÿซ‘ Tex-Mex Style

    Add:

    • Bell peppers
    • Extra cumin
    • Fresh tomatoes

    ๐Ÿง€ Cheesy Carne Guisada Tacos

    Serve with:

    • Shredded cheddar
    • Monterey Jack cheese

    ๐ŸŒฎ Carne Guisada Burritos

    Wrap the stew in large flour tortillas with:

    • Rice
    • Beans
    • Cheese

    Serving Ideas

    Serve with:

    ๐Ÿš Mexican rice
    ๐Ÿซ˜ Refried beans
    ๐Ÿฅ‘ Guacamole
    ๐ŸŒฝ Mexican street corn
    ๐Ÿฅ— Fresh salad
    ๐ŸŒถ๏ธ Homemade salsa


    Storage

    Refrigerator:
    Store the stew in an airtight container for up to 4 days.

    Freezer:
    Freeze for up to 3 months.

    Reheating:
    Warm gently on the stovetop, adding a splash of broth if needed.


    Nutrition Facts (Approximate)

    Per serving (with tortillas):

    • Calories: 650โ€“800 kcal
    • Protein: 40โ€“50 g
    • Carbohydrates: 40โ€“50 g
    • Fat: 30โ€“40 g

    Frequently Asked Questions (Q&A)

    Q: What cut of beef is best for carne guisada?
    A: Chuck roast is the traditional choice because it becomes incredibly tender after slow cooking.

    Q: Can I make this in a slow cooker?
    A: Yes! After browning the beef, cook on Low for 7โ€“8 hours or High for 4โ€“5 hours.

    Q: Can I use store-bought tortillas?
    A: Absolutely, but homemade flour tortillas provide the most authentic flavor and texture.

    Q: Why is my gravy too thin?
    A: Simmer uncovered for a few extra minutes, or whisk 1 tablespoon of flour with a little cold water and stir it into the stew.

    Q: Can I make it spicy?
    A: Yes! Add diced jalapeรฑos, serrano peppers, or your favorite hot sauce.


    Social Media Caption Ideas โค๏ธ

    Option 1:
    “Made Carne Guisada with homemade flour tortillas, and it was pure comfort food! ๐Ÿฅฉ๐ŸŒฎ Tender beef simmered in rich gravy with warm, soft tortillas fresh off the skillet.”

    Option 2:
    “Nothing beats a homemade Mexican classic! ๐Ÿ˜ Slow-cooked carne guisada paired with fresh flour tortillas makes the perfect family meal.”

    Option 3:
    “From scratch is always worth it! ๐ŸŒฎโœจ Rich, hearty carne guisada served with soft homemade tortillas for the ultimate comforting dinner.”


    ๐Ÿฅฉ๐ŸŒฎ Carne Guisada with Homemade Flour Tortillas is a timeless Mexican comfort mealโ€”slow-cooked, flavorful, and perfect for sharing with family and friends! โค๏ธ

  • Green Chile Hamburger Helper

    Green Chile Hamburger Helper

    (Creamy Southwestern One-Pot Beef Pasta)

    This Green Chile Hamburger Helper is a delicious homemade twist on the classic comfort meal. It combines seasoned ground beef, tender pasta, creamy cheese sauce, and roasted green chiles for a flavorful Southwestern-inspired dinner thatโ€™s easy, cheesy, and perfect for busy nights!


    Ingredients

    For the Hamburger Helper:

    • 1ยฝ pounds ground beef
    • 1 tablespoon olive oil (if needed)
    • 1 small onion, diced
    • 3 cloves garlic, minced
    • 2 cups elbow macaroni or small pasta shells
    • 3 cups beef broth
    • 1 cup milk
    • 1ยฝ cups shredded cheddar cheese
    • 1 cup Monterey Jack or Pepper Jack cheese
    • 1 can (4โ€“7 oz) diced green chiles
    • 2 tablespoons tomato paste
    • 1 teaspoon chili powder
    • 1 teaspoon cumin
    • 1 teaspoon smoked paprika
    • 1 teaspoon garlic powder
    • ยฝ teaspoon onion powder
    • 1 teaspoon salt (adjust to taste)
    • ยฝ teaspoon black pepper

    Optional Toppings:

    • Fresh cilantro ๐ŸŒฟ
    • Green onions
    • Sour cream
    • Extra shredded cheese
    • Diced jalapeรฑos ๐ŸŒถ๏ธ
    • Avocado slices
    • Hot sauce

    Instructions

    Step 1: Brown the Beef

    Heat a large skillet over medium heat.

    Add:

    • Ground beef
    • Onion

    Cook until beef is browned and onion is softened.

    Drain excess grease.

    Add:

    • Garlic

    Cook for 30 seconds.


    Step 2: Add Seasonings & Pasta

    Stir in:

    • Tomato paste
    • Chili powder
    • Cumin
    • Smoked paprika
    • Garlic powder
    • Onion powder
    • Salt
    • Pepper

    Add:

    • Pasta
    • Beef broth
    • Milk
    • Green chiles

    Stir well.


    Step 3: Cook the Pasta

    Bring mixture to a gentle boil.

    Reduce heat, cover, and simmer:

    12โ€“15 minutes

    until pasta is tender.

    Stir occasionally to prevent sticking.


    Step 4: Make It Cheesy

    Remove from heat.

    Stir in:

    • Cheddar cheese
    • Monterey Jack cheese

    Mix until melted and creamy.


    Step 5: Serve

    Top with:

    • Extra cheese
    • Cilantro
    • Green onions
    • Sour cream

    Serve hot!


    Extra Tips & Secrets โœจ

    โœ… Roasted Hatch green chiles give the best flavor.

    โœ… Use Pepper Jack for extra creamy heat.

    โœ… Donโ€™t overcook the pasta โ€” it will continue absorbing sauce.

    โœ… Let it sit for 5 minutes before serving so the sauce thickens.


    Delicious Variations

    ๐ŸŒถ๏ธ Extra Spicy Green Chile Helper

    Add:

    • Serrano peppers
    • Jalapeรฑos
    • Hot sauce

    ๐Ÿ” Green Chile Chicken Helper

    Replace beef with:

    • Shredded chicken
    • Chicken broth

    ๐Ÿฅ“ Bacon Green Chile Cheeseburger Helper

    Add:

    • Crispy bacon
    • Extra cheddar

    ๐ŸŒฝ Southwest Taco Helper

    Add:

    • Corn
    • Black beans
    • Taco seasoning

    ๐Ÿง€ Green Chile Mac & Cheese

    Skip the beef and add:

    • More cheese
    • Roasted chiles

    Serving Ideas

    Serve with:

    ๐Ÿฅ— Side salad
    ๐ŸŒฝ Cornbread
    ๐Ÿฅ‘ Guacamole
    ๐Ÿซ˜ Refried beans
    ๐ŸŒฎ Tortilla chips
    ๐Ÿ‹ Lime wedges


    Storage

    Refrigerator:
    Store in an airtight container for up to 4 days.

    Freezer:
    Freeze for up to 3 months.

    Reheating:
    Add a splash of milk before reheating to bring back the creamy texture.


    Nutrition Facts (Approximate)

    Per serving:

    • Calories: 550โ€“700 kcal
    • Protein: 35โ€“45 g
    • Carbohydrates: 45โ€“55 g
    • Fat: 30โ€“40 g

    Frequently Asked Questions (Q&A)

    Q: What kind of green chile should I use?
    A: Roasted Hatch green chiles are ideal, but canned diced green chiles work great too.

    Q: Can I make this less spicy?
    A: Yes. Use mild green chiles and skip extra peppers.

    Q: Can I use another pasta shape?
    A: Yes! Shells, rotini, or penne all work well.

    Q: Can I make this ahead?
    A: Yes. Reheat gently with a little milk or broth.

    Q: Can I use ground turkey instead of beef?
    A: Absolutely. It makes a lighter version while keeping the flavors.


    Social Media Caption Ideas โค๏ธ

    Option 1:
    “Made this Green Chile Hamburger Helper and it was a cheesy comfort food dream! ๐ŸŒถ๏ธ๐Ÿ” Creamy pasta, seasoned beef, and roasted green chiles make this homemade version so much better than the box!”

    Option 2:
    “A Southwest twist on a classic favorite! ๐Ÿ˜ This Green Chile Hamburger Helper is creamy, cheesy, and loaded with bold flavors.”

    Option 3:
    “Easy dinner with BIG flavor! ๐ŸŒถ๏ธ๐Ÿง€ This one-pot green chile pasta is the perfect cozy meal for busy nights.”


    ๐ŸŒถ๏ธ๐Ÿ”๐Ÿง€ Green Chile Hamburger Helper is the ultimate homemade comfort dish โ€” creamy, cheesy, hearty, and full of Southwestern flavor! โค๏ธ

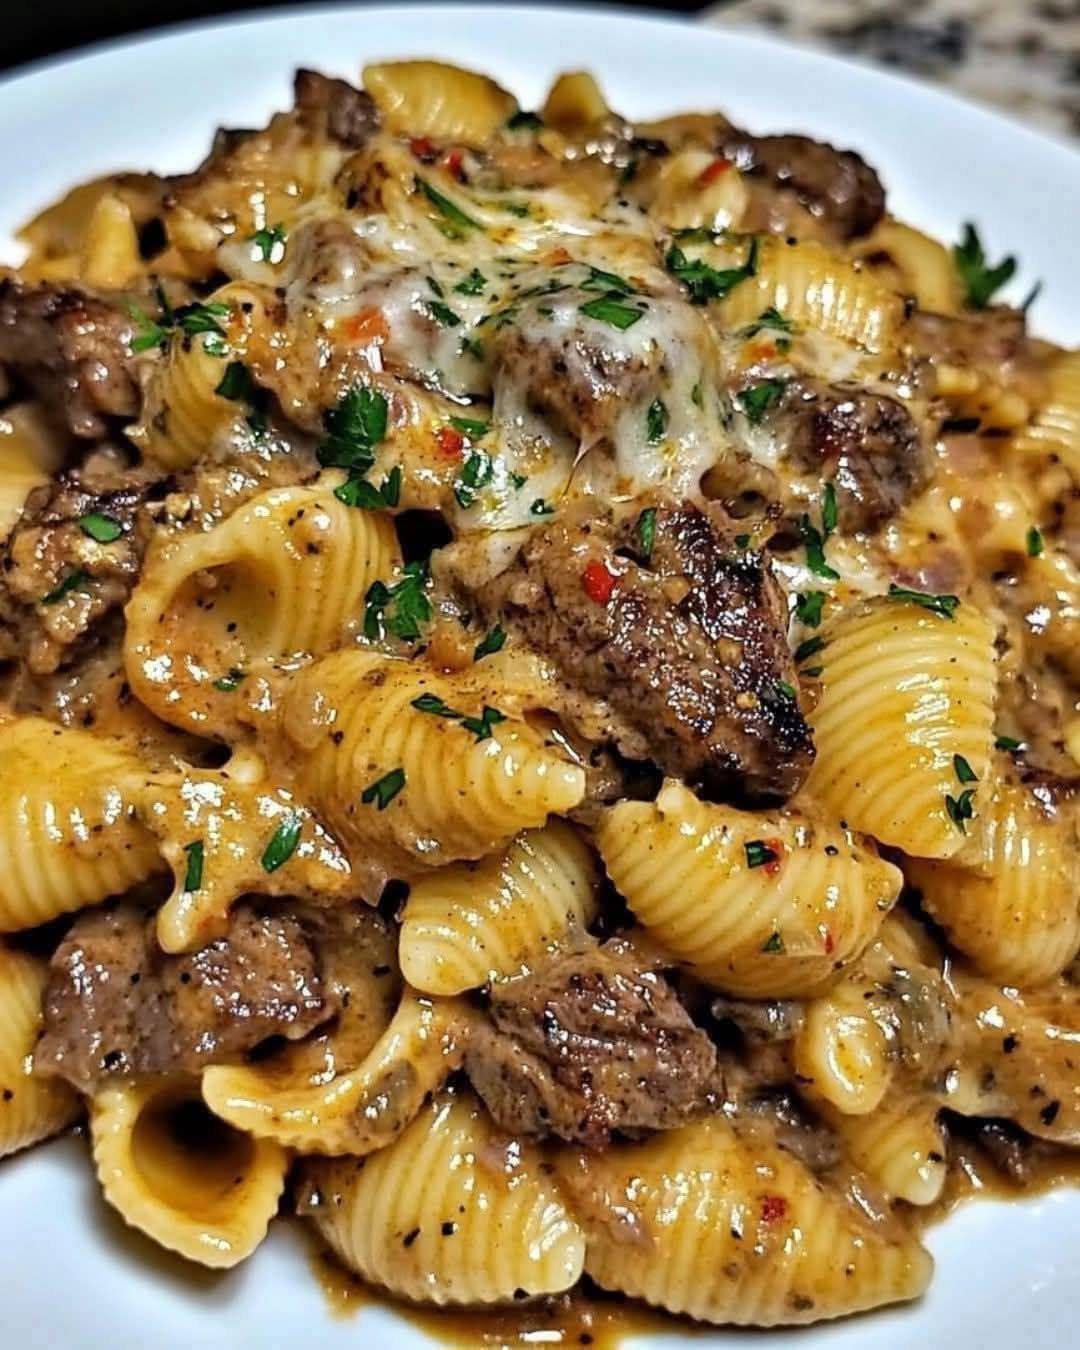
  • Cheesy Steak Shells

    Cheesy Steak Shells

    (Creamy Beef-Stuffed Pasta Shells)

    These Cheesy Steak Shells combine tender seasoned steak, creamy cheese filling, and jumbo pasta shells baked in a rich sauce. Itโ€™s a comforting, family-friendly dinner that brings together the flavors of a steak dinner and classic Italian pasta bake!


    Ingredients

    For the Steak Filling:

    • 1ยฝ pounds sirloin steak or ribeye, finely chopped
    • 1 tablespoon olive oil
    • 2 cloves garlic, minced
    • 1 small onion, diced
    • 1 bell pepper, diced
    • 1 teaspoon salt
    • 1 teaspoon black pepper
    • 1 teaspoon smoked paprika
    • 1 teaspoon Italian seasoning

    For the Pasta Shells:

    • 24 jumbo pasta shells
    • 2 cups shredded mozzarella cheese
    • 1 cup shredded cheddar cheese
    • 8 ounces cream cheese, softened
    • ยฝ cup ricotta cheese (optional)
    • ยฝ cup sour cream
    • 2 tablespoons chopped parsley

    For the Sauce:

    • 2 cups Alfredo sauce or creamy cheese sauce
    • 1 cup shredded mozzarella for topping
    • ยฝ cup Parmesan cheese

    Instructions

    Step 1: Cook the Pasta Shells

    Bring a large pot of salted water to a boil.

    Cook jumbo shells according to package directions until:

    Al dente

    Drain and set aside.


    Step 2: Prepare the Steak Filling

    Heat olive oil in a large skillet.

    Add:

    • Steak pieces

    Cook until browned.

    Add:

    • Onion
    • Bell pepper
    • Garlic

    Cook until vegetables soften.

    Season with:

    • Salt
    • Pepper
    • Smoked paprika
    • Italian seasoning

    Remove from heat.


    Step 3: Make the Cheese Filling

    In a bowl combine:

    • Cream cheese
    • Ricotta
    • Sour cream
    • Cheddar cheese
    • Mozzarella
    • Parsley

    Mix until creamy.

    Fold in cooked steak mixture.


    Step 4: Stuff the Shells

    Preheat oven to:

    375ยฐF (190ยฐC)

    Spread a thin layer of sauce in a baking dish.

    Fill each shell with steak and cheese mixture.

    Arrange shells in the dish.


    Step 5: Bake

    Pour remaining sauce over shells.

    Top with:

    • Mozzarella
    • Parmesan

    Cover with foil.

    Bake:

    25 minutes

    Remove foil and bake another:

    10 minutes

    until golden and bubbly.


    Extra Tips & Secrets โœจ

    โœ… Use ribeye or sirloin for the best steak flavor.

    โœ… Donโ€™t overcook the steak before baking โ€” it will continue cooking in the oven.

    โœ… Cook pasta shells slightly underdone so they hold their shape.

    โœ… Let the dish rest 5โ€“10 minutes before serving.


    Delicious Variations

    ๐Ÿง€ Philly Cheesesteak Shells

    Add:

    • Mushrooms
    • Extra peppers
    • Provolone cheese

    ๐ŸŒถ๏ธ Spicy Steak Shells

    Add:

    • Jalapeรฑos
    • Hot sauce
    • Pepper Jack cheese

    ๐Ÿฅ“ Bacon Steak Shells

    Add:

    • Crispy bacon pieces
    • Cheddar cheese

    ๐Ÿ„ Mushroom Steak Shells

    Add:

    • Sautรฉed mushrooms
    • Garlic cream sauce

    ๐Ÿฅฉ Garlic Butter Steak Shells

    Add:

    • Extra garlic butter
    • Fresh herbs

    Serving Ideas

    Serve with:

    ๐Ÿฅ— Garden salad
    ๐Ÿฅ– Garlic bread
    ๐Ÿ… Roasted vegetables
    ๐Ÿท A glass of red wine
    ๐ŸŒฟ Fresh parsley garnish


    Storage

    Refrigerator:
    Store covered for up to 4 days.

    Freezer:
    Freeze baked shells for up to 3 months.

    Reheating:
    Warm in the oven with a little extra sauce.


    Nutrition Facts (Approximate)

    Per serving:

    • Calories: 550โ€“700 kcal
    • Protein: 35โ€“45 g
    • Carbohydrates: 45โ€“55 g
    • Fat: 30โ€“40 g

    Frequently Asked Questions (Q&A)

    Q: What steak is best for stuffed shells?
    A: Sirloin, ribeye, or shaved steak work best because they stay flavorful and tender.

    Q: Can I use ground beef instead?
    A: Yes! It becomes a delicious cheeseburger-style pasta shell.

    Q: Can I prepare these ahead?
    A: Yes. Assemble the shells, refrigerate, and bake when ready.

    Q: Can I use marinara instead of Alfredo?
    A: Absolutely. A tomato-based sauce gives it a delicious Italian twist.

    Q: How do I make them extra cheesy?
    A: Add layers of mozzarella, cheddar, and Parmesan throughout.


    Social Media Caption Ideas โค๏ธ

    Option 1:
    “Made these Cheesy Steak Shells and they were pure comfort food! ๐Ÿฅฉ๐Ÿง€ Tender steak, creamy cheese filling, and pasta shells baked until golden and bubbly.”

    Option 2:
    “When steak night meets pasta night! ๐Ÿ˜ These cheesy steak shells are loaded with flavor and guaranteed to be a family favorite.”

    Option 3:
    “The ultimate cheesy dinner idea! ๐Ÿง€โœจ Steak, pasta, and creamy sauce come together in one unforgettable baked dish.”


    ๐Ÿฅฉ๐Ÿง€ Cheesy Steak Shells are the perfect comfort meal โ€” rich, creamy, cheesy, and packed with delicious steak flavor in every bite! โค๏ธ

  • Creamy Beef-Stuffed Pasta Shells

    Creamy Beef-Stuffed Pasta Shells

    (Creamy Beef-Stuffed Pasta Shells)

    These Cheesy Steak Shells combine tender seasoned steak, creamy cheese filling, and jumbo pasta shells baked in a rich sauce. Itโ€™s a comforting, family-friendly dinner that brings together the flavors of a steak dinner and classic Italian pasta bake!


    Ingredients

    For the Steak Filling:

    • 1ยฝ pounds sirloin steak or ribeye, finely chopped
    • 1 tablespoon olive oil
    • 2 cloves garlic, minced
    • 1 small onion, diced
    • 1 bell pepper, diced
    • 1 teaspoon salt
    • 1 teaspoon black pepper
    • 1 teaspoon smoked paprika
    • 1 teaspoon Italian seasoning

    For the Pasta Shells:

    • 24 jumbo pasta shells
    • 2 cups shredded mozzarella cheese
    • 1 cup shredded cheddar cheese
    • 8 ounces cream cheese, softened
    • ยฝ cup ricotta cheese (optional)
    • ยฝ cup sour cream
    • 2 tablespoons chopped parsley

    For the Sauce:

    • 2 cups Alfredo sauce or creamy cheese sauce
    • 1 cup shredded mozzarella for topping
    • ยฝ cup Parmesan cheese

    Instructions

    Step 1: Cook the Pasta Shells

    Bring a large pot of salted water to a boil.

    Cook jumbo shells according to package directions until:

    Al dente

    Drain and set aside.


    Step 2: Prepare the Steak Filling

    Heat olive oil in a large skillet.

    Add:

    • Steak pieces

    Cook until browned.

    Add:

    • Onion
    • Bell pepper
    • Garlic

    Cook until vegetables soften.

    Season with:

    • Salt
    • Pepper
    • Smoked paprika
    • Italian seasoning

    Remove from heat.


    Step 3: Make the Cheese Filling

    In a bowl combine:

    • Cream cheese
    • Ricotta
    • Sour cream
    • Cheddar cheese
    • Mozzarella
    • Parsley

    Mix until creamy.

    Fold in cooked steak mixture.


    Step 4: Stuff the Shells

    Preheat oven to:

    375ยฐF (190ยฐC)

    Spread a thin layer of sauce in a baking dish.

    Fill each shell with steak and cheese mixture.

    Arrange shells in the dish.


    Step 5: Bake

    Pour remaining sauce over shells.

    Top with:

    • Mozzarella
    • Parmesan

    Cover with foil.

    Bake:

    25 minutes

    Remove foil and bake another:

    10 minutes

    until golden and bubbly.


    Extra Tips & Secrets โœจ

    โœ… Use ribeye or sirloin for the best steak flavor.

    โœ… Donโ€™t overcook the steak before baking โ€” it will continue cooking in the oven.

    โœ… Cook pasta shells slightly underdone so they hold their shape.

    โœ… Let the dish rest 5โ€“10 minutes before serving.


    Delicious Variations

    ๐Ÿง€ Philly Cheesesteak Shells

    Add:

    • Mushrooms
    • Extra peppers
    • Provolone cheese

    ๐ŸŒถ๏ธ Spicy Steak Shells

    Add:

    • Jalapeรฑos
    • Hot sauce
    • Pepper Jack cheese

    ๐Ÿฅ“ Bacon Steak Shells

    Add:

    • Crispy bacon pieces
    • Cheddar cheese

    ๐Ÿ„ Mushroom Steak Shells

    Add:

    • Sautรฉed mushrooms
    • Garlic cream sauce

    ๐Ÿฅฉ Garlic Butter Steak Shells

    Add:

    • Extra garlic butter
    • Fresh herbs

    Serving Ideas

    Serve with:

    ๐Ÿฅ— Garden salad
    ๐Ÿฅ– Garlic bread
    ๐Ÿ… Roasted vegetables
    ๐Ÿท A glass of red wine
    ๐ŸŒฟ Fresh parsley garnish


    Storage

    Refrigerator:
    Store covered for up to 4 days.

    Freezer:
    Freeze baked shells for up to 3 months.

    Reheating:
    Warm in the oven with a little extra sauce.


    Nutrition Facts (Approximate)

    Per serving:

    • Calories: 550โ€“700 kcal
    • Protein: 35โ€“45 g
    • Carbohydrates: 45โ€“55 g
    • Fat: 30โ€“40 g

    Frequently Asked Questions (Q&A)

    Q: What steak is best for stuffed shells?
    A: Sirloin, ribeye, or shaved steak work best because they stay flavorful and tender.

    Q: Can I use ground beef instead?
    A: Yes! It becomes a delicious cheeseburger-style pasta shell.

    Q: Can I prepare these ahead?
    A: Yes. Assemble the shells, refrigerate, and bake when ready.

    Q: Can I use marinara instead of Alfredo?
    A: Absolutely. A tomato-based sauce gives it a delicious Italian twist.

    Q: How do I make them extra cheesy?
    A: Add layers of mozzarella, cheddar, and Parmesan throughout.


    Social Media Caption Ideas โค๏ธ

    Option 1:
    “Made these Cheesy Steak Shells and they were pure comfort food! ๐Ÿฅฉ๐Ÿง€ Tender steak, creamy cheese filling, and pasta shells baked until golden and bubbly.”

    Option 2:
    “When steak night meets pasta night! ๐Ÿ˜ These cheesy steak shells are loaded with flavor and guaranteed to be a family favorite.”

    Option 3:
    “The ultimate cheesy dinner idea! ๐Ÿง€โœจ Steak, pasta, and creamy sauce come together in one unforgettable baked dish.”


    ๐Ÿฅฉ๐Ÿง€ Cheesy Steak Shells are the perfect comfort meal โ€” rich, creamy, cheesy, and packed with delicious steak flavor in every bite! โค๏ธ

  • Chicken Gorditas

    Chicken Gorditas

    (Mexican Homemade Gorditas Filled with Shredded Chicken)

    These Chicken Gorditas are a delicious Mexican comfort food made with thick, soft corn masa shells stuffed with flavorful shredded chicken, fresh toppings, and creamy sauces. The outside is lightly crisp while the inside stays tender and perfect for holding your favorite fillings.


    Ingredients

    For the Gordita Dough:

    • 2 cups masa harina (corn flour for tortillas)
    • 1ยฝ cups warm water (adjust as needed)
    • 1 teaspoon salt
    • 1 tablespoon vegetable oil or melted lard (optional)

    For the Chicken Filling:

    • 2 pounds boneless skinless chicken breasts or thighs
    • 4 cups chicken broth or water
    • ยฝ onion
    • 3 cloves garlic
    • 1 bay leaf
    • 1 teaspoon salt

    After cooking:

    • 1 small onion, diced
    • 2 cloves garlic, minced
    • 1 tablespoon oil
    • 1 teaspoon cumin
    • 1 teaspoon chili powder
    • ยฝ teaspoon oregano
    • Salt and pepper to taste
    • ยฝ cup salsa verde or red salsa

    For Toppings:

    • Shredded lettuce
    • Queso fresco or shredded cheese
    • Mexican crema or sour cream
    • Diced onion
    • Fresh cilantro
    • Salsa
    • Sliced avocado

    Instructions

    Step 1: Cook the Chicken

    Place chicken in a pot with:

    • Chicken broth
    • Onion
    • Garlic
    • Bay leaf
    • Salt

    Bring to a boil, then simmer:

    20โ€“30 minutes

    until tender.

    Shred chicken and set aside.


    Step 2: Prepare the Chicken Filling

    Heat oil in a skillet.

    Add:

    • Onion
    • Garlic

    Cook until softened.

    Add shredded chicken.

    Season with:

    • Cumin
    • Chili powder
    • Oregano
    • Salt
    • Pepper

    Add salsa and simmer:

    5โ€“10 minutes

    until flavorful.


    Step 3: Make the Gordita Dough

    Mix:

    • Masa harina
    • Salt

    Slowly add warm water.

    Knead until a soft dough forms.

    Cover and rest:

    15โ€“20 minutes


    Step 4: Shape the Gorditas

    Divide dough into:

    8โ€“10 portions

    Roll into balls.

    Flatten into thick discs:

    • About ยฝ inch thick
    • 4 inches wide

    Step 5: Cook the Gorditas

    Heat a comal or skillet over medium heat.

    Cook:

    3โ€“5 minutes per side

    until golden spots appear and cooked through.


    Step 6: Create the Pocket

    While warm, carefully cut a slit along the side.

    Open gently.

    Fill with:

    ๐Ÿ” Shredded chicken
    ๐Ÿง€ Cheese
    ๐Ÿฅฌ Lettuce
    ๐ŸŒถ๏ธ Salsa
    ๐Ÿฅ„ Crema

    Serve warm!


    Extra Tips & Secrets โœจ

    โœ… Chicken thighs make the filling extra juicy.

    โœ… Keep masa covered so it doesnโ€™t dry out.

    โœ… Donโ€™t make gorditas too thin โ€” they need thickness to hold filling.

    โœ… A little lard in the masa creates a more traditional flavor.


    Delicious Variations

    ๐ŸŒถ๏ธ Chicken Green Chile Gorditas

    Add:

    • Roasted Hatch green chiles
    • Pepper Jack cheese
    • Salsa verde

    ๐Ÿง€ Chicken & Cheese Gorditas

    Add:

    • Melted Oaxaca cheese
    • Extra crema

    ๐Ÿ”ฅ Crispy Fried Chicken Gorditas

    After cooking:

    • Fry briefly until golden and crispy

    ๐Ÿ… Chicken Tinga Gorditas

    Use:

    • Chipotle tomato shredded chicken

    ๐Ÿซ˜ Chicken & Bean Gorditas

    Add:

    • Refried beans
    • Chicken
    • Cheese

    Serving Ideas

    Serve with:

    ๐Ÿš Mexican rice
    ๐Ÿซ˜ Refried beans
    ๐Ÿฅ‘ Guacamole
    ๐ŸŒถ๏ธ Salsa verde
    ๐ŸŒฝ Elote (Mexican street corn)
    ๐Ÿ‹ Lime wedges


    Storage

    Cooked gorditas:
    Refrigerate up to 4 days.

    Chicken filling:
    Store separately up to 4 days.

    Freezer:
    Freeze cooked gordita shells for up to 3 months.


    Frequently Asked Questions (Q&A)

    Q: Are chicken gorditas made with flour or corn?
    A: Traditional Mexican gorditas are usually made with corn masa, though flour versions also exist.

    Q: Can I use leftover chicken?
    A: Yes! Rotisserie chicken works perfectly.

    Q: Why did my gorditas crack?
    A: The masa needs more moisture. Add warm water a tablespoon at a time.

    Q: Can I fry gorditas instead of cooking them on a skillet?
    A: Yes! Frying creates a crispy shell with a soft center.

    Q: What salsa goes best with chicken gorditas?
    A: Salsa verde, roasted tomatillo salsa, or spicy red chile salsa are all delicious.


    Social Media Caption Ideas โค๏ธ

    Option 1:
    “Made homemade Chicken Gorditas and they were amazing! ๐Ÿซ“๐Ÿ” Soft corn masa pockets filled with juicy seasoned chicken, cheese, salsa, and fresh toppings.”

    Option 2:
    “A taste of Mexico right at home! ๐Ÿ˜ These chicken gorditas are warm, flavorful, and packed with comforting homemade goodness.”

    Option 3:
    “Fresh homemade gorditas are always worth the effort! ๐Ÿซ“โœจ Stuffed with delicious chicken and all your favorite toppings.”


    ๐Ÿซ“๐Ÿ” Chicken Gorditas are the perfect Mexican comfort food โ€” soft homemade masa, flavorful shredded chicken, and delicious toppings in every bite! โค๏ธ

  • Copycat of an Old Classic โ€“ The Enchirito

    Copycat of an Old Classic โ€“ The Enchirito

    (Homemade Taco Bell-Style Enchirito)

    The Enchirito is a beloved Mexican-American comfort food classic โ€” a delicious cross between an enchilada and a burrito. This copycat version features a soft flour tortilla filled with seasoned beef, beans, and cheese, smothered in rich red enchilada sauce and topped with melted cheese, onions, and olives.


    Ingredients

    For the Beef Filling:

    • 1 pound ground beef
    • 1 small onion, finely diced
    • 2 cloves garlic, minced
    • 2 tablespoons taco seasoning
    • 1 teaspoon chili powder
    • ยฝ teaspoon cumin
    • ยฝ teaspoon paprika
    • ยฝ teaspoon salt
    • ยผ teaspoon black pepper
    • ยฝ cup water

    For the Enchirito:

    • 8 medium flour tortillas
    • 1ยฝ cups refried beans
    • 2 cups shredded cheddar cheese or Mexican cheese blend
    • 2 cups red enchilada sauce
    • ยฝ cup diced white onion
    • Sliced black olives (optional)
    • Sour cream (optional)

    Instructions

    Step 1: Prepare the Beef Filling

    Heat a skillet over medium heat.

    Add:

    • Ground beef
    • Onion

    Cook until beef is browned.

    Drain excess grease.

    Add:

    • Garlic
    • Taco seasoning
    • Chili powder
    • Cumin
    • Paprika
    • Salt
    • Pepper
    • Water

    Simmer for:

    5 minutes

    until flavorful.


    Step 2: Warm the Tortillas

    Warm tortillas in a skillet or microwave until soft and flexible.

    This prevents cracking when rolling.


    Step 3: Assemble the Enchiritos

    Spread each tortilla with:

    • Refried beans

    Add:

    • Seasoned beef
    • A sprinkle of cheese

    Roll into a burrito shape.

    Place seam-side down in a baking dish.


    Step 4: Add Sauce & Cheese

    Pour red enchilada sauce generously over the top.

    Sprinkle with remaining cheese.

    Add diced onions and olives if desired.


    Step 5: Bake

    Bake at:

    375ยฐF (190ยฐC)

    for:

    20โ€“25 minutes

    until hot and cheese is melted.


    Extra Tips & Secrets โœจ

    โœ… Use warm tortillas for easy rolling.

    โœ… Donโ€™t skip the beans โ€” they give the classic Enchirito texture.

    โœ… A flavorful enchilada sauce makes the dish.

    โœ… Let it rest a few minutes after baking so it holds together better.


    Delicious Variations

    ๐Ÿ” Chicken Enchirito

    Replace beef with:

    • Shredded chicken
    • Green chile sauce

    ๐ŸŒถ๏ธ Green Chile Enchirito

    Add:

    • Roasted Hatch green chiles
    • Pepper Jack cheese

    ๐Ÿง€ Extra Cheese Enchirito

    Add:

    • Extra cheddar
    • Monterey Jack
    • Queso sauce

    ๐Ÿซ˜ Bean & Cheese Enchirito

    Use:

    • Extra refried beans
    • No meat

    ๐ŸŒฎ Carne Asada Enchirito

    Fill with:

    • Chopped grilled steak
    • Salsa verde

    Serving Ideas

    Serve with:

    ๐Ÿš Mexican rice
    ๐Ÿซ˜ Refried beans
    ๐Ÿฅ‘ Guacamole
    ๐ŸŒถ๏ธ Salsa
    ๐Ÿฅ— Fresh salad
    ๐Ÿ‹ Lime wedges


    Storage

    Refrigerator:
    Store covered for up to 4 days.

    Freezer:
    Freeze assembled enchiritos before baking for up to 3 months.

    Reheating:
    Bake or microwave until heated through.


    Nutrition Facts (Approximate)

    Per enchirito:

    • Calories: 450โ€“600 kcal
    • Protein: 25โ€“35 g
    • Carbohydrates: 45โ€“60 g
    • Fat: 20โ€“30 g

    Frequently Asked Questions (Q&A)

    Q: What is the difference between an enchilada and an Enchirito?
    A: An enchilada is usually a rolled tortilla covered in sauce, while an Enchirito combines burrito-style fillings with enchilada-style sauce and toppings.

    Q: Can I use corn tortillas?
    A: Yes, but flour tortillas are closer to the classic fast-food version.

    Q: What sauce is best?
    A: A red enchilada sauce with mild chile flavor works best.

    Q: Can I make this ahead?
    A: Yes! Assemble it, refrigerate, and bake when ready.

    Q: Can I make it spicy?
    A: Add jalapeรฑos, hot sauce, or spicy enchilada sauce.


    Social Media Caption Ideas โค๏ธ

    Option 1:
    “Made a Copycat Enchirito and it brought back all the memories! ๐ŸŒฏ๐ŸŒถ๏ธ A cheesy, saucy classic loaded with beef, beans, and delicious Mexican flavors.”

    Option 2:
    “Old-school comfort food at its best! ๐Ÿ˜ This homemade Enchirito is covered in sauce, melted cheese, and packed with flavor.”

    Option 3:
    “Who remembers the Enchirito? ๐ŸŒฏโœจ I recreated this classic at home and it tastes just like the favorite we grew up loving!”


    ๐ŸŒฏ๐ŸŒถ๏ธ The Copycat Enchirito is the perfect nostalgic meal โ€” a cheesy, saucy, comforting classic that brings the flavors of a favorite back to your kitchen! โค๏ธ

  • Strawberry Cheesecake French Toast

    Strawberry Cheesecake French Toast

    (Creamy Cheesecake Filling with Sweet Strawberries)

    This Strawberry Cheesecake French Toast is the ultimate breakfast treat โ€” thick slices of golden brioche or bread stuffed with a rich cheesecake-style filling, fresh strawberries, and topped with a sweet strawberry sauce. Itโ€™s like dessert and breakfast combined into one irresistible dish!


    Ingredients

    For the French Toast:

    • 8 thick slices brioche, challah, or Texas toast
    • 4 large eggs
    • 1 cup whole milk
    • ยฝ cup heavy cream
    • 2 teaspoons vanilla extract
    • 1 teaspoon cinnamon
    • ยผ teaspoon nutmeg
    • Pinch of salt
    • 2 tablespoons butter (for cooking)

    For the Cheesecake Filling:

    • 8 ounces cream cheese, softened
    • ยผ cup powdered sugar
    • 1 teaspoon vanilla extract
    • ยฝ cup whipped cream or whipped topping
    • 1 cup fresh strawberries, diced

    Strawberry Topping:

    • 2 cups fresh strawberries, sliced
    • 2 tablespoons sugar
    • 1 tablespoon lemon juice
    • Powdered sugar for dusting

    Instructions

    Step 1: Make the Cheesecake Filling

    In a bowl beat together:

    • Cream cheese
    • Powdered sugar
    • Vanilla

    until smooth.

    Fold in:

    • Whipped cream
    • Diced strawberries

    Set aside.


    Step 2: Prepare the Strawberry Topping

    Combine:

    • Sliced strawberries
    • Sugar
    • Lemon juice

    Let sit:

    10โ€“15 minutes

    until juicy.


    Step 3: Assemble the French Toast

    Spread cheesecake filling between two slices of bread to create sandwiches.

    Press gently to seal.


    Step 4: Make the Custard

    Whisk together:

    • Eggs
    • Milk
    • Heavy cream
    • Vanilla
    • Cinnamon
    • Nutmeg
    • Salt

    Dip each stuffed sandwich into the mixture.

    Coat both sides well.


    Step 5: Cook the French Toast

    Heat butter in a skillet over medium heat.

    Cook stuffed French toast:

    3โ€“4 minutes per side

    until golden brown and cooked through.


    Step 6: Serve

    Top with:

    ๐Ÿ“ Strawberry topping
    ๐Ÿš Powdered sugar
    ๐Ÿฆ Whipped cream
    ๐Ÿฏ Maple syrup

    Serve warm!


    Extra Tips & Secrets โœจ

    โœ… Use thick bread so it holds the cheesecake filling.

    โœ… Day-old bread absorbs the custard better.

    โœ… Cook over medium heat so the outside doesnโ€™t burn before the inside warms.

    โœ… Fresh strawberries give the best flavor.


    Delicious Variations

    ๐Ÿซ Chocolate Strawberry Cheesecake French Toast

    Add:

    • Chocolate chips
    • Chocolate drizzle

    ๐ŸŒ Banana Cheesecake French Toast

    Add:

    • Sliced bananas
    • Caramel sauce

    ๐Ÿซ Berry Cheesecake French Toast

    Use:

    • Blueberries
    • Raspberries
    • Blackberries

    ๐Ÿ‹ Lemon Strawberry Cheesecake Toast

    Add:

    • Lemon zest
    • Lemon cream cheese filling

    ๐Ÿฅœ Nutella Strawberry French Toast

    Add:

    • Nutella layer
    • Strawberries

    Serving Ideas

    Perfect with:

    โ˜• Coffee
    ๐Ÿฅ“ Crispy bacon
    ๐Ÿ“ Fresh berries
    ๐Ÿฏ Maple syrup
    ๐Ÿฅ› Cold milk


    Storage

    Refrigerator:
    Store leftovers for up to 3 days.

    Reheating:
    Warm in a toaster oven, oven, or skillet for best texture.


    Nutrition Facts (Approximate)

    Per serving:

    • Calories: 450โ€“600 kcal
    • Protein: 12โ€“18 g
    • Carbohydrates: 50โ€“65 g
    • Fat: 25โ€“35 g

    Frequently Asked Questions (Q&A)

    Q: What bread is best for stuffed French toast?
    A: Brioche, challah, and thick Texas toast work best because they are soft but sturdy.

    Q: Can I prepare this ahead?
    A: Yes! Assemble the stuffed bread and refrigerate overnight, then cook in the morning.

    Q: Can I use frozen strawberries?
    A: Yes, but thaw and drain them first to avoid extra moisture.

    Q: How do I keep French toast from getting soggy?
    A: Donโ€™t soak the bread too long and cook it over medium heat.

    Q: Can I bake it instead of frying?
    A: Yes! Bake stuffed slices at 375ยฐF (190ยฐC) until golden and warmed through.


    Social Media Caption Ideas โค๏ธ

    Option 1:
    “Made this Strawberry Cheesecake French Toast and it was breakfast heaven! ๐Ÿ“โœจ Golden bread stuffed with creamy cheesecake filling and fresh strawberries โ€” the perfect sweet treat.”

    Option 2:
    “When breakfast tastes like dessert! ๐Ÿ˜ This strawberry cheesecake French toast is rich, creamy, fruity, and absolutely unforgettable.”

    Option 3:
    “A little indulgence for the morning! ๐Ÿ“๐Ÿž Creamy cheesecake filling, sweet strawberries, and golden French toast make the perfect combination.”


    ๐Ÿ“๐Ÿžโœจ Strawberry Cheesecake French Toast is the ultimate brunch recipe โ€” crispy outside, creamy inside, and bursting with fresh strawberry flavor! โค๏ธ

  • Grilled Thai Coconut Chicken Skewers

    Grilled Thai Coconut Chicken Skewers

    (Tender Thai-Inspired Chicken Satay with Coconut Marinade)

    These Grilled Thai Coconut Chicken Skewers are juicy, flavorful, and packed with tropical Thai-inspired flavors. The chicken is marinated in creamy coconut milk, garlic, ginger, lime, and warm spices, then grilled until beautifully charred and tender. Perfect for BBQs, summer dinners, or an easy weeknight meal!


    Ingredients

    For the Coconut Chicken Marinade:

    • 2 pounds boneless skinless chicken thighs or breasts, cut into strips or cubes
    • 1 cup coconut milk
    • 3 tablespoons soy sauce
    • 2 tablespoons brown sugar
    • 2 tablespoons lime juice
    • 1 tablespoon fish sauce
    • 3 cloves garlic, minced
    • 1 tablespoon fresh ginger, grated
    • 1 tablespoon olive oil or sesame oil
    • 1 teaspoon curry powder
    • 1 teaspoon smoked paprika
    • ยฝ teaspoon turmeric
    • ยฝ teaspoon black pepper
    • ยฝ teaspoon salt
    • ยผ teaspoon crushed red pepper flakes (optional)

    For the Skewers:

    • Wooden skewers, soaked in water for 30 minutes
      or
    • Metal skewers

    Peanut Dipping Sauce (Optional)

    • ยฝ cup creamy peanut butter
    • ยผ cup coconut milk
    • 2 tablespoons soy sauce
    • 1 tablespoon lime juice
    • 1 tablespoon brown sugar
    • 1 teaspoon garlic, minced
    • 1 teaspoon sriracha or chili sauce
    • Water as needed to thin

    Mix until smooth.


    Instructions

    Step 1: Marinate the Chicken

    In a large bowl combine:

    • Coconut milk
    • Soy sauce
    • Fish sauce
    • Brown sugar
    • Lime juice
    • Garlic
    • Ginger
    • Spices

    Add chicken and coat well.

    Cover and refrigerate:

    2โ€“8 hours

    For the best flavor, marinate overnight.


    Step 2: Prepare the Skewers

    Thread marinated chicken onto skewers.

    Leave small spaces between pieces for even cooking.


    Step 3: Grill the Chicken

    Preheat grill to:

    Medium-high heat (400โ€“450ยฐF / 200โ€“230ยฐC)

    Grill skewers:

    4โ€“6 minutes per side

    until:

    โœ… Golden and slightly charred
    โœ… Juicy inside
    โœ… Internal temperature reaches 165ยฐF (74ยฐC)


    Step 4: Serve

    Brush with extra coconut marinade while grilling if desired.

    Garnish with:

    • Fresh cilantro
    • Green onions
    • Lime wedges
    • Sesame seeds

    Serve with peanut sauce.


    Extra Tips & Secrets โœจ

    โœ… Chicken thighs stay extra juicy on the grill.

    โœ… Do not skip the coconut milk โ€” it tenderizes the chicken and adds richness.

    โœ… Soak wooden skewers so they donโ€™t burn.

    โœ… Let chicken rest a few minutes after grilling to keep it juicy.


    Delicious Variations

    ๐ŸŒถ๏ธ Spicy Thai Coconut Chicken

    Add:

    • Thai chili peppers
    • Extra sriracha
    • Chili paste

    ๐Ÿ Thai Pineapple Chicken Skewers

    Add:

    • Fresh pineapple chunks
    • Bell peppers

    ๐Ÿฅฅ Creamy Coconut Curry Chicken

    Add:

    • Extra curry powder
    • Coconut cream

    ๐Ÿฏ Sweet Chili Chicken Skewers

    Glaze with:

    • Thai sweet chili sauce

    ๐Ÿฅ— Thai Chicken Salad Bowl

    Serve over:

    • Lettuce
    • Rice noodles
    • Fresh herbs

    Serving Ideas

    Serve with:

    ๐Ÿš Jasmine rice
    ๐Ÿฅ— Thai cucumber salad
    ๐Ÿฅฅ Coconut rice
    ๐Ÿฅญ Mango salad
    ๐Ÿฅœ Peanut sauce
    ๐Ÿ‹ Lime wedges


    Storage

    Refrigerator:
    Store cooked chicken for up to 4 days.

    Freezer:
    Freeze cooked skewers for up to 3 months.

    Reheating:
    Warm gently on a grill, skillet, or air fryer.


    Nutrition Facts (Approximate)

    Per serving:

    • Calories: 350โ€“450 kcal
    • Protein: 35โ€“45 g
    • Carbohydrates: 10โ€“20 g
    • Fat: 18โ€“25 g

    Frequently Asked Questions (Q&A)

    Q: Can I bake these instead of grilling?
    A: Yes! Bake at 425ยฐF (220ยฐC) for about 20โ€“25 minutes.

    Q: Can I use chicken breast?
    A: Yes, but chicken thighs stay more tender and juicy.

    Q: Can I make these ahead?
    A: Yes! Marinate the chicken overnight and grill when ready.

    Q: What makes Thai coconut chicken flavorful?
    A: The combination of coconut milk, lime, garlic, ginger, and savory sauces creates the signature Thai-inspired taste.

    Q: Can I make this dairy-free?
    A: Yes! Coconut milk is naturally dairy-free.


    Social Media Caption Ideas โค๏ธ

    Option 1:
    “Made these Grilled Thai Coconut Chicken Skewers and they were incredible! ๐Ÿข๐Ÿฅฅ๐Ÿ”ฅ Tender chicken marinated in coconut, garlic, ginger, and lime with the perfect smoky grilled flavor.”

    Option 2:
    “Dinner on a stick never tasted this good! ๐Ÿ˜ These Thai coconut chicken skewers are juicy, flavorful, and perfect with a creamy peanut dipping sauce.”

    Option 3:
    “A little tropical flavor straight from the grill! ๐ŸŒด๐Ÿข These coconut chicken skewers are easy, delicious, and guaranteed to be a crowd favorite.”


    ๐Ÿข๐Ÿฅฅ๐Ÿ”ฅ Grilled Thai Coconut Chicken Skewers are the perfect blend of sweet, savory, creamy, and smoky flavors โ€” a delicious meal everyone will love! โค๏ธ

  • Gorditas de Harina

    Gorditas de Harina

    (Soft Mexican Flour Gorditas โ€“ Homemade Thick Flour Cakes)

    These Gorditas de Harina are soft, fluffy, and slightly chewy Mexican flour cakes made with simple ingredients. Unlike corn masa gorditas, these are made with flour dough and are perfect for slicing open and filling with savory meats, beans, cheese, or sweet fillings.


    Ingredients

    For the Flour Gordita Dough:

    • 4 cups all-purpose flour
    • 1 teaspoon salt
    • 1 tablespoon baking powder
    • ยฝ cup shortening, lard, or butter
    • 1ยฝ cups warm milk or warm water (add as needed)
    • 1 tablespoon sugar (optional, for a slightly sweeter dough)

    Instructions

    Step 1: Prepare the Dough

    In a large bowl combine:

    • Flour
    • Salt
    • Baking powder
    • Sugar (if using)

    Add:

    • Shortening, lard, or butter

    Mix with your hands until the flour looks crumbly.

    Slowly add warm milk or water.

    Knead until you have a soft, smooth dough.

    The dough should be:

    โœ… Soft
    โœ… Elastic
    โœ… Not sticky


    Step 2: Let the Dough Rest

    Cover dough with a clean towel or plastic wrap.

    Let rest:

    30โ€“45 minutes

    This helps the dough become easier to roll and makes softer gorditas.


    Step 3: Shape the Gorditas

    Divide dough into:

    10โ€“12 balls

    Roll each ball into a thick circle:

    • About 4โ€“5 inches wide
    • About ยผ inch thick

    Keep them thicker than tortillas.


    Step 4: Cook the Gorditas

    Heat a comal, skillet, or griddle over:

    Medium heat

    Cook each gordita:

    2โ€“4 minutes per side

    until golden spots appear and the inside is cooked.


    Step 5: Fill & Serve

    Let cool slightly.

    Slice open like a pocket and fill with your favorite ingredients.


    Popular Gorditas de Harina Fillings ๐ŸŒฎ

    ๐Ÿฅฉ Beef Gorditas

    Fill with:

    • Shredded beef
    • Salsa
    • Cheese
    • Lettuce

    ๐Ÿท Pork Gorditas

    Fill with:

    • Carnitas
    • Chicharrรณn
    • Salsa verde

    ๐Ÿซ˜ Bean & Cheese Gorditas

    Fill with:

    • Refried beans
    • Queso fresco
    • Jalapeรฑos

    ๐Ÿณ Breakfast Gorditas

    Fill with:

    • Eggs
    • Bacon
    • Potatoes
    • Cheese

    ๐ŸŒถ๏ธ Green Chile Gorditas

    Fill with:

    • Roasted green chile
    • Cheese
    • Chicken or beef

    Extra Tips & Secrets โœจ

    โœ… Lard gives the most traditional flavor and softness.

    โœ… Do not overcook โ€” flour gorditas should stay tender.

    โœ… Resting the dough is important for a softer texture.

    โœ… Cook on medium heat so the outside doesnโ€™t brown before the inside cooks.


    Sweet Gorditas de Harina Variation ๐Ÿฏ

    For dessert-style gorditas add:

    • ยผ cup sugar
    • 1 teaspoon cinnamon
    • A splash of vanilla

    Serve with:

    ๐Ÿฏ Honey
    ๐Ÿ“ Jam
    ๐Ÿฅ› Sweetened cream
    ๐Ÿซ Chocolate spread


    Storage

    Room Temperature:
    Keep covered for up to 2 days.

    Refrigerator:
    Store up to 5 days.

    Freezer:
    Freeze cooked gorditas for up to 3 months.

    Reheat on a skillet for the best texture.


    Frequently Asked Questions (Q&A)

    Q: Are Gorditas de Harina the same as tortillas de harina?
    A: They are similar, but gorditas are thicker and softer, while tortillas are thin and flexible.

    Q: Why are my gorditas hard?
    A: They may have too much flour, not enough fat, or were cooked too long.

    Q: Can I use butter instead of lard?
    A: Yes! Butter gives a rich flavor, while lard creates a more traditional texture.

    Q: Can I make the dough ahead?
    A: Yes, keep it covered in the refrigerator and bring it back to room temperature before shaping.

    Q: Do Gorditas de Harina need to be fried?
    A: Traditional flour gorditas are usually cooked on a dry griddle, but they can also be lightly fried for a crispier version.


    Social Media Caption Ideas โค๏ธ

    Option 1:
    “Made homemade Gorditas de Harina from scratch! ๐Ÿซ“โœจ Soft, fluffy, and perfect for filling with your favorite Mexican flavors.”

    Option 2:
    “Nothing beats fresh homemade flour gorditas! ๐Ÿ˜ Warm, tender, and ready to be stuffed with delicious fillings.”

    Option 3:
    “A little taste of Mexico made right at home! ๐Ÿซ“โค๏ธ These Gorditas de Harina are soft, golden, and absolutely delicious.”


    ๐Ÿซ“โœจ Gorditas de Harina are a true Mexican comfort food โ€” soft homemade flour pockets that turn any filling into a delicious meal! โค๏ธ