Category: MEXICAN RECIPES

  • Mexican Cornbread

    Mexican Cornbread

    (The Best Homemade Mexican Cornbread โ€“ Moist, Cheesy & Full of Flavor)

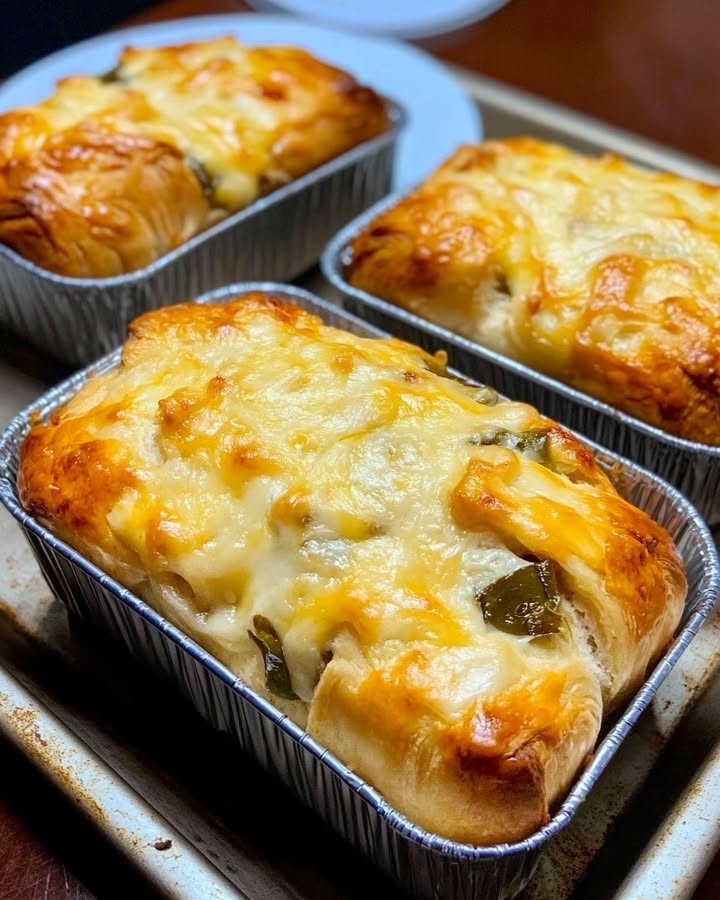
    This Mexican Cornbread is a rich, moist, and flavorful twist on classic cornbread. Made with sweet corn, melted cheese, green chiles, and a touch of spice, this recipe creates the perfect balance of sweetness, heat, and savory goodness.

    Itโ€™s soft on the inside, golden on the outside, and packed with Mexican-inspired flavors. Perfect alongside chili, soups, BBQ, tacos, or served warm with butter.


    Full Recipe (Ingredients + Instructions)

    Ingredients

    For the Cornbread:

    • 1 cup yellow cornmeal
    • 1 cup all-purpose flour
    • 1 tablespoon baking powder
    • 1 teaspoon salt
    • ยผ cup granulated sugar (optional)
    • 2 large eggs
    • 1 cup buttermilk
    • ยฝ cup sour cream
    • ยฝ cup melted butter
    • 1 cup whole corn kernels (fresh, frozen, or canned drained)
    • 1 cup shredded cheddar cheese
    • 1 cup shredded Monterey Jack cheese
    • 1 can (4 oz) diced green chiles
    • ยฝ medium onion, finely diced
    • 1โ€“2 jalapeรฑos, finely chopped (optional)

    Optional Additions:

    • Crispy bacon pieces
    • Cooked breakfast sausage
    • Pepper Jack cheese
    • Fresh cilantro
    • Smoked paprika
    • Roasted poblano peppers

    Instructions

    Step 1: Prepare the Oven

    Preheat oven to:

    375ยฐF (190ยฐC)

    Grease a:

    9×13-inch baking dish

    or cast iron skillet.


    Step 2: Mix Dry Ingredients

    In a large bowl combine:

    • Cornmeal
    • Flour
    • Baking powder
    • Salt
    • Sugar

    Mix well.


    Step 3: Mix Wet Ingredients

    In another bowl whisk together:

    • Eggs
    • Buttermilk
    • Sour cream
    • Melted butter

    until smooth.


    Step 4: Combine Everything

    Add wet ingredients into dry ingredients.

    Stir gently.

    Fold in:

    • Corn
    • Green chiles
    • Onion
    • Jalapeรฑos
    • Cheddar cheese
    • Monterey Jack cheese

    Do not overmix.


    Step 5: Bake

    Pour batter into prepared pan.

    Bake:

    35โ€“45 minutes

    until:

    โœ… Golden brown top
    โœ… Center is set
    โœ… Toothpick comes out clean

    Let cool:

    10 minutes

    before slicing.


    Extra Recipe Tips & Variations โœจ

    ๐ŸŒถ๏ธ Hatch Green Chile Cornbread

    Use roasted Hatch green chiles for a smoky New Mexico-style flavor.


    ๐Ÿฅ“ Bacon Cheddar Cornbread

    Add:

    • Crispy bacon
    • Extra cheddar

    for a savory upgrade.


    ๐Ÿง€ Extra Cheesy Version

    Add:

    • More Monterey Jack
    • Pepper Jack cheese

    for a gooey texture.


    ๐ŸŒฝ Sweet Mexican Cornbread

    Add:

    • Extra corn
    • A little honey

    for a sweeter version.


    ๐Ÿ– Cornbread Casserole Style

    Mix in:

    • Ground beef
    • Taco seasoning

    for a complete meal.


    Flavor Upgrades / Secret Tips ๐Ÿ”ฅ

    โœ… Use buttermilk for the softest texture.

    โœ… Add sour creamโ€”it keeps the cornbread moist.

    โœ… A cast iron skillet creates crispy golden edges.

    โœ… Roast your green chiles before adding for deeper flavor.

    โœ… Freshly shredded cheese melts better than pre-shredded.

    โœ… Let the batter rest for 5โ€“10 minutes before baking for a better crumb.


    Serving Ideas ๐Ÿฝ๏ธ

    Serve with:

    ๐Ÿฅฃ Green chile stew
    ๐Ÿฒ Chili
    ๐Ÿ– BBQ ribs
    ๐ŸŒฎ Tacos
    ๐Ÿ— Fried chicken
    ๐Ÿซ˜ Pinto beans
    ๐Ÿฅ— Fresh salad

    Perfect for:

    • Family dinners
    • Holiday meals
    • Potlucks
    • Cookouts
    • Sunday dinners

    Storage & Meal Prep Tips ๐Ÿฅก

    Room Temperature:

    Store covered for:

    1โ€“2 days

    Refrigerator:

    Store in an airtight container for:

    4โ€“5 days

    Freezer:

    Freeze slices for:

    up to 3 months

    Wrap individually before freezing.

    Reheating:

    Warm in oven:

    300ยฐF (150ยฐC) for 10 minutes

    or microwave briefly.


    Nutrition Facts (Approximate)

    Per serving:

    • Calories: 300โ€“400 kcal
    • Protein: 10โ€“15 g
    • Carbohydrates: 35โ€“45 g
    • Fat: 15โ€“25 g

    (Nutrition varies depending on cheese and additions.)


    Frequently Asked Questions (Q&A)

    Q: Is Mexican cornbread spicy?
    A: It can be mild or spicy depending on the amount of jalapeรฑos and green chiles.

    Q: Can I use regular milk instead of buttermilk?
    A: Yes. Add 1 tablespoon of lemon juice or vinegar to 1 cup of milk and let sit for 5 minutes.

    Q: Can I make this gluten-free?
    A: Yes. Use a gluten-free flour blend instead of all-purpose flour.

    Q: Why is my cornbread dry?
    A: Overbaking or too much flour can make it dry. Sour cream and buttermilk help keep it moist.

    Q: Can I make this ahead of time?
    A: Yes. It reheats beautifully and is great for meal prep.


    Social Media Captions โค๏ธ

    Option 1 (Facebook Style)

    “I finally made the Mexican Cornbread everyone talks about ๐ŸŒฝ๐Ÿง€๐ŸŒถ๏ธ Moist, cheesy, packed with corn and green chilesโ€”the perfect side dish for any meal!”

    Option 2 (Instagram Style)

    “The cornbread that steals the show ๐Ÿ˜๐ŸŒฝ Cheesy, golden, and loaded with Mexican flavors!”

    Option 3 (Short Viral Caption)

    “Not your ordinary cornbread ๐ŸŒฝ๐Ÿ”ฅ”

    Option 4 (Homestyle Caption)

    “Some side dishes become family favorites โค๏ธ This homemade Mexican Cornbread is warm, cheesy, and made for sharing around the table.”


    Final Food Description for Posting ๐Ÿด

    Mexican Cornbread is a moist, cheesy, and flavorful homemade side dish loaded with sweet corn, roasted green chiles, and melted cheese. With crispy golden edges and a soft, tender center, this Southern-meets-Mexican favorite is the perfect companion for chili, BBQ, soups, and family dinners. ๐ŸŒฝ๐Ÿง€๐ŸŒถ๏ธโœจ

  • Tamales de Rajas con Queso y Crema

    Tamales de Rajas con Queso y Crema

    (Traditional Mexican Tamales Filled with Roasted Poblano Peppers, Cheese & Cream)

    Tamales de Rajas con Queso y Crema are a beloved Mexican classic made with soft, fluffy masa filled with roasted poblano pepper strips, melted cheese, and creamy flavors wrapped in corn husks and steamed until perfectly tender.

    This vegetarian tamale recipe is rich, comforting, and full of authentic Mexican flavor. The smoky roasted peppers, creamy cheese, and delicate masa create the perfect balance of savory, spicy, and satisfying.


    Full Recipe (Ingredients + Instructions)

    Ingredients

    For the Corn Husks:

    • 30โ€“40 dried corn husks
    • Warm water for soaking

    For the Masa:

    • 4 cups masa harina (corn flour for tamales)
    • 1ยฝ teaspoons baking powder
    • 1ยฝ teaspoons salt
    • 1 cup vegetable shortening or lard
    • 2ยฝโ€“3 cups warm vegetable broth (adjust as needed)

    For the Rajas Filling:

    • 6 large poblano peppers
    • 2 tablespoons butter or oil
    • 1 large onion, sliced
    • 3 cloves garlic, minced
    • 2 cups Oaxaca cheese, shredded
    • 1 cup Monterey Jack cheese, shredded
    • 1 cup Mexican crema or sour cream
    • ยฝ cup corn kernels (optional)
    • 1 teaspoon salt
    • ยฝ teaspoon black pepper
    • ยฝ teaspoon Mexican oregano

    Instructions

    Step 1: Prepare the Corn Husks

    Place corn husks in a large bowl.

    Cover with warm water.

    Soak for:

    45โ€“60 minutes

    until soft and flexible.

    Drain and pat dry.


    Step 2: Roast the Poblanos

    Roast poblano peppers over a flame, grill, or under the broiler until:

    โœ… Skin is blackened
    โœ… Peppers are softened

    Place in a covered bowl for:

    10 minutes

    Peel skins, remove seeds, and slice into strips.


    Step 3: Cook the Rajas Filling

    Heat butter or oil in a skillet.

    Add:

    • Onion

    Cook until softened.

    Add garlic and cook:

    30 seconds

    Add:

    • Poblano strips
    • Corn (optional)
    • Salt
    • Pepper
    • Oregano

    Cook for a few minutes.

    Remove from heat and mix with:

    • Oaxaca cheese
    • Monterey Jack cheese
    • Mexican crema

    Set aside.


    Step 4: Prepare the Masa

    Beat shortening or lard until fluffy:

    3โ€“5 minutes

    In a separate bowl mix:

    • Masa harina
    • Baking powder
    • Salt

    Gradually add warm broth.

    Mix until a soft dough forms.

    Add whipped fat and beat until combined.

    Test the Masa:

    Drop a small piece into water.

    If it floats, the masa is ready.


    Step 5: Assemble the Tamales

    Spread about:

    2โ€“3 tablespoons masa

    onto the smooth side of a corn husk.

    Add:

    1โ€“2 tablespoons rajas filling

    in the center.

    Fold sides inward.

    Fold the bottom upward.

    Repeat with remaining ingredients.


    Step 6: Steam the Tamales

    Place tamales upright in a steamer.

    Steam for:

    60โ€“90 minutes

    until:

    โœ… Masa pulls away easily from husk
    โœ… Tamales are firm and fluffy

    Let rest:

    10โ€“15 minutes

    before serving.


    Extra Recipe Tips & Variations โœจ

    ๐ŸŒฝ Extra Cheesy Tamales

    Add more:

    • Oaxaca cheese
    • Queso Chihuahua
    • Pepper Jack

    for a gooey filling.


    ๐ŸŒถ๏ธ Spicy Rajas Tamales

    Add:

    • Jalapeรฑos
    • Serrano peppers
    • Roasted green chile

    for extra heat.


    ๐ŸŒฝ Sweet Corn Rajas Tamales

    Add:

    • Fresh corn kernels

    for a slightly sweet flavor.


    ๐Ÿฅ“ Bacon Rajas Tamales

    Add:

    • Crispy bacon pieces

    for a smoky twist.


    ๐Ÿ— Chicken Rajas Tamales

    Add shredded chicken for a heartier version.


    Flavor Upgrades / Secret Tips ๐Ÿ”ฅ

    โœ… Roast the poblanos wellโ€”the smoky flavor is what makes rajas special.

    โœ… Use freshly shredded cheese for the best melt.

    โœ… Donโ€™t make the masa too dry; soft masa creates fluffy tamales.

    โœ… Let the filled tamales rest a few minutes before steaming.

    โœ… Keep husks covered while assembling so they donโ€™t dry out.

    โœ… Tamales taste even better the next day after the flavors settle.


    Serving Ideas ๐Ÿฝ๏ธ

    Serve with:

    ๐Ÿฅฃ Mexican crema
    ๐ŸŒถ๏ธ Salsa verde
    ๐Ÿ… Pico de gallo
    ๐Ÿซ˜ Refried beans
    ๐Ÿš Mexican rice
    ๐Ÿฅ‘ Guacamole
    โ˜• Mexican hot chocolate or cafรฉ de olla

    Perfect for:

    • Christmas gatherings
    • Holidays
    • Family celebrations
    • Weekend cooking
    • Mexican food traditions

    Storage & Meal Prep Tips ๐Ÿฅก

    Refrigerator:

    Store cooked tamales in an airtight container for:

    4โ€“5 days

    Freezer:

    Freeze cooked tamales for:

    up to 6 months

    Wrap individually before freezing.

    Reheating:

    Best methods:

    Steamer: 15โ€“20 minutes
    Microwave: Wrap in a damp paper towel and heat gently

    Meal Prep:

    Tamales freeze beautifully, making them perfect for preparing large batches ahead of time.


    Nutrition Facts (Approximate)

    Per tamale:

    • Calories: 250โ€“350 kcal
    • Protein: 8โ€“12 g
    • Carbohydrates: 30โ€“40 g
    • Fat: 12โ€“20 g

    (Nutrition varies depending on cheese and fat used in masa.)


    Frequently Asked Questions (Q&A)

    Q: What are rajas in Mexican cooking?
    A: โ€œRajasโ€ means strips of roasted chile peppers, usually poblano peppers cooked with onion and cream.

    Q: Are Tamales de Rajas spicy?
    A: Poblanos are usually mild, giving more smoky flavor than heat.

    Q: Can I make tamales without lard?
    A: Yes. Vegetable shortening or oil works well.

    Q: How do I know when tamales are done?
    A: The masa should separate easily from the corn husk.

    Q: Can I freeze uncooked tamales?
    A: Yes. Steam them directly from frozen, adding extra cooking time.


    Social Media Captions โค๏ธ

    Option 1 (Facebook Style)

    “Made homemade Tamales de Rajas con Queso y Crema today ๐ŸŒฝ๐ŸŒถ๏ธ๐Ÿง€ Soft masa filled with roasted poblano peppers, creamy cheese, and authentic Mexican flavors. A recipe made for sharing!”

    Option 2 (Instagram Style)

    “Steamy, cheesy, and full of tradition โค๏ธ๐ŸŒฝ These rajas tamales are pure Mexican comfort food!”

    Option 3 (Short Viral Caption)

    “Cheesy rajas + fluffy masa = tamale perfection ๐ŸŒถ๏ธ๐Ÿง€๐Ÿ”ฅ”

    Option 4 (Homestyle Caption)

    “Some recipes carry memories โค๏ธ Homemade tamales bring family together, one delicious bite at a time.”


    Final Food Description for Posting ๐Ÿด

    Tamales de Rajas con Queso y Crema are a traditional Mexican favorite made with fluffy corn masa filled with roasted poblano pepper strips, melted cheese, and creamy flavors. Wrapped in corn husks and steamed until tender, these tamales are smoky, cheesy, comforting, and perfect for sharing with family and friends. ๐ŸŒฝ๐ŸŒถ๏ธ๐Ÿง€โœจ

  • Roasted Poblano Corn Chowder

    Roasted Poblano Corn Chowder

    (Creamy Southwestern Soup with Roasted Poblanos, Sweet Corn & Smoky Flavor)

    This Roasted Poblano Corn Chowder is a rich and comforting Southwestern-inspired soup made with smoky roasted poblano peppers, sweet corn, potatoes, and a creamy broth. The roasted peppers add a gentle heat and deep flavor, while the corn brings natural sweetness that balances every bite.

    Perfect for cozy dinners, chilly evenings, family meals, or whenever you want a bowl of homemade comfort food.


    Full Recipe (Ingredients + Instructions)

    Ingredients

    For the Chowder:

    • 4 large poblano peppers
    • 5 cups fresh or frozen corn kernels
    • 3 tablespoons butter
    • 1 tablespoon olive oil
    • 1 large yellow onion, diced
    • 3 cloves garlic, minced
    • 2 medium Yukon Gold potatoes, peeled and diced
    • 4 cups chicken broth (or vegetable broth)
    • 1ยฝ cups heavy cream
    • 1 cup milk
    • 1 teaspoon cumin
    • 1 teaspoon smoked paprika
    • 1 teaspoon chili powder
    • 1 teaspoon Mexican oregano
    • 1 teaspoon salt (adjust to taste)
    • ยฝ teaspoon black pepper

    Optional Toppings:

    • Crispy bacon
    • Shredded cheddar cheese
    • Monterey Jack cheese
    • Fresh cilantro
    • Sour cream
    • Avocado slices
    • Tajรญn seasoning
    • Lime wedges
    • Crushed tortilla chips

    Instructions

    Step 1: Roast the Poblanos

    Roast poblano peppers over an open flame, grill, or under the broiler until:

    โœ… Skin is blackened
    โœ… Peppers are softened

    Place in a covered bowl for:

    10 minutes

    Peel off the skin, remove seeds, and chop.


    Step 2: Cook the Vegetables

    Heat butter and olive oil in a large soup pot.

    Add:

    • Onion

    Cook for:

    4โ€“5 minutes

    until softened.

    Add garlic and cook:

    30 seconds.


    Step 3: Build the Chowder

    Add:

    • Corn
    • Potatoes
    • Roasted poblanos
    • Chicken broth

    Season with:

    • Cumin
    • Smoked paprika
    • Chili powder
    • Mexican oregano
    • Salt
    • Pepper

    Bring to a simmer.

    Cook:

    20โ€“25 minutes

    until potatoes are tender.


    Step 4: Make It Creamy

    Blend about half of the soup using:

    • Immersion blender
      or
    • Regular blender

    (Leave some chunks for texture.)

    Return blended soup to the pot.

    Add:

    • Heavy cream
    • Milk

    Simmer gently for:

    5โ€“10 minutes

    until creamy.


    Step 5: Serve

    Taste and adjust seasoning.

    Top with your favorite garnishes:

    • Cheese
    • Cilantro
    • Bacon
    • Lime juice

    Serve warm with crusty bread or tortilla chips.


    Extra Recipe Tips & Variations โœจ

    ๐Ÿฅ“ Bacon Poblano Corn Chowder

    Add:

    • Crispy bacon pieces

    and cook onions in bacon grease for extra flavor.


    ๐Ÿ— Chicken Poblano Corn Chowder

    Add:

    • Shredded roasted chicken

    for a hearty complete meal.


    ๐Ÿง€ Cheesy Poblano Chowder

    Add:

    • Monterey Jack
    • Pepper Jack
    • Cheddar cheese

    for an extra creamy version.


    ๐ŸŒถ๏ธ Spicy Version

    Add:

    • Jalapeรฑos
    • Serrano peppers
    • Chipotle peppers

    for more heat.


    ๐ŸŒฑ Vegetarian Version

    Use:

    • Vegetable broth

    and add extra vegetables like zucchini or bell peppers.


    Flavor Upgrades / Secret Tips ๐Ÿ”ฅ

    โœ… Roasting the poblanos is the secretโ€”it creates a smoky, restaurant-quality flavor.

    โœ… Use fresh corn when in season for the sweetest taste.

    โœ… Blend only part of the soup to keep a hearty texture.

    โœ… Add lime juice at the end to brighten the creamy flavors.

    โœ… A small amount of smoked paprika enhances the roasted pepper flavor.

    โœ… Let the chowder rest for 10 minutes before serving so flavors develop.


    Serving Ideas ๐Ÿฝ๏ธ

    Serve with:

    ๐Ÿฅ– Crusty bread
    ๐ŸŒฝ Cornbread
    ๐ŸŒฎ Quesadillas
    ๐Ÿฅ‘ Avocado toast
    ๐Ÿฅ— Fresh salad
    ๐Ÿค Grilled shrimp
    ๐Ÿ— Roasted chicken

    Perfect for:

    • Fall dinners
    • Winter comfort meals
    • Family gatherings
    • Lunch meal prep
    • Weekend cooking

    Storage & Meal Prep Tips ๐Ÿฅก

    Refrigerator:

    Store in an airtight container for:

    3โ€“4 days

    Freezer:

    Freeze for:

    up to 2 months

    (For best texture, add cream after thawing and reheating.)

    Reheating:

    Warm slowly on the stove over medium-low heat.

    Add a splash of:

    • Milk
    • Cream
    • Broth

    if it becomes too thick.

    Meal Prep:

    Make a large batch and portion into containers for easy lunches.


    Nutrition Facts (Approximate)

    Per serving:

    • Calories: 400โ€“550 kcal
    • Protein: 10โ€“18 g
    • Carbohydrates: 45โ€“55 g
    • Fat: 25โ€“35 g

    (Nutrition varies depending on cream, cheese, and toppings.)


    Frequently Asked Questions (Q&A)

    Q: Are poblano peppers spicy?
    A: Poblanos are usually mild with a smoky flavor, but some can have a little more heat.

    Q: Can I use canned corn?
    A: Yes. Drain well before adding.

    Q: Can I make this dairy-free?
    A: Yes. Use coconut milk or a dairy-free cream alternative.

    Q: Can I make this in a slow cooker?
    A: Yes. Cook vegetables and broth on low for 5โ€“6 hours, then add cream at the end.

    Q: What makes this chowder different from regular corn soup?
    A: The roasted poblano peppers add a smoky Southwestern flavor and gentle chile heat.


    Social Media Captions โค๏ธ

    Option 1 (Facebook Style)

    “This Roasted Poblano Corn Chowder is pure comfort in a bowl ๐ŸŒฝ๐ŸŒถ๏ธ Creamy, smoky, and packed with sweet corn and roasted pepper flavor. The perfect cozy homemade soup!”

    Option 2 (Instagram Style)

    “Creamy, smoky, and full of Southwestern flavor ๐ŸŒถ๏ธ๐Ÿฅฃ This roasted poblano corn chowder is a must-try!”

    Option 3 (Short Viral Caption)

    “A bowl of smoky comfort ๐ŸŒฝ๐Ÿ”ฅ”

    Option 4 (Homestyle Caption)

    “Nothing warms the heart like a homemade bowl of soup โค๏ธ This roasted poblano corn chowder brings creamy comfort and bold flavors to the table.”


    Final Food Description for Posting ๐Ÿด

    Roasted Poblano Corn Chowder is a creamy Southwestern soup made with smoky roasted poblano peppers, sweet corn, tender potatoes, and a rich seasoned broth. Comforting, flavorful, and perfectly balanced between creamy, sweet, and spicy, this homemade chowder is the perfect meal for cozy nights and family dinners. ๐ŸŒฝ๐ŸŒถ๏ธ๐Ÿฅฃโœจ

  • Green Chile Quiche

    Green Chile Quiche

    (Creamy Southwestern Quiche with Roasted Green Chiles & Cheese)

    This Green Chile Quiche is a delicious Southwestern-inspired dish made with roasted green chiles, creamy eggs, melted cheese, and a buttery flaky crust. The smoky chile flavor pairs perfectly with the rich custard filling, creating a comforting meal that works beautifully for breakfast, brunch, lunch, or even a light dinner.

    A classic New Mexico-style recipe that brings bold flavor and a little spice to your table.


    Full Recipe (Ingredients + Instructions)

    Ingredients

    For the Quiche:

    • 1 refrigerated pie crust or homemade pastry crust
    • 6 large eggs
    • 1ยฝ cups half-and-half or heavy cream
    • 2 cups shredded Monterey Jack cheese
    • 1 cup shredded cheddar cheese
    • 1ยฝ cups roasted green chiles, chopped
    • ยฝ medium onion, finely diced
    • 3 cloves garlic, minced
    • 1 teaspoon salt
    • ยฝ teaspoon black pepper
    • 1 teaspoon cumin
    • 1 teaspoon smoked paprika
    • ยฝ teaspoon Mexican oregano
    • ยผ teaspoon cayenne pepper (optional)

    Optional Additions:

    • 1 cup cooked bacon pieces
    • 1 cup diced ham
    • 1 cup cooked sausage
    • Fresh cilantro
    • Diced tomatoes
    • Jalapeรฑos
    • Queso fresco

    Instructions

    Step 1: Prepare the Crust

    Preheat oven to:

    375ยฐF (190ยฐC)

    Place pie crust into a 9-inch pie dish.

    Prick the bottom with a fork.

    Bake crust for:

    8โ€“10 minutes

    to prevent sogginess.


    Step 2: Prepare the Filling

    In a large bowl whisk together:

    • Eggs
    • Half-and-half
    • Salt
    • Pepper
    • Cumin
    • Smoked paprika
    • Mexican oregano

    Mix until smooth.


    Step 3: Add the Ingredients

    Stir in:

    • Green chiles
    • Onion
    • Garlic
    • Monterey Jack cheese
    • Cheddar cheese

    Mix well.


    Step 4: Fill the Crust

    Pour filling into the prepared crust.

    Top with extra cheese if desired.


    Step 5: Bake

    Bake for:

    35โ€“45 minutes

    until:

    โœ… Center is set
    โœ… Top is golden
    โœ… Knife inserted comes out clean

    Let rest:

    10 minutes

    before slicing.


    Extra Recipe Tips & Variations โœจ

    ๐Ÿฅ“ Green Chile Bacon Quiche

    Add:

    • Crispy bacon
    • Extra cheddar

    for a smoky breakfast version.


    ๐ŸŒญ Sausage Green Chile Quiche

    Add:

    • Cooked breakfast sausage

    for a hearty meal.


    ๐Ÿฅ” Green Chile Potato Quiche

    Add:

    • Roasted diced potatoes

    for extra texture.


    ๐Ÿ… Fresh Garden Version

    Add:

    • Tomatoes
    • Spinach
    • Fresh herbs

    for a lighter option.


    ๐ŸŒถ๏ธ Extra Spicy Version

    Use:

    • Hot Hatch green chiles
    • Serrano peppers
    • Pepper Jack cheese

    for more heat.


    Flavor Upgrades / Secret Tips ๐Ÿ”ฅ

    โœ… Roast your green chiles for the best smoky flavor.

    โœ… Drain excess liquid from canned or frozen chiles to avoid a watery quiche.

    โœ… Use freshly shredded cheese for a smoother melt.

    โœ… Let the quiche rest before slicing so it holds together.

    โœ… Add a little sour cream to the egg mixture for extra creaminess.

    โœ… A pinch of smoked paprika enhances the roasted chile flavor.


    Serving Ideas ๐Ÿฝ๏ธ

    Serve with:

    ๐Ÿฅ— Fresh salad
    ๐Ÿฅ‘ Avocado slices
    ๐Ÿ… Pico de gallo
    ๐Ÿž Toast
    ๐Ÿฅ” Breakfast potatoes
    ๐Ÿ“ Fresh fruit

    Perfect for:

    • Weekend brunch
    • Holiday breakfasts
    • Meal prep
    • Family gatherings
    • Light dinners

    Storage & Meal Prep Tips ๐Ÿฅก

    Refrigerator:

    Store covered for:

    3โ€“4 days

    Freezer:

    Freeze individual slices for:

    up to 2 months

    Wrap tightly before freezing.

    Reheating:

    Warm slices in the oven:

    325ยฐF (165ยฐC) for 10โ€“15 minutes

    or microwave gently.

    Meal Prep:

    Bake ahead, slice, and store portions for quick breakfasts.


    Nutrition Facts (Approximate)

    Per slice (1/8 quiche):

    • Calories: 350โ€“450 kcal
    • Protein: 18โ€“22 g
    • Carbohydrates: 15โ€“25 g
    • Fat: 25โ€“35 g

    (Nutrition varies depending on crust, cheese, and optional meats.)


    Frequently Asked Questions (Q&A)

    Q: What kind of green chile is best for quiche?
    A: Hatch green chiles are ideal because they have a smoky, slightly spicy flavor.

    Q: Can I make this crustless?
    A: Yes! Bake in a greased pie dish for a lower-carb version.

    Q: Can I use canned green chiles?
    A: Absolutely. Drain them well before adding.

    Q: Can I prepare this ahead of time?
    A: Yes. Bake the quiche ahead and reheat before serving.

    Q: How do I know when quiche is done?
    A: The center should be slightly firm but still have a gentle jiggle when removed from the oven.


    Social Media Captions โค๏ธ

    Option 1 (Facebook Style)

    “This Green Chile Quiche is packed with roasted green chile flavor, creamy eggs, and melted cheese ๐ŸŒถ๏ธ๐Ÿฅš๐Ÿง€ The perfect Southwestern breakfast that everyone loves!”

    Option 2 (Instagram Style)

    “A little spice, a lot of comfort ๐ŸŒถ๏ธโœจ This cheesy Green Chile Quiche is brunch perfection!”

    Option 3 (Short Viral Caption)

    “Green chile + cheese = breakfast magic ๐ŸŒถ๏ธ๐Ÿง€๐Ÿ”ฅ”

    Option 4 (Homestyle Caption)

    “Simple ingredients, big flavor โค๏ธ This homemade Green Chile Quiche is warm, cheesy, and made for sharing around the table.”


    Final Food Description for Posting ๐Ÿด

    Green Chile Quiche is a flavorful Southwestern dish made with roasted green chiles, creamy eggs, and melted cheese baked inside a golden flaky crust. Smoky, cheesy, and perfectly comforting, this homemade quiche is the perfect breakfast, brunch, or anytime meal for green chile lovers. ๐ŸŒถ๏ธ๐Ÿฅš๐Ÿง€โœจ

  • Classic Mexican Pico de Gallo Salsais fresh

    Classic Mexican Pico de Gallo Salsais fresh

    (Fresh Authentic Mexican Salsa with Tomatoes, Onion, Cilantro & Lime)

    Classic Mexican Pico de Gallo Salsa is a fresh, vibrant, and simple salsa made with ripe tomatoes, crisp onions, fresh cilantro, jalapeรฑos, and bright lime juice. Unlike cooked salsas, Pico de Gallo is served fresh and chunky, allowing every ingredient to shine.

    This traditional Mexican salsa is the perfect topping for tacos, carne asada, grilled meats, quesadillas, burritos, or simply enjoyed with crispy tortilla chips.


    Full Recipe (Ingredients + Instructions)

    Ingredients

    • 6 ripe Roma tomatoes, finely diced
    • 1 medium white onion, finely diced
    • 1โ€“2 fresh jalapeรฑos, finely chopped
    • ยฝ cup fresh cilantro, chopped
    • Juice of 2 fresh limes
    • 1 teaspoon salt (adjust to taste)
    • ยฝ teaspoon black pepper
    • 1 small garlic clove, minced (optional)
    • 1 teaspoon Tajรญn seasoning (optional)

    Instructions

    Step 1: Prepare the Tomatoes

    Dice tomatoes into small, even pieces.

    For a less watery salsa:

    • Remove some seeds and pulp
    • Let diced tomatoes drain for a few minutes

    Step 2: Combine Ingredients

    In a large bowl combine:

    • Tomatoes
    • Onion
    • Jalapeรฑos
    • Cilantro
    • Garlic (optional)

    Mix gently.


    Step 3: Add Lime & Seasoning

    Add:

    • Fresh lime juice
    • Salt
    • Pepper
    • Tajรญn (optional)

    Stir everything together.


    Step 4: Let the Flavors Blend

    Cover and refrigerate for:

    20โ€“30 minutes

    before serving.

    This allows the onion, lime, and chile flavors to come together.


    Extra Recipe Tips & Variations โœจ

    ๐Ÿฅ‘ Avocado Pico de Gallo

    Add:

    • Diced avocado

    for a creamy twist.


    ๐Ÿ Pineapple Pico

    Add:

    • Fresh pineapple
    • Extra jalapeรฑo

    for a sweet and spicy version.


    ๐ŸŒฝ Corn Pico de Gallo

    Add:

    • Roasted corn
    • Black beans

    for a heartier salsa.


    ๐Ÿฅญ Mango Pico

    Add:

    • Diced mango
    • Serrano peppers

    for a tropical flavor.


    ๐ŸŒถ๏ธ Extra Spicy Version

    Add:

    • Serrano peppers
    • Habanero peppers
    • Chile de รกrbol

    for more heat.


    Flavor Upgrades / Secret Tips ๐Ÿ”ฅ

    โœ… Use ripe, fresh tomatoesโ€”the flavor depends on them.

    โœ… Let the salsa rest before serving so the flavors develop.

    โœ… Use fresh lime juice instead of bottled.

    โœ… Chop ingredients small for the perfect scoopable texture.

    โœ… Add salt gradually because it brings out the tomato juices.

    โœ… Use white onion for the most authentic Mexican flavor.


    Serving Ideas ๐Ÿฝ๏ธ

    Serve with:

    ๐ŸŒฎ Tacos
    ๐Ÿฅฉ Carne asada
    ๐Ÿ— Grilled chicken
    ๐ŸŒฏ Burritos
    ๐Ÿง€ Quesadillas
    ๐Ÿฅ‘ Guacamole
    ๐ŸŸ Tortilla chips
    ๐Ÿณ Breakfast eggs

    Perfect for:

    • Taco Tuesday
    • BBQs
    • Parties
    • Mexican food nights
    • Summer gatherings

    Storage & Meal Prep Tips ๐Ÿฅก

    Refrigerator:

    Store in an airtight container for:

    2โ€“3 days

    For the freshest taste, enjoy within 24 hours.

    Meal Prep:

    Chop vegetables ahead of time and combine with lime and salt just before serving.

    Freezing:

    Not recommended because tomatoes lose their fresh texture after freezing.


    Nutrition Facts (Approximate)

    Per serving (ยฝ cup):

    • Calories: 25โ€“40 kcal
    • Protein: 1 g
    • Carbohydrates: 6โ€“8 g
    • Fat: 0 g

    (Nutrition varies depending on additions like avocado or corn.)


    Frequently Asked Questions (Q&A)

    Q: What does Pico de Gallo mean?
    A: Pico de Gallo means โ€œroosterโ€™s beakโ€ in Spanish. It refers to this traditional fresh chunky salsa.

    Q: Is Pico de Gallo spicy?
    A: It can be mild or spicy depending on how many jalapeรฑos or peppers you add.

    Q: What tomatoes are best for Pico de Gallo?
    A: Roma tomatoes are ideal because they are firm and less watery.

    Q: Can I make Pico de Gallo ahead of time?
    A: Yes. It tastes even better after resting, but itโ€™s best within 1โ€“2 days.

    Q: What is the difference between salsa and Pico de Gallo?
    A: Pico de Gallo is fresh and chunky, while many salsas are blended or cooked.


    Social Media Captions โค๏ธ

    Option 1 (Facebook Style)

    “Fresh homemade Pico de Gallo is always a good idea! ๐Ÿ…๐ŸŒถ๏ธ Made with juicy tomatoes, crisp onions, cilantro, and lime, this classic Mexican salsa brings every meal to life.”

    Option 2 (Instagram Style)

    “Fresh ingredients, bold flavors, and a taste of Mexico ๐Ÿ‡ฒ๐Ÿ‡ฝ๐Ÿ…โœจ Classic Pico de Gallo never disappoints!”

    Option 3 (Short Viral Caption)

    “Fresh, zesty, and made for dipping ๐ŸŒถ๏ธ๐Ÿ…๐Ÿ”ฅ”

    Option 4 (Homestyle Caption)

    “Some recipes are simple because theyโ€™re perfect โค๏ธ This homemade Pico de Gallo brings fresh flavor and family-style comfort to every table.”


    Final Food Description for Posting ๐Ÿด

    Classic Mexican Pico de Gallo Salsa is a fresh and colorful salsa made with ripe tomatoes, crunchy onions, jalapeรฑos, cilantro, and fresh lime juice. Light, refreshing, and full of authentic Mexican flavor, this homemade salsa is the perfect topping for tacos, grilled meats, burritos, or a bowl of crispy tortilla chips. ๐Ÿ…๐ŸŒถ๏ธโœจ

  • Chili Colorado

    Chili Colorado

    (Authentic Mexican Beef in Red Chile Sauce)

    Chile Colorado is a traditional Mexican dish made with tender chunks of beef slowly simmered in a rich red chile sauce made from dried chiles, garlic, onions, tomatoes, and warm spices. The name โ€œColoradoโ€ means โ€œcolored red,โ€ referring to the beautiful deep red chile sauce that gives this dish its signature flavor.

    This comforting recipe is perfect with warm tortillas, Mexican rice, beans, or stuffed into burritos and tacos.


    Full Recipe (Ingredients + Instructions)

    Ingredients

    For the Beef:

    • 3 pounds beef chuck roast, cut into 1ยฝ-inch cubes
    • 2 tablespoons vegetable oil
    • 1 teaspoon salt
    • 1 teaspoon black pepper
    • 1 teaspoon garlic powder
    • 1 teaspoon onion powder

    For the Red Chile Sauce:

    • 6 dried guajillo chiles
    • 3 dried ancho chiles
    • 2โ€“3 dried chile de รกrbol peppers (optional for heat)
    • 4 cups hot water
    • 5 garlic cloves
    • ยฝ large white onion
    • 2 Roma tomatoes
    • 2 teaspoons ground cumin
    • 1 teaspoon Mexican oregano
    • ยฝ teaspoon smoked paprika
    • 1 tablespoon apple cider vinegar
    • 1 teaspoon salt (adjust to taste)
    • 2 cups beef broth

    Optional Additions:

    • 2 potatoes, cubed
    • Fresh cilantro
    • Lime wedges
    • Diced onion
    • Queso fresco

    Instructions

    Step 1: Prepare the Chiles

    Remove stems and seeds from dried chiles.

    Toast chiles in a dry skillet for:

    20โ€“30 seconds

    until fragrant.

    Be careful not to burn them.

    Place chiles in hot water and soak for:

    15โ€“20 minutes

    until softened.


    Step 2: Make the Chile Sauce

    Blend together:

    • Softened chiles
    • Tomatoes
    • Onion
    • Garlic
    • Cumin
    • Oregano
    • Smoked paprika
    • Vinegar
    • Salt
    • Beef broth

    Blend until completely smooth.

    Strain the sauce through a fine mesh strainer for a silky texture.


    Step 3: Brown the Beef

    Season beef with:

    • Salt
    • Pepper
    • Garlic powder
    • Onion powder

    Heat oil in a large Dutch oven.

    Brown beef in batches until deeply golden.

    Remove and set aside.


    Step 4: Cook the Chile Colorado

    Add the red chile sauce to the same pot.

    Cook for:

    5โ€“10 minutes

    until slightly thickened and fragrant.

    Return beef to the pot.

    Add remaining beef broth.

    Bring to a simmer.

    Cover and cook:

    2ยฝโ€“3 hours

    until the beef is tender and the sauce is rich.


    Step 5: Add Potatoes (Optional)

    Add diced potatoes during the last:

    30โ€“40 minutes

    of cooking.

    Cook until tender.


    Step 6: Serve

    Garnish with:

    • Fresh cilantro
    • Diced onion
    • Lime juice

    Serve with warm tortillas.


    Extra Recipe Tips & Variations โœจ

    ๐ŸŒฏ Chile Colorado Burritos

    Fill flour tortillas with:

    • Chile Colorado beef
    • Refried beans
    • Cheese

    and smother with extra red chile sauce.


    ๐Ÿฅ” Chile Colorado con Papas

    Add potatoes for a traditional hearty version.


    ๐Ÿ– Pork Chile Colorado

    Replace beef with pork shoulder for another classic Mexican variation.


    ๐ŸŒถ๏ธ Extra Spicy Version

    Add:

    • More chile de รกrbol
    • Serrano peppers
    • Chipotle peppers

    for deeper heat.


    ๐Ÿš Bowl Style

    Serve over:

    • Mexican rice
    • Beans
    • Lettuce
    • Avocado

    for a filling meal.


    Flavor Upgrades / Secret Tips ๐Ÿ”ฅ

    โœ… Toast dried chiles lightly to bring out their smoky flavor.

    โœ… Strain the sauce for a smooth restaurant-style texture.

    โœ… Brown the beef wellโ€”the caramelized crust adds incredible depth.

    โœ… Slow cooking is the secret to tender, flavorful meat.

    โœ… Make it a day ahead; the flavors become even richer overnight.

    โœ… Add a small piece of Mexican chocolate for a deeper mole-like flavor (optional).


    Serving Ideas ๐Ÿฝ๏ธ

    Serve with:

    ๐ŸŒฎ Warm flour tortillas
    ๐Ÿš Mexican rice
    ๐Ÿซ˜ Refried beans
    ๐Ÿฅ‘ Guacamole
    ๐ŸŒฝ Corn tortillas
    ๐Ÿฅ— Fresh salad
    ๐Ÿง€ Queso fresco

    Perfect for:

    • Family dinners
    • Sunday meals
    • Mexican food nights
    • Meal prep
    • Holiday gatherings

    Storage & Meal Prep Tips ๐Ÿฅก

    Refrigerator:

    Store in an airtight container for:

    4โ€“5 days

    Freezer:

    Freeze Chile Colorado for:

    up to 3 months

    The flavor holds very well.

    Reheating:

    Warm slowly on the stovetop.

    Add a splash of beef broth if the sauce thickens too much.

    Meal Prep:

    Make a large batch and use leftovers for:

    • Burritos
    • Tacos
    • Enchiladas
    • Nachos

    Nutrition Facts (Approximate)

    Per serving:

    • Calories: 500โ€“650 kcal
    • Protein: 45โ€“55 g
    • Carbohydrates: 15โ€“25 g
    • Fat: 30โ€“40 g

    (Nutrition varies depending on beef cut and serving size.)


    Frequently Asked Questions (Q&A)

    Q: What does Chile Colorado mean?
    A: It means โ€œcolored redโ€ in Spanish, referring to the deep red chile sauce used in the dish.

    Q: What meat is traditionally used?
    A: Beef chuck roast is most common because it becomes tender during slow cooking.

    Q: Is Chile Colorado spicy?
    A: It can be mild or spicy depending on the dried chiles used. Guajillo and ancho give more flavor than heat.

    Q: Can I make it in a slow cooker?
    A: Yes. Brown the beef first, then cook on low for 7โ€“8 hours.

    Q: What is the difference between Chile Colorado and Carne Guisada?
    A: Chile Colorado is centered around a red chile sauce, while Carne Guisada is usually a thicker stew with tomatoes, vegetables, and spices.


    Social Media Captions โค๏ธ

    Option 1 (Facebook Style)

    “Tonightโ€™s dinner was homemade Chile Colorado ๐ŸŒถ๏ธ๐Ÿฅฉ Tender beef slow-cooked in a rich red chile sauce with authentic Mexican flavors. Comfort food at its best!”

    Option 2 (Instagram Style)

    “Slow cooked, bold flavors, and pure Mexican comfort ๐ŸŒถ๏ธโœจ Chile Colorado is a dish everyone needs to try!”

    Option 3 (Short Viral Caption)

    “Red chile magic in every bite ๐ŸŒถ๏ธ๐Ÿฅฉ๐Ÿ”ฅ”

    Option 4 (Homestyle Caption)

    “Some recipes are worth the time โค๏ธ This homemade Chile Colorado brings traditional Mexican flavor and family comfort straight to the table.”


    Final Food Description for Posting ๐Ÿด

    Chile Colorado is an authentic Mexican comfort dish featuring tender beef simmered slowly in a rich red chile sauce made with dried chiles, garlic, onions, tomatoes, and traditional spices. Deeply flavorful, slightly smoky, and incredibly satisfying, this classic recipe is perfect served with warm tortillas, rice, and beans for a true taste of Mexico. ๐ŸŒถ๏ธ๐Ÿฅฉโœจ

  • Tajin shrimp tostadas

    (Crispy Mexican Shrimp Tostadas with Fresh Lime, Avocado & Tajรญn Flavor)

    These Tajรญn Shrimp Tostadas are a fresh and vibrant Mexican-inspired dish featuring juicy seasoned shrimp layered over crispy tostada shells with creamy avocado, crunchy vegetables, and a zesty lime topping. The iconic chili-lime flavor of Tajรญn gives the shrimp a bright, tangy kick that makes every bite refreshing and full of flavor.

    Perfect for warm days, seafood lovers, Taco Tuesday, parties, or a light but satisfying dinner.


    Full Recipe (Ingredients + Instructions)

    Ingredients

    For the Tajรญn Shrimp:

    • 1ยฝ pounds large shrimp, peeled and deveined
    • 2 tablespoons olive oil
    • 2 tablespoons fresh lime juice
    • 2 teaspoons Tajรญn Clรกsico seasoning
    • 1 teaspoon chili powder
    • 1 teaspoon garlic powder
    • ยฝ teaspoon smoked paprika
    • ยฝ teaspoon cumin
    • ยฝ teaspoon salt
    • ยผ teaspoon black pepper
    • 2 cloves garlic, minced

    For the Tostadas:

    • 12 crispy corn tostada shells
    • 1 can refried beans (optional)
    • 2 ripe avocados, mashed
    • 2 cups shredded lettuce
    • 1 cup diced tomatoes
    • ยฝ red onion, finely diced
    • ยผ cup fresh cilantro, chopped
    • 1 jalapeรฑo, sliced (optional)
    • Queso fresco (optional)

    For the Lime Crema:

    • ยฝ cup Mexican crema or sour cream
    • 2 tablespoons lime juice
    • 1 tablespoon chopped cilantro
    • Pinch of Tajรญn seasoning
    • Salt to taste

    Instructions

    Step 1: Season the Shrimp

    In a bowl combine:

    • Shrimp
    • Olive oil
    • Lime juice
    • Tajรญn
    • Chili powder
    • Garlic powder
    • Smoked paprika
    • Cumin
    • Salt
    • Pepper
    • Garlic

    Toss until evenly coated.

    Let marinate for:

    10โ€“15 minutes


    Step 2: Cook the Shrimp

    Heat a skillet over medium-high heat.

    Cook shrimp for:

    2โ€“3 minutes per side

    until:

    โœ… Pink
    โœ… Tender
    โœ… Slightly charred

    Do not overcook.


    Step 3: Make the Lime Crema

    Mix together:

    • Mexican crema
    • Lime juice
    • Cilantro
    • Tajรญn
    • Salt

    Refrigerate until ready to use.


    Step 4: Build the Tostadas

    Spread each tostada with:

    1. Refried beans (optional)
    2. Mashed avocado
    3. Lettuce
    4. Tajรญn shrimp
    5. Tomatoes
    6. Onion
    7. Cilantro
    8. Jalapeรฑos
    9. Queso fresco

    Drizzle with lime crema.

    Finish with extra Tajรญn and lime juice.


    Extra Recipe Tips & Variations โœจ

    ๐Ÿ Tajรญn Mango Shrimp Tostadas

    Add:

    • Diced mango
    • Pineapple salsa

    for a sweet and spicy twist.


    ๐Ÿฅ‘ Creamy Avocado Shrimp Version

    Make an avocado crema with:

    • Avocado
    • Lime
    • Cilantro
    • Sour cream

    and drizzle over the top.


    ๐ŸŒถ๏ธ Spicy Shrimp Tostadas

    Add:

    • Chile de รกrbol
    • Hot sauce
    • Serrano peppers

    for extra heat.


    ๐Ÿฅ— Ceviche Style

    Marinate cooked shrimp with:

    • Lime juice
    • Tomato
    • Onion
    • Cilantro

    and serve chilled.


    Flavor Upgrades / Secret Tips ๐Ÿ”ฅ

    โœ… Pat shrimp dry before seasoning so the spices stick better.

    โœ… Don’t marinate shrimp too long in limeโ€”the acid can change the texture.

    โœ… Cook shrimp quickly over high heat for the best texture.

    โœ… Warm tostadas slightly in the oven for extra crunch.

    โœ… Add fresh lime right before serving for a bright finish.

    โœ… A sprinkle of Tajรญn on top makes the flavors pop.


    Serving Ideas ๐Ÿฝ๏ธ

    Serve with:

    ๐ŸŒฎ Mexican rice
    ๐Ÿซ˜ Black beans
    ๐Ÿฅ‘ Guacamole
    ๐ŸŒฝ Street corn
    ๐Ÿฅญ Mango salsa
    ๐Ÿน Agua fresca

    Perfect for:

    • Summer dinners
    • Seafood nights
    • Parties
    • Cinco de Mayo
    • Taco Tuesday

    Storage & Meal Prep Tips ๐Ÿฅก

    Refrigerator:

    Store shrimp separately for:

    2โ€“3 days

    Keep toppings separate.

    Tostada Shells:

    Store at room temperature in a sealed container to maintain crispiness.

    Meal Prep:

    Prepare:

    • Shrimp
    • Crema
    • Chopped vegetables

    ahead of time and assemble fresh before serving.


    Nutrition Facts (Approximate)

    Per 2 tostadas:

    • Calories: 400โ€“500 kcal
    • Protein: 30โ€“35 g
    • Carbohydrates: 40โ€“50 g
    • Fat: 18โ€“25 g

    (Nutrition varies depending on toppings and tostada size.)


    Frequently Asked Questions (Q&A)

    Q: What is Tajรญn seasoning?
    A: Tajรญn is a Mexican chili-lime seasoning made with dried chiles, lime, and salt. It adds a tangy, slightly spicy flavor.

    Q: Can I use frozen shrimp?
    A: Yes. Thaw completely and pat dry before seasoning.

    Q: Can I bake the shrimp instead?
    A: Yes. Bake at 400ยฐF (200ยฐC) for 8โ€“10 minutes until cooked through.

    Q: Can I make these ahead?
    A: Prepare all toppings and shrimp ahead, but assemble just before serving so the tostadas stay crispy.

    Q: What else can I use instead of shrimp?
    A: Try grilled fish, chicken, crab, or black beans.


    Social Media Captions โค๏ธ

    Option 1 (Facebook Style)

    “Made these Tajรญn Shrimp Tostadas and they were a hit! ๐Ÿค๐ŸŒฎ Crispy tostadas topped with juicy chili-lime shrimp, fresh veggies, creamy avocado, and the perfect Tajรญn kick.”

    Option 2 (Instagram Style)

    “Fresh, crispy, and full of Mexican flavor ๐ŸŒถ๏ธ๐Ÿค These Tajรญn shrimp tostadas are the perfect bite!”

    Option 3 (Short Viral Caption)

    “Crunchy tostadas + chili lime shrimp = perfection ๐ŸŒฎ๐Ÿ”ฅ”

    Option 4 (Homestyle Caption)

    “Fresh ingredients, bold flavors, and a recipe everyone loves โค๏ธ These homemade shrimp tostadas bring restaurant-style Mexican flavor right to your kitchen.”


    Final Food Description for Posting ๐Ÿด

    Tajรญn Shrimp Tostadas are a colorful Mexican-inspired seafood dish featuring crispy corn tostadas topped with juicy chili-lime seasoned shrimp, creamy avocado, fresh vegetables, and a tangy lime crema. Bright, refreshing, and packed with flavor, these tostadas are the perfect meal for seafood lovers and Mexican food fans. ๐Ÿค๐ŸŒฎโœจ

  • Beef green chile

    (Authentic New Mexico-Style Beef Green Chile Stew)

    This Beef Green Chile is a hearty Southwestern classic made with tender chunks of beef simmered in a flavorful roasted green chile sauce with onions, garlic, tomatoes, and warm spices. The slow cooking creates melt-in-your-mouth beef with a rich, smoky chile flavor thatโ€™s perfect for serving with warm tortillas, rice, or beans.

    A comforting dish that brings the bold flavors of New Mexico straight to your kitchen.


    Full Recipe (Ingredients + Instructions)

    Ingredients

    For the Beef Chile:

    • 2ยฝ pounds beef chuck roast, cut into 1-inch cubes
    • 2 tablespoons vegetable oil
    • 1 large onion, diced
    • 5 cloves garlic, minced
    • 3 cups roasted Hatch green chiles, chopped
    • 2 Roma tomatoes, diced
    • 1 can (14.5 oz) diced tomatoes (optional)
    • 4 cups beef broth
    • 2 tablespoons all-purpose flour (optional, for thickening)
    • 2 teaspoons ground cumin
    • 1 teaspoon Mexican oregano
    • 1 teaspoon smoked paprika
    • 1 teaspoon garlic powder
    • 1 teaspoon onion powder
    • 1 teaspoon salt (adjust to taste)
    • ยฝ teaspoon black pepper
    • 1 bay leaf

    Optional Additions:

    • 3 medium potatoes, diced
    • 1 cup pinto beans
    • Fresh cilantro
    • Lime juice
    • Shredded cheese
    • Sour cream
    • Sliced jalapeรฑos

    Instructions

    Step 1: Brown the Beef

    Heat oil in a large Dutch oven or heavy pot over medium-high heat.

    Season beef with:

    • Salt
    • Pepper

    Brown beef in batches until deeply golden.

    Remove and set aside.


    Step 2: Cook the Aromatics

    In the same pot add:

    • Onion

    Cook for:

    4โ€“5 minutes

    until softened.

    Add garlic and cook for:

    30 seconds

    until fragrant.


    Step 3: Build the Green Chile Sauce

    Add:

    • Roasted green chiles
    • Tomatoes
    • Cumin
    • Oregano
    • Smoked paprika
    • Garlic powder
    • Onion powder

    Stir well.

    Cook for:

    2โ€“3 minutes

    to release the flavors.


    Step 4: Simmer the Beef

    Return beef to the pot.

    Add:

    • Beef broth
    • Bay leaf

    Bring to a gentle boil.

    Reduce heat to low.

    Cover and simmer:

    2โ€“3 hours

    until beef is tender and the sauce is rich.


    Step 5: Add Potatoes (Optional)

    Add diced potatoes during the last:

    30โ€“40 minutes

    of cooking.

    Cook until fork tender.


    Step 6: Finish & Serve

    Remove bay leaf.

    Adjust seasoning.

    Add a squeeze of lime and fresh cilantro if desired.

    Serve hot.


    Extra Recipe Tips & Variations โœจ

    ๐ŸŒถ๏ธ Extra Spicy Beef Green Chile

    Add:

    • Hot Hatch green chiles
    • Serrano peppers
    • Chile de รกrbol

    for more heat.


    ๐Ÿฅ” Beef Green Chile with Potatoes

    A classic versionโ€”add potatoes for a hearty stew perfect for cold nights.


    ๐ŸŒฏ Green Chile Burritos

    Use leftovers as a filling for:

    • Smothered burritos
    • Tacos
    • Enchiladas

    ๐Ÿง€ Smothered Green Chile Beef

    Top with:

    • Monterey Jack cheese
    • Cheddar cheese

    and serve over burritos or fries.


    ๐Ÿฒ Slow Cooker Version

    Brown the beef first, then cook:

    Low: 7โ€“8 hours
    High: 4โ€“5 hours

    until tender.


    Flavor Upgrades / Secret Tips ๐Ÿ”ฅ

    โœ… Roast your green chiles for the deepest smoky flavor.

    โœ… Brown the beef wellโ€”those caramelized bits add incredible richness.

    โœ… Use chuck roast because it becomes tender and flavorful during slow cooking.

    โœ… Make it a day ahead; the flavor becomes even better overnight.

    โœ… Add fresh lime at the end to balance the richness.

    โœ… A little flour or masa harina can help create a thicker, restaurant-style chile.


    Serving Ideas ๐Ÿฝ๏ธ

    Serve with:

    ๐ŸŒฎ Warm flour tortillas
    ๐Ÿš Mexican rice
    ๐Ÿซ˜ Pinto beans
    ๐Ÿฅ‘ Avocado slices
    ๐Ÿง€ Queso fresco
    ๐Ÿฅ— Fresh salad
    ๐ŸŒฝ Cornbread

    Perfect for:

    • Family dinners
    • Sunday meals
    • Cold-weather comfort food
    • Meal prep
    • Mexican food nights

    Storage & Meal Prep Tips ๐Ÿฅก

    Refrigerator:

    Store in an airtight container for:

    4โ€“5 days

    Freezer:

    Freeze for:

    up to 3 months

    Cool completely before freezing.

    Reheating:

    Warm slowly on the stovetop.

    Add a little broth if the sauce becomes too thick.

    Meal Prep:

    Make a large batch and use leftovers for:

    • Burritos
    • Tacos
    • Nachos
    • Enchiladas

    Nutrition Facts (Approximate)

    Per serving:

    • Calories: 450โ€“600 kcal
    • Protein: 40โ€“50 g
    • Carbohydrates: 15โ€“25 g
    • Fat: 25โ€“35 g

    (Nutrition varies depending on beef cut and optional potatoes.)


    Frequently Asked Questions (Q&A)

    Q: What kind of beef is best for green chile?
    A: Beef chuck roast is ideal because it becomes tender and flavorful when slow-cooked.

    Q: Is green chile spicy?
    A: The heat depends on the type of chiles used. Mild Hatch chiles create flavor without too much spice.

    Q: Can I use ground beef instead of chunks?
    A: Yes! Ground beef makes a quicker version similar to green chile stew.

    Q: Can I freeze beef green chile?
    A: Yes, it freezes very well for up to 3 months.

    Q: What is the best way to eat leftovers?
    A: Try it in burritos, tacos, enchiladas, or over rice.


    Social Media Captions โค๏ธ

    Option 1 (Facebook Style)

    “Made a big pot of Beef Green Chile and the house smells amazing! ๐ŸŒถ๏ธ๐Ÿฅฉ Tender beef, roasted green chiles, and bold Southwestern flavors make this the perfect comfort meal.”

    Option 2 (Instagram Style)

    “Slow-cooked comfort in every bite ๐ŸŒถ๏ธโœจ This Beef Green Chile is rich, hearty, and full of authentic flavor!”

    Option 3 (Short Viral Caption)

    “Green chile season is the best season! ๐ŸŒถ๏ธ๐Ÿฅฉ๐Ÿ”ฅ”

    Option 4 (Homestyle Caption)

    “Some recipes bring everyone back to the table โค๏ธ This homemade Beef Green Chile is warm, comforting, and packed with family-style flavor.”


    Final Food Description for Posting ๐Ÿด

    Beef Green Chile is a hearty New Mexico-inspired dish featuring tender chunks of beef slow-simmered with roasted green chiles, garlic, onions, tomatoes, and traditional spices. Rich, smoky, and full of bold Southwestern flavor, this comforting stew is perfect with warm tortillas, rice, or your favorite Mexican sides. ๐ŸŒถ๏ธ๐Ÿฅฉโœจ

  • Country Sausage, Potatoes & Onions Skillet

    Country Sausage, Potatoes & Onions Skillet

    (Hearty Southern-Style Sausage Potato Skillet with Crispy Golden Potatoes)

    This Country Sausage, Potatoes & Onions Skillet is the ultimate comfort food made with savory sausage, crispy golden potatoes, sweet caramelized onions, and simple seasonings. Everything cooks together in one pan, creating a flavorful, rustic meal thatโ€™s perfect for breakfast, brunch, lunch, or an easy family dinner.

    A classic country-style recipe thatโ€™s budget-friendly, filling, and packed with homemade flavor.


    Full Recipe (Ingredients + Instructions)

    Ingredients

    For the Skillet:

    • 1ยฝ pounds smoked sausage or country sausage, sliced
    • 2 pounds Yukon Gold potatoes, diced into bite-sized pieces
    • 1 large yellow onion, sliced
    • 1 green bell pepper, sliced (optional)
    • 3 tablespoons olive oil
    • 3 tablespoons butter
    • 4 cloves garlic, minced
    • 1 teaspoon smoked paprika
    • 1 teaspoon garlic powder
    • 1 teaspoon onion powder
    • 1 teaspoon dried thyme
    • 1 teaspoon dried parsley
    • ยฝ teaspoon black pepper
    • 1 teaspoon salt (adjust to taste)
    • ยฝ teaspoon crushed red pepper flakes (optional)

    Optional Additions:

    • 4 fried eggs (for breakfast style)
    • Shredded cheddar cheese
    • Fresh parsley
    • Jalapeรฑos
    • Mushrooms
    • Bacon pieces

    Instructions

    Step 1: Prepare the Potatoes

    Wash and dice potatoes into small cubes.

    For extra crispy potatoes:

    Soak them in cold water for:

    15โ€“20 minutes

    then drain and dry completely.


    Step 2: Cook the Sausage

    Heat a large skillet over medium-high heat.

    Add sliced sausage and cook for:

    5โ€“7 minutes

    until browned.

    Remove sausage and set aside.


    Step 3: Crisp the Potatoes

    Add olive oil and butter to the same skillet.

    Add potatoes.

    Season with:

    • Salt
    • Pepper
    • Smoked paprika
    • Garlic powder
    • Onion powder

    Cook for:

    15โ€“20 minutes

    stirring occasionally until golden and crispy.


    Step 4: Add Onions & Garlic

    Add:

    • Onion
    • Bell pepper

    Cook for:

    5โ€“7 minutes

    until softened and caramelized.

    Add garlic and cook for:

    30 seconds

    until fragrant.


    Step 5: Combine Everything

    Return sausage to the skillet.

    Add:

    • Thyme
    • Parsley
    • Red pepper flakes

    Stir everything together.

    Cook another:

    3โ€“5 minutes

    until heated through.


    Step 6: Serve

    Top with:

    • Fresh parsley
    • Cheese
    • Fried eggs (optional)

    Serve hot straight from the skillet.


    Extra Recipe Tips & Variations โœจ

    ๐Ÿณ Breakfast Skillet

    Top with:

    • Fried eggs
    • Cheese
    • Hot sauce

    for a hearty country breakfast.


    ๐Ÿง€ Cheesy Sausage Potato Skillet

    Add:

    • Cheddar cheese
    • Monterey Jack
    • Pepper Jack

    and cover until melted.


    ๐ŸŒถ๏ธ Spicy Version

    Use:

    • Hot Italian sausage
    • Jalapeรฑos
    • Cajun seasoning
    • Cayenne pepper

    ๐Ÿฅ“ Loaded Version

    Add:

    • Crispy bacon
    • Sour cream
    • Green onions

    for a loaded potato-style skillet.


    ๐Ÿฅฆ Vegetable Version

    Add:

    • Mushrooms
    • Spinach
    • Zucchini
    • Bell peppers

    for extra flavor.


    Flavor Upgrades / Secret Tips ๐Ÿ”ฅ

    โœ… Use the same skillet to cook everythingโ€”the sausage drippings add incredible flavor.

    โœ… Don’t overcrowd the pan so potatoes become crispy instead of steamed.

    โœ… Cut potatoes evenly so they cook at the same speed.

    โœ… Let potatoes sit untouched for a few minutes while cooking to develop a golden crust.

    โœ… Add fresh herbs at the end for a brighter flavor.

    โœ… A splash of chicken broth can help loosen browned bits from the pan.


    Serving Ideas ๐Ÿฝ๏ธ

    Serve with:

    ๐Ÿณ Fried eggs
    ๐Ÿฅ– Biscuits
    ๐Ÿฅ— Fresh salad
    ๐ŸŒฝ Cornbread
    ๐Ÿฅ‘ Avocado slices
    ๐Ÿฅ’ Pickles
    ๐Ÿž Toast

    Perfect for:

    • Country breakfasts
    • Weekend brunch
    • Quick dinners
    • Meal prep
    • Family gatherings

    Storage & Meal Prep Tips ๐Ÿฅก

    Refrigerator:

    Store leftovers in an airtight container for:

    3โ€“4 days

    Freezer:

    Freeze for:

    up to 2 months

    Texture is best when reheated from the refrigerator.

    Reheating:

    Warm in a skillet over medium heat to bring back crispiness.

    Air fryer:
    375ยฐF (190ยฐC) for 5โ€“7 minutes

    Meal Prep:

    Cook a large batch and portion into containers for easy breakfasts or lunches.


    Nutrition Facts (Approximate)

    Per serving:

    • Calories: 500โ€“650 kcal
    • Protein: 20โ€“30 g
    • Carbohydrates: 35โ€“45 g
    • Fat: 30โ€“40 g

    (Nutrition varies depending on sausage type and additions.)


    Frequently Asked Questions (Q&A)

    Q: What type of sausage works best?
    A: Smoked sausage, country sausage, kielbasa, or Italian sausage all work great.

    Q: Can I use frozen potatoes?
    A: Yes, but thaw and drain them first for better crispiness.

    Q: Can I make this ahead of time?
    A: Yes. Reheat in a skillet for the best texture.

    Q: How do I make the potatoes extra crispy?
    A: Dry them well, avoid overcrowding the pan, and cook over medium-high heat.

    Q: Can I add eggs to this recipe?
    A: Absolutely! Eggs make it a classic breakfast skillet.


    Social Media Captions โค๏ธ

    Option 1 (Facebook Style)

    “This Country Sausage, Potatoes & Onions Skillet is pure comfort food! ๐ŸŒญ๐Ÿฅ” Crispy potatoes, savory sausage, and caramelized onions all cooked together in one delicious pan.”

    Option 2 (Instagram Style)

    “One skillet, endless comfort ๐Ÿ˜๐Ÿฅ” Golden potatoes, juicy sausage, and sweet onions make the perfect homemade meal!”

    Option 3 (Short Viral Caption)

    “Country comfort in every bite! ๐ŸŒญ๐Ÿฅ”๐Ÿ”ฅ”

    Option 4 (Homestyle Caption)

    “Simple ingredients, big flavor โค๏ธ This old-fashioned sausage and potato skillet is the kind of meal that brings everyone to the table.”


    Final Food Description for Posting ๐Ÿด

    Country Sausage, Potatoes & Onions Skillet is a hearty one-pan comfort meal featuring crispy golden potatoes, savory sausage, sweet caramelized onions, and warm herbs and spices. Easy, affordable, and full of homemade flavor, this rustic skillet recipe is perfect for breakfast, brunch, or a cozy family dinner. ๐ŸŒญ๐Ÿฅ”๐Ÿง…โœจ

  • Herb Butter Roasted Chicken Thighs with Crispy Garlic Potatoes

    Herb Butter Roasted Chicken Thighs with Crispy Garlic Potatoes

    Herb Butter Roasted Chicken Thighs with Crispy Garlic Potatoes ๐Ÿ—๐Ÿฅ”๐Ÿง„

    (Juicy Herb Butter Chicken with Golden Crispy Garlic Potatoes)

    These Herb Butter Roasted Chicken Thighs with Crispy Garlic Potatoes are the ultimate one-pan comfort meal. Tender, juicy chicken thighs are coated in a rich garlic herb butter, then roasted alongside crispy golden potatoes until everything is perfectly caramelized. Simple ingredients come together to create a restaurant-quality dinner that’s perfect for busy weeknights or Sunday family meals.


    Full Recipe (Ingredients + Instructions)

    Ingredients

    For the Chicken:

    • 8 bone-in, skin-on chicken thighs
    • 3 tablespoons unsalted butter, softened
    • 2 tablespoons olive oil
    • 5 cloves garlic, minced
    • 1 teaspoon salt
    • 1 teaspoon black pepper
    • 1 teaspoon smoked paprika
    • 1 teaspoon garlic powder
    • 1 teaspoon onion powder
    • 1 teaspoon dried thyme
    • 1 teaspoon dried rosemary
    • 1 teaspoon dried parsley
    • 1 teaspoon Italian seasoning
    • Juice of ยฝ lemon

    For the Garlic Potatoes:

    • 2 pounds baby Yukon Gold potatoes, halved
    • 2 tablespoons olive oil
    • 3 tablespoons melted butter
    • 4 cloves garlic, minced
    • 1 teaspoon paprika
    • 1 teaspoon dried oregano
    • ยฝ teaspoon black pepper
    • 1 teaspoon salt
    • 2 tablespoons chopped fresh parsley

    Optional Garnishes:

    • Fresh thyme
    • Fresh rosemary
    • Lemon wedges
    • Grated Parmesan cheese

    Instructions

    Step 1: Preheat the Oven

    Preheat oven to:

    425ยฐF (220ยฐC)

    Lightly grease a large baking dish or sheet pan.


    Step 2: Make the Herb Butter

    In a bowl combine:

    • Softened butter
    • Olive oil
    • Garlic
    • Salt
    • Pepper
    • Paprika
    • Garlic powder
    • Onion powder
    • Thyme
    • Rosemary
    • Parsley
    • Italian seasoning
    • Lemon juice

    Mix until smooth.


    Step 3: Season the Chicken

    Pat the chicken thighs dry.

    Rub the herb butter mixture all over the chicken, including underneath the skin when possible.

    Arrange the chicken skin-side up on one side of the baking pan.


    Step 4: Prepare the Potatoes

    In a large bowl toss the potatoes with:

    • Olive oil
    • Melted butter
    • Garlic
    • Paprika
    • Oregano
    • Salt
    • Pepper

    Spread the potatoes around the chicken in a single layer.


    Step 5: Roast

    Bake for:

    45โ€“55 minutes

    or until:

    โœ… Chicken reaches an internal temperature of 165ยฐF (74ยฐC)
    โœ… Skin is golden and crispy
    โœ… Potatoes are fork-tender with crispy edges

    For extra crispy skin, broil for 2โ€“3 minutes at the end.


    Step 6: Finish & Serve

    Sprinkle with:

    • Fresh parsley
    • Parmesan (optional)

    Serve with fresh lemon wedges.


    Extra Recipe Tips & Variations โœจ

    ๐Ÿง€ Parmesan Garlic Potatoes

    Toss the potatoes with grated Parmesan during the last 10 minutes of roasting.


    ๐ŸŒถ๏ธ Spicy Version

    Add:

    • Cayenne pepper
    • Crushed red pepper flakes
    • Hot paprika

    for extra heat.


    ๐Ÿฅ• Add More Vegetables

    Roast alongside:

    • Carrots
    • Brussels sprouts
    • Green beans
    • Asparagus

    for a complete one-pan meal.


    ๐Ÿ„ Mushroom Version

    Add whole mushrooms during the last 20 minutes of roasting.


    ๐Ÿ‹ Lemon Herb Upgrade

    Add lemon slices to the pan while roasting for extra freshness.


    Flavor Upgrades / Secret Tips ๐Ÿ”ฅ

    โœ… Pat the chicken completely dry before seasoning to help the skin crisp.

    โœ… Don’t overcrowd the panโ€”give the potatoes space to roast instead of steam.

    โœ… Use baby Yukon Gold potatoes for creamy centers and crispy edges.

    โœ… Baste the chicken with pan juices halfway through cooking.

    โœ… Finish with fresh herbs and a squeeze of lemon for bright flavor.

    โœ… Let the chicken rest for 5โ€“10 minutes before serving.


    Serving Ideas ๐Ÿฝ๏ธ

    Serve with:

    ๐Ÿฅ— Caesar salad
    ๐Ÿฅฆ Roasted broccoli
    ๐Ÿฅฌ Green beans
    ๐ŸŒฝ Buttered corn
    ๐Ÿฅ– Garlic bread
    ๐Ÿท White wine
    ๐Ÿฅ• Honey-glazed carrots

    Perfect for:

    • Family dinners
    • Sunday supper
    • Holiday meals
    • Meal prep
    • Weeknight dinners

    Storage & Meal Prep Tips ๐Ÿฅก

    Refrigerator:

    Store leftovers in an airtight container for:

    3โ€“4 days

    Freezer:

    Freeze cooked chicken for:

    up to 3 months

    Potatoes are best enjoyed fresh but can also be frozen if needed.

    Reheating:

    Reheat in a 375ยฐF (190ยฐC) oven for 10โ€“15 minutes or in an air fryer to keep the skin crispy.

    Meal Prep:

    Season the chicken and potatoes up to 24 hours in advance and refrigerate until ready to roast.


    Nutrition Facts (Approximate)

    Per serving:

    • Calories: 620โ€“720 kcal
    • Protein: 35โ€“42 g
    • Carbohydrates: 28โ€“35 g
    • Fat: 38โ€“46 g

    (Nutrition varies depending on the size of the chicken thighs and potatoes.)


    Frequently Asked Questions (Q&A)

    Q: Can I use boneless chicken thighs?
    A: Yes. Reduce the cooking time to about 30โ€“35 minutes.

    Q: What potatoes work best?
    A: Baby Yukon Gold or baby red potatoes roast beautifully and become crispy on the outside while staying creamy inside.

    Q: How do I get extra crispy chicken skin?
    A: Pat the chicken dry, roast at high heat, and broil for the final 2โ€“3 minutes if needed.

    Q: Can I prepare this meal ahead of time?
    A: Yes. Season everything the day before and refrigerate until ready to bake.

    Q: Can I add other vegetables?
    A: Absolutely! Carrots, Brussels sprouts, asparagus, mushrooms, or green beans all roast well with the chicken.


    Social Media Captions โค๏ธ

    Option 1 (Facebook Style)

    “This Herb Butter Roasted Chicken with Crispy Garlic Potatoes is pure comfort food! ๐Ÿ—๐Ÿฅ” Golden crispy chicken, buttery garlic potatoes, and fresh herbs make this an easy one-pan dinner everyone will love.”

    Option 2 (Instagram Style)

    “One pan. Incredible flavor. ๐Ÿ—๐Ÿง„โœจ Crispy chicken, golden potatoes, and rich herb butter in every bite!”

    Option 3 (Short Viral Caption)

    “The easiest dinner that tastes like a Sunday feast! ๐Ÿ—๐Ÿฅ”๐Ÿ”ฅ”

    Option 4 (Homestyle Caption)

    “Simple ingredients, homemade flavor, and one pan to clean โค๏ธ This herb butter chicken and crispy garlic potatoes will become a family favorite.”


    Final Food Description for Posting ๐Ÿด

    Herb Butter Roasted Chicken Thighs with Crispy Garlic Potatoes is a comforting one-pan meal featuring juicy chicken thighs coated in rich garlic herb butter and roasted alongside perfectly crispy golden potatoes. Packed with savory herbs, buttery flavor, and irresistible crispy edges, this easy dinner is perfect for family meals, meal prep, or cozy nights at home. ๐Ÿ—๐Ÿฅ”๐Ÿง„โœจ